

 BVI Snorkeling, Scuba Diving & Activities for Your Sailing Charter">

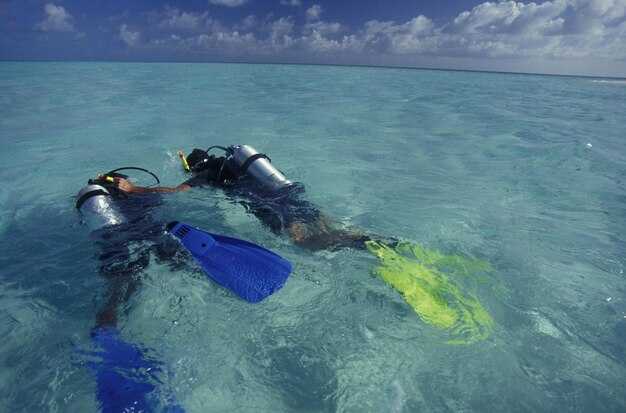
Begin with a guided underwater exploration at calm anchorages to acclimate to gear and currents, because the first exposure sets the tone for the voyage.
In sheltered lanes, select routes that balance visibility with ease of return: outcroppings, named formations, and a steady drift. The royal chimneys provide a reliable view, while sergeant pinnacles rise in the distance when the drift eases.
Underwater sightings include spotted lobsters tucked into crevices and lush coral gardens that glow in afternoon light. A pelican patrols the surface as you slide past shelves, turning the experience into a activity that rewards patience. When youre ready, extend your route along a shallow drift to stretch the time spent in the water.
Before any shore landings near Indians settlement, obtain permission from the park authority; locals keep a careful eye on signs and access points, ensuring minimal disruption. The site is named after an ancient community, and a respectful approach makes the visit productive and safe.
The gear list stays compact: mask and fins with a lightweight camera; keep a single buddy pair for safety and check the weather and currents each dawn. When youre done with the morning session, review sightings and map route choices; the same practice made routine and yields steady confidence.
Choose itineraries that balance timing with exposure, keeping in mind the lush coast, quiet settlement whispers, and the opportunity to witness how marine life becomes accustomed to human presence without stress.
RMS Rhone Wreck: Entry points, current patterns, and best photography angles
Begin with a morning approach from a stable mooring near Salt Island; two primary entry points sit on the east-side of the wreck – the bow swim-through and a midship access on the main deck – where current is milder. From the coast, the rhones hull rises into shallower water, making a controlled transition into the wreck’s frame. The bow access hatch yields the largest open space to set up a shot before moving into the middle of the structure for broader frames.
Current patterns: calm conditions typically produce a gentle NE-to-SW drift along the coast, with smoother traffic near the middle of the hull. Slack water occurs mid-morning, improving control and visibility; stronger winds later in the day push a more demanding drift. Always plan with the mooring in sight, and keep your gear ready to quickly re-setup if the current shifts. Check the wind and current system before heading out.
Entry points in detail: Bow swim-through and midship hatch on the main deck serve as primary access; between the bow and midship, these zones sit on the east side where conditions stay milder. Avoid the stern area when tides push; secure to the mooring to keep orientation; keep hands off fragile corals; bring snorkel gear to access the cabins, and ensure your trip plan lists both zones clearly.
Photography angles: best angles come from the middle of the hull looking toward the bow with the sun behind you. Between the bow and stern, the hull reveals lines that guide composition; frame interiors through portholes to add depth, and shoot at varying heights from shoulder level to a low angle that emphasizes the hull’s lines. Focus on vibrant life around the wreck: goatfish and queen angelfish, plus the occasional spotted fish, provide contrast against rust and coral. A wide lens captures the vast silhouette, while a macro approach reveals details in the cabins.
Life and subjects: a vast range of species thrives here, with bigger goatfish, queen angelfish, and various spotted varieties near the rails and windows. The vibrant corals provide a colorful backdrop, and the geometry of stairs and cabins creates unique frames. If you notice sharkplaneo markings on the hull, document them as a curious detail that adds to the wreck’s famous history show.
Gear, safety, and planning: carry a camera with a spare battery, a rugged housing, and a color-correct filter to recover blues and greens. Keep snorkel handy and bring a small field book to note currents, entries, and subjects; use a surface marker buoy to mark your mooring; wear reef-safe gear and soft-bottom fins; stay near the main deck to avoid snagging lines. Always have a ready safety plan and maintain good communication with your buddy.
Trip timing: the famous site shines in morning light after calm nights; Norman Island is a common starting point and the coast offers many access routes; this activity attracts adventure seekers seeking unique history and a visual story that could fill a book. The rhones wreck is a monument to an era, its hull telling a story in varied textures that stay with you long after the trip.
Chikuzen Wreck: Access routes, hull features, and reef etiquette
Begin with a shore entry from the northwest coast during slack tides; follow a fixed reef line about 150-200 m until you reach the wreck’s middle, then descend to 8-14 m and glide along the hull runs from bow to stern. A diver should maintain buoyancy, check currents, and work with a buddy to discover the best visibility while staying close to the seafloor and while avoiding sensitive zones near the islands and settlement.
- Access routes
- Shore entry: northwest coast, slack tide, 150-200 m along a fixed reef, drop to 8-14 m at the middle of the wreck, then swim along the hull runs to the stern, exiting near the stern and following the reef back shoreward. While you move, keep a steady pace to reduce disturbance.
- Boat drop: mooring near the former settlement on the southern shore; drop on the lee side, 12-18 m; proceed along the middle of the hull, and return along the starboard side, surfacing near the reef if conditions permit.
- Landmark approach: follow the camanoe buoy to the site; enter from the middle reef at 10-20 m, stay along natural ledges, and work toward the hull from the near islands, keeping to the visible lines of the wreck.
- Hull features
- Shape and deck: long rectangular hull with a prominent keel; bow and stern intact; deck fittings are visible; portholes line both sides.
- Structure and scars: the hull runs along the entire length; cargo recesses and hatches offer shelter for small fish; corrosion patterns resemble a time capsule, revealing history of the voyage; the hull itself offers life to a range of organisms.
- Habitat and wildlife: angelfish patrol the midsection while barracudas lurk near the tail; a vast seafloor surrounds the surface and supports natural communities; grouper may hover in crevices, and the area hosts rhones and other scavengers.
- Reef etiquette
- Wildlife distance: keep a respectful distance from them; do not touch coral or the inhabitants; avoid chasing the grouper or schooling angelfish; observe from a natural position and let them resume their activities.
- Buoyancy and lines: use slow, controlled kicks; maintain a clean profile; keep lines and rhones clear of cracks and crevices; avoid kicking up sediment that may cloud the seafloor and reduce visibility for others.
- Depth and training: levels 20-45 m require proper training and equipment; currents can build near the middle of the wreck; plan with a buddy and place safety stops as required.
- Conservation: respect the former life of the vessel; do not remove artifacts; document observations by noting the vast reef surrounds but leave everything intact in future trips.
Blonde Rock & Painted Walls: Depths, marine life highlights, and visibility windows
Depths, visibility windows, and route strategy

Start at the shallower edge, 6–9 m, then take the line into 12–18 m to study the painted wall. Which area offers the best color depends on sun angle. Morning sessions during summer deliver the clearest visibility, with light sweeping down into the depths and revealing natural tones on the reef. Expect a mix of macro life and larger residents: anemones tucked into wall nooks, star formations across the face, and a barracuda cruising the edge. Some pockets along the alley hold more life, while other sections feel pristine and nearly invisibles until the light shifts. If nothing else appears, stay near the shallows. Dont miss the cue: a distant airplane profile on the surface can signal calm seas and a wide vis window. Within the built rock, you can spot a queen conch shell and snail trails that hint at a busy domain. If currents rise, stay in shallower zones; an intermediate pace keeps risk low. Take care to avoid stirring silt; sweepers and other small fish respond to smooth, deliberate strokes.
Life on the wall: highlights and practical notes
As you move along, look into reef crevices where some tiny critters hide; you may spot a star peeking from a crack or a natural color palette formed by sponge and coral. The Painted Walls provide sections that go into deeper depths, which can be challenging if you push too far without a plan; within those depths, reef structures host queen conchs, anemones, and a few stealthy octopuses. The best vantage comes when you stay within the shallower-to-mid-depth range, where you can compare favorite spots and see how light plays on the surface during the morning quiet. In midsummer, the visibility windows broaden; watch the morning light sweep across the walls while warm steam from the boat’s wake fades. If you want a reliable experience, choose two locations–Blonde Rock, offering easier entry near the shallows, and Painted Walls, offering deeper exploration–and take notes on what the reef shows in natural form. Onboard refrigeration keeps drinks cool during longer sessions, and always respect the marine life, including sweepers and the quick dart of barracudas that pass through. The best plan is to map out an intermediate loop that stays mostly into the 6–18 m zone, then end with a favorite shallow drift that lets you savor the colors without pushing the depth envelope.
Ginger Steps, The Chimney, and The Kodiak Queen: Safe dives and kit needs
Plan your excursion during slack water and carry a compact, salt-ready kit, making entry from sheltered corners and moving with controlled, deliberate kicks.
Ginger Steps reveals sheer walls and canyons that descend into vibrant depths. Entry is best from the sheltered side, with the four-step approach pausing at each ledge to read currents. Expect a range of species such as goatfish and snapper in crevices, plus pufferfish and sergeant cruising nearby. Underwater colors shift from sunlit gold to deep cobalt, and a pearl-like coral cluster often glitters in tucked corners. The feature is named for its zigzag terraces–an excellent destination to discover tiny critters and macro life against salt-tinged light. In glassy conditions, the scene becomes photogenic, with the Kodiak Queen hovering in the distance and a twin school of reef fish slipping by.
The Chimney is a vertical slot with a sheer, exposed wall and a sheltered upper pocket. Buoyancy control is key as current can shift through the mouth of the shaft; hover in the upper chamber and follow the line to the broader crevices beyond. Here you’ll find canyons hosting pufferfish and sergeant alongside shy goatfish and snapper, plus pockets where colors bloom in sun-dappled shafts. Sometimes the water is glassy, which makes these features look near-perfect and almost theatrical, a fantastic backdrop for photos. The name reflects the tall, narrow geometry that creates a natural funnel, and you may notice four distinct routes around the edges, each offering different looks at tucked ledges and hidden alcoves.
The Kodiak Queen is a photogenic wreck whose name carries history and curiosity. The vessel sank long ago and now rests as a haunting silhouette against a salt-washed backdrop, with exposed decks that invite exploration while attracting marine life. A lore-rich piece of history, the site rewards steady buoyancy and careful attention to line management; you may catch glimpses of small pufferfish or sergeant patrolling the rails, and goatfish and snapper often patrol the nearby canyons. Nearly every angle offers a dramatic frame for images, from the bow’s angles to the lantern-like openings in the hull. A few relics, including wrenches tucked in crevices, remind visitors of the kit that once kept the machinery ticking, making the experience both educational and awe-inspiring for any destination-focused explorer.
Equipment essentials
| Gear item | Why it matters | Notes |
|---|---|---|
| Mask and twin fins | Clear vision and efficient propulsion | Test for leaks; adjust straps before entry |
| Backup mask | Fog or scratch contingency | Keep in a dry bag on the surface |
| Wetsuit 3–5 mm | Temperature control in salt environments | Adapt thickness to water feel |
| Surface marker buoy | Location marker for safety | Attach when at depth and in canyons |
| Gloves | Protection against rough surfaces | Choose flexible material for grip |
| Knife or line cutter | Entanglement risk management | Keep accessible on vest |
| Underwater slate or waterproof notebook | Record canyons and species for later pairings | Great for notes and sharing |
| Camera with spare batteries | Capture photogenic scenes | Use a dry bag for electronics |
| Spare O-rings and a wrench set | Maintenance on site for regulators and seals | Include small wrenches |
| Twin fins or backup fin | Better propulsion in canyons | Check fit and pocket size |
Coral Gardens: Snorkel routes, reef health, and wildlife to spot
Start at francis and trace the middle reef corridor along rocky edges with open runs. Follow crevices where gorgonians tilt in dappled sunlight and small reef species accumulate, creating nearly constant opportunities to discover wildlife in these areas.
Reef health is visible from the surface: intact coral heads, balanced algae cover, and a lively mix of life with salt levels staying balanced. Look for a variety of corals, healthy sponges, and clear water with stable salinity.
Wildlife to spot includes pelican along the shoreline, rays gliding over rubble and reef fish weaving through crevices. The reef itself offers shelter where gorgonians sway; think about something thriving in every niche.
locations to pencil into the plan include francis, norman, pelican point, and the rocky corridor that runs toward the open channel. At norman you’ll encounter a wrecked airplane–the airplane itself rests near the reef, its open frame becoming an installation that attracts small fish and invertebrates. A nearby old mail crate lies half-buried, adding a hint of history to the scenery. Crevices along these sections provide shelter and looks into hidden life to curious snorkelers.
Practical tips: move slowly, stay within breathing range of a buddy, and keep a safe distance from reef edges. Start early, when light enhances color and visibility; plan around a rising tide to reduce surface glare and improve depth perception. If on a sail-based itinerary, anchor on a sandy patch and step in from the shoreline to minimize disturbance to fragile zones.
Charter Planning: Itinerary options, timing, and gear checklists
Begin with a six-stop circuit prioritizing remote, secluded sites and photogenic gardens, allowing three long passages and five shorter anchorages.
Option A spans seven to nine days: three longer hops, two sheltered bays, and a middle leg along rocky headlands; Option B extends to twelve days, adding an extra stop in a site with calmer currents and two additional dives.
Timing depends on months with steadier winds and gentler seas; choose a window in spring or autumn when patterns are predictable, and schedule a number of port calls to maximize daylight. Prepare a plan months before departure, accompanied by a concise info brief for the crew without delay.
Gear check: mask with purge, fins, booties, reef-safe sunscreen, lightweight towel, reusable water bottle, dry bag, spare parts kit, pump, signaling device, first-aid kit, cistern and extra water containers, anchor line, and a compact camera or housing to capture photogenic moments.
Notes from alices and jacques help map sightings: sponges, grouper, and eagle rays are common along sites situated near remote ledges. A ladder of coral and an alley between reef walls often reveals a look into sheltered pockets where life is spotted and concentrates.
Onboard strategy allows occasional activity alongside more intense dives without compromising safety; maintain anchor discipline, and proximity to wildlife. The result is a surprising range of life, from curious reef fish to a playground of color and motion beside photogenic gardens.