

 Boating – The Ultimate Summer Hack for Every Budget">

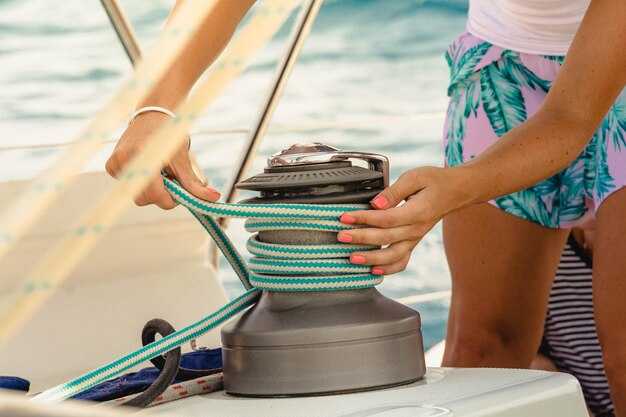
Start with a compact, modular boating setup to maximize value this summer. A lightweight inflatable or small aluminum craft with an electric motor delivers predictable power and solid performance at low operating costs. Have a prepared gear kit: life jackets, pump, spare parts, and a compact anchor. Check weight limits to avoid overloading, which reduces wear and tear and keeps handling predictable on hot days. Consider your environmental footprint by choosing quiet, electric propulsion whenever possible.
These are common issues in budget boating: battery life, hull leaks, and wind drift. A quick check before each trip saves time and trouble: inspect connections, test the motor, and verify patch kits. theyre easy fixes you can handle with basic tools, and a compact pump keeps air decks in shape. This approach reduces downtime across times of peak season and long weekends, and they appreciate the practical, affordable setup that keeps trips on track.
To improve performance without breaking the bank, optimize gear for seasonal shifts. Use a battery with 2–4 hour runtime and a lightweight charger for longer trips. For environmental conditions, switch to breathable, UV-protective clothing, wearing a properly fitted life jacket. Whether you’re paddling in calm water or dealing with light chop, the right setup scales with the forecast and the day’s plan.
Different trips require different gear and a flexible packing list saves money: a small repair kit, spare fuse, waterproof bag, and a compact anchor. As you plan, check local regulations and seasonal speed limits. theres always a way to tailor gear to your budget while keeping safety first, and you can adjust by times, weather, and group size.
Track your boating performance with a simple, repeatable routine to improve reliability. Log power draw, check battery status, and note any issues that arise. Over several weekends, this habit makes trips smoother and cheaper, as you adjust launch times for shade and calm water. theyre improvements show up as more confident outings across different schedules.
Sonar’s Safe Summer Boating Tips for Budget-Friendly Adventures
Check wind forecasts and water conditions before you set out to stay safe and save money, depending on your locale.
Sonar’s system enhances safety by showing depth, submerged hazards, and bottom structure, so you can look ahead and find hazards before you reach trouble.
Consider a budget-friendly setup: rent a compact craft, borrow gear from friends, or use simple inflatables; plan routes that stay near shore and avoid crowded channels; on-demand weather alerts help you adjust in real time, reducing fuel use and wear on equipment.
Dehydration risk rises in heat, so pack water, electrolyte tablets, and a light shade, and wear breathable clothing; this helps people stay aware and perform better on the water.
Most safety checks are quick: verify PFDs fit, ensure signaling gear works, and keep a compact first-aid kit and dry bag aboard; boaters know to check battery levels and lights, and maintain simple lines, anchors, and fenders for reliability.
Questions to ask before you launch include: where are the shallow spots, what wind shifts are common, and which boaters are nearby for safe navigation? Each answer helps you choose safer routes and improve your awareness.
For kayaking and other everyday small craft, stay within sight of shore, use light, efficient paddling, and practice a smooth, controlled pace; youll gain confidence and reduce risk on most trips, even on calm days.
Choose a budget-friendly vessel with built-in safety features: size, stability, and load capacity
Choose an 18–20 ft, wide-beam hull with a stable profile and a load capacity of 1,500–1,800 lbs to support 4–6 passengers and their gear. For upgrading later, pick a hull that accepts modular safety equipment and simple access to storage.
Size and stability matter for stay dry handling on choppy days. Look for a beam of at least 7 ft in an 18–20 ft vessel, a flat or gently V-shaped hull, and reinforced transom to handle the situation around you. These features improve primary stability and reduce the risk of nosedive when you encounter chop. A higher freeboard keeps spray down and helps you stay in control, which is common in a marine class and on-demand safety in environmental conditions.
Load capacity and built-in safety features matter. Ensure the plate shows a rating of 1,500–1,800 lbs and that equipment is included: PFDs for 4–6 people, a throwable flotation device, a fire extinguisher, a horn, and a paddle or anchor. Look for a self-bailing cockpit, non-slip decking, grab rails, and a high-visibility color scheme. A simple kill-switch connection and an automatic bilge pump on-demand add layers of safety and simplify maintenance in busy season. Quality materials last longer in sun and salt, reducing maintenance and downtime for you and them.
Steps to evaluate a candidate vessel before you buy: verify the capacity plate and load capacity; inspect the hull for even trim and a stable beam; check built-in safety equipment; request a test ride to feel handling, stopping distance, and response when you hit a wake. Do this with experts, or with a trusted friend, and stay within your budget. If youre planning for family use, check that theyre equipped for kids and gear, and consider environmental rules around you. Before you buy, compare several options and avoid common mistakes by focusing on a thorough, repeatable check at the dock. Local rules may require gear like a throwable device and a whistle; dont skip safety checks. These steps help you compare options. This resource guide helps you stay informed and making the right choice.
| Model | Longueur (ft) | Load capacity (lbs) | Built-in safety features | Approx. price |
|---|---|---|---|---|
| Model A | 18 | 1,500–1,800 | Self-bailing cockpit, flotation, non-slip deck, grab rails | $9,000–$12,000 |
| Model B | 20 | 1,700–2,000 | Wide beam, aft ladder, built-in flotation, kill-switch | $12,000–$16,500 |
| Model C | 16 | 1,400–1,600 | High freeboard, non-slip decking, life jacket storage | $6,500–$9,500 |
Set up Sonar: step-by-step installation, calibration, and mapping basics
Install the transducer on a clean, open hull area just below the waterline and align it with the keel. Secure the bracket and seal the base to provide protection from rain and spray. Route power and data cables neatly, away from moving parts, so theyre not snag points during rough conditions. A proper mount improves stability and makes land-based getaways safer by reducing the risk of accidents.
-
Mounting location and orientation: place the transducer on the stern or a flat hull section where it stays submerged at all speeds. Keep it level with the waterline, and use the included shims or a leveling tool to ensure the face is perpendicular to the water. This step yields the greatest clarity in both depth and bottom detail.
-
Wiring and power: run a dedicated fused 12V line from the boat battery to the sonar unit, plus a solid ground connection. Keep the power cable separate from engine cables to minimize interference. Use waterproof connectors and secure the run with clips; store excess cable neatly in a labeled storage area, so you don’t spend time hunting it during everyday trips or on-demand outings.
-
Display installation and connections: mount the display where you have a clear line of sight and easy reach while operating the boat. Connect the transducer cable firmly, then power on and confirm the unit boots in seconds. If you use NMEA 2000 or another network, verify the network address and do a quick ping test to ensure data flow.
-
Calibration basics: begin in calm water. Set the depth offset to zero, then perform a basic bottom-read test by noting the displayed depth when your boat is in a known shallow area. Adjust range, gain (sensitivity), and noise rejection so arches are crisp and clutter is minimized. For higher accuracy, run a slow pass and compare the sonar readout with known markers; this keeps you knowing your environment in different situations.
-
Mapping setup: enable a simple map layer to record bottom contours as you cruise. Start with a moderate range (10–30 meters) and a low-to-mid gain to capture clear returns without washing out weaker signals. Save the session to internal storage and tag it with a waypoint for your local getaways. Use on-demand overlays to switch between depth, bottom texture, and vessel-track views as needed.
-
Testing and drills: test the system at dawn or dusk when light is limited to verify screen readability and sensor response in low-light conditions. Run short drills to simulate emergency awareness: practice catching depth data quickly, marking hazards, and switching to warning overlays. This habit improves safety and confidence, especially during busy weekends and hot-weather boating days.
-
Upgrading and maintenance: periodically check for firmware updates and, if available, install them after confirming column and data compatibility. Inspect seals, cables, and mounting hardware after every outing, especially if you run in saltwater or rough seas. Regular checks minimize downtime and support everyday use, great for land-based trips and water getaways alike.
Tips for smoother operation: test in safe conditions first, carry light weather gear and jackets for crew, and keep a compact storage pouch for spare fittings. Knowing your sonar setup inside out reduces emergency reaction time, supports cautious decisions, and preserves freedom on open waters.
Plan routes using real-time weather, water conditions, and buoy data to avoid hazards
Use a real-time forecast feed and buoy data before you cast off to plot a route that keeps your watercraft safe and your summer sailing enjoyable.
First, check today’s wind, wave, and current updates for the area you’ll travel. If forecast shows light winds early, depart then to minimize risk. Overlay the data on a map, which helps you see relationships between wind, current, and depth, and steer toward the safest channels. Set your course to stay in water with stable depth and fewer shoals. Avoid downwind zones where chop worsens, and choose routes that feel smoother for you and your crew. Safer choices reduce risk and make the experience more rewarding. Consider the environmental impact of your route to preserve natural habitats for future trips.
Then examine buoy data along the path. Buoys report sea state, currents, water temperature, and any flagged hazards. If a buoy shows a stronger current or rising swell ahead, find an alternative course to stay clear of hazards. These adjustments pay off; theyre why you can stay safe and comfortable on longer trips.
dont rely on a single plan. If conditions shift, have an alternative harbor stop and a safe exit strategy. If you own your watercraft or you rent, this habit keeps you flexible. It matters whether you travel alone or with family, and it helps avoid stress in the moment. Your routing systems and offline maps are a good backup, so you wont get stuck without a plan. theyre robust tools that help you maintain safe operations today.
heres a quick checklist to implement today: first, ask these questions before departure; is weather stable for the planned run; are buoys showing a safe path; is there an alternative harbor? theyre designed to keep you safe and preserving the environment while enjoying your ride today. The resource also supports decisions about ownership vs rentals.
Portez correctement les gilets de sauvetage et surveillez chaque passager à bord.
Portez un gilet de sauvetage pour chaque personne à bord chaque fois que le bateau est en marche, et attachez toutes les sangles avant de larguer les amarres.
Chaque gilet est un dispositif approuvé par l'USCG et dimensionné pour le porteur ; assurez-vous que l'ajustement reste sûr en le testant en place et en soulevant la personne par les épaules pour vous assurer qu'il ne remonte pas. Voici une vérification rapide pour confirmer l'ajustement : assurez-vous que la sangle de poitrine est bien ajustée, que la fermeture éclair ou la boucle se ferme complètement et que le col est bien ajusté au niveau du cou. Pour les enfants, choisissez un modèle avec une sangle d'entrejambe et un harnais ajusté. Gardez les gilets à portée de main et facilement accessibles à la demande près de la barre et le long des rambardes, et assurez-vous qu'ils sont bien étiquetés et en bon état avant chaque voyage pour garantir leur fiabilité, même dans diverses conditions météorologiques. Si une boucle présente une rupture ou une usure, remplacez-la immédiatement.
Supervisez chaque passager de près. Attribuez un adulte à chaque enfant, maintenez le contact visuel et assurez-vous que tout le monde est assis ou dans une position stable lorsque l'embarcation se déplace. Faites un décompte au départ, après chaque changement de cap et avant d’approcher du rivage ; autour des eaux agitées, prochaine étape du voyage, répétez les vérifications plus souvent. Lorsque la visibilité est limitée, désignez un guetteur pour confirmer que les gilets restent attachés et pour vous assurer que chacun reste dans les limites de sécurité. Gardez également un gilet de rechange sec accessible pour un remplacement rapide si une boucle se casse ou si une couture s'use.
Planifiez en tenant compte des conditions météorologiques marines. Consultez les prévisions de la NOAA et les avis maritimes avant de partir, en particulier pour les voyages en Alaska ou les sorties de l'après-midi lorsque l'éblouissement et le vent changent rapidement. Sollicitez les commentaires de l'équipage et incluez un bref plan de sécurité au début du voyage. Assurez-vous que chacun sait comment demander de l'aide, comment signaler un danger et où trouver les gilets. N'oubliez pas de vous exercer à une simulation d'homme à la mer si possible et assurez-vous que le dispositif de ligne est prêt pour la récupération. Cela aidera tout le monde à rester préparé, ce qui renforcera la confiance lors du prochain voyage.
En suivant ces étapes, vous resterez plus en sécurité sur l'eau, profiterez pleinement du voyage et serez récompensé par des vies sauvées et des sorties plus assurées.
Économisez du carburant et prolongez la saison grâce à un entretien simple et des habitudes de ravitaillement intelligentes.

Commencez par une vérification approfondie avant le départ du système de carburant, du moteur et de la coque du navire, puis tenez un simple registre de carburant pour mieux planifier le ravitaillement et prolonger chaque sortie avant de rentrer.
Une coque propre et une hélice au pas correct réduisent la traînée et la consommation de carburant. A commun L’amélioration consiste à retirer les balanes, inspecter les roulements et s’assurer que l’hélice est exempte de bosses ; cela peut réduire la consommation de carburant de 5 à 12 % aux vitesses de croisière pour de nombreux navires. Ceci souligne l’importance des contrôles de routine pour maintenir des opérations fluides et prévisibles.
Adoptez des habitudes de ravitaillement intelligentes : utilisez du carburant stabilisé, privilégiez les options sans éthanol lorsque cela est possible et limitez le stockage à long terme dans le réservoir. Si vous avez un équipage, discutez des rôles lors des arrêts de ravitaillement et sollicitez l'avis d'experts pour affiner la routine, en veillant à ce que le stabilisateur circule en faisant tourner le moteur pendant quelques minutes après avoir fait le plein.
Envisagez de passer à une hélice plus efficace, à des flaps ou à une option de propulsion alternative comme un moteur électrique compact pour les jours calmes. Ces améliorations permettent à l’équipage de profiter davantage de ses aventures tout en réduisant la consommation de carburant et la sollicitation du moteur principal.
Pendant les voyages, effectuez des exercices rapides pour vérifier le fonctionnement des jauges et des systèmes : vérifiez les niveaux de température et d'huile, l'exactitude de la jauge de carburant et recherchez les anomalies. Discutez des questions avec les personnes à bord et sollicitez leur avis afin de garantir une exploitation sûre et une efficacité optimale autour du navire.
Établissez un programme pratique : effectuez une vérification approfondie mensuellement et réalisez un entretien de pré-saison avec remplacement des filtres, de l'huile et une inspection du système de carburant. Les données montrent que la consommation de carburant peut diminuer de 5 à 15 % grâce à un entretien approprié, en fonction de l'état de la coque et de la charge. Tenez un registre simple et mettez-le à jour après chaque voyage pour suivre les progrès sur différents navires et saisons.
Évitez les problèmes en mer en conservant une réserve de carburant et un plan clair, ainsi qu'une liste de contrôle concise. Restez vigilant dans la marina et gardez votre bateau prêt pour des aventures agréables, tout en préservant votre budget et votre temps pour plus de jours en mer.
Préparation aux situations d'urgence : trousses de bord, exercices et liste de contrôle d'intervention rapide
Voici une configuration pratique qui convient à la plupart des budgets : gardez une trousse d'urgence de bord réfrigérée et clairement étiquetée dans une boîte sèche près de la barre. Incluez une série d'articles de sécurité faciles à saisir et à remplacer. Choisissez un contenant avec un indicateur intégré, qui vous aide à suivre les réapprovisionnements. La trousse doit comprendre des articles de premiers soins de base, des dispositifs de signalisation, une lampe de poche, une pile de rechange pour la radio, un sifflet, un outil multifonction, une couverture anti-feu, des allumettes imperméables, de l'eau, des collations non périssables, une bâche et une petite couverture.
Étapes pour mettre en œuvre la préparation : 1) vérifier et faire tourner les articles tous les 90 jours ; 2) désigner un responsable d'exercice pour chaque saison ; 3) afficher la liste de contrôle de réponse rapide dans la cabine ; 4) tester la radio, le téléphone satellite ou la couverture cellulaire avant le départ. Inclure une carte plastifiée avec les actions étape par étape pour les situations courantes. Les heures de départ ou les moments de la journée où vous prévoyez de naviguer influencent le moment où vous vous entraînez. Une cadence de rotation est préférable à la mémoire.
Les exercices permettent d'entretenir les compétences et de réduire la panique sur l'eau. Si vous n'avez jamais fait d'exercices, commencez par un exercice en deux étapes et développez à partir de là. Organisez des exercices pour homme à la mer, redressement après un chavirement, incendie de moteur et abandon du navire. Faites des exercices lorsque le temps est calme ; en été, vous pouvez programmer des séances familiales après un repas léger. N'oubliez pas de vous assurer que tous les participants portent des VFI et savent comment signaler une demande d'aide. Ils devraient effectuer chaque exercice en 2 à 5 minutes, selon leur expérience.
Liste de vérification pour réaction rapide : enfiler les gilets de sauvetage, identifier la sortie de secours la plus proche, localiser la liste d'équipage et les numéros de contact, déployer les dispositifs de signalisation (sifflet et fusée de détresse si permis), vérifier le vent, le courant et la profondeur, démarrer le moteur si cela ne présente aucun danger, se rassembler sur le pont, attribuer un plan de sauvetage et noter l'heure. Garder une liste de vérification sur le tableau de bord et une dans la cabine ; mettre à jour après chaque exercice ou événement réel.
Sans plan clair, les situations dégénèrent, mais grâce à une formation spécifique en sécurité, les plaisanciers gèreront les événements avec plus d'aisance et moins de panique. Ils découvriront peut-être des moments où ils pourront ajuster le plan en fonction de la météo. Cette approche permet de préserver le caractère agréable des aventures de voyage et de réduire les risques dans de nombreuses situations. Les routines à terre, le soutien à terre et les contrôles avant le départ contribuent à préserver un état d'esprit calme et détendu parmi l'équipage.
La sensibilisation à l'environnement est importante : stockez l'eau dans des bouteilles réutilisables pour lutter contre la déshydratation ; planifiez vos itinéraires en tenant compte des règles environnementales ; gardez un petit sac à déchets pour préserver le littoral ; dans la mesure du possible, choisissez des équipements durables et recyclez les emballages. Une vérification rapide avant le départ vous permet d'éviter des allers-retours inutiles à terre, ce qui vous fait gagner du temps et réduit l'impact environnemental tout en préservant les expériences des plaisanciers.
N'oubliez pas : cette approche est idéale aussi bien sur terre que sur mer ; vous pouvez adapter le kit pour un week-end ou un voyage plus long, inclure une trousse médicale de base et une balise de signalisation pour les sorties en mer. Ils vous aideront à rester détendu, relaxé et prêt à affronter toutes les situations, transformant ainsi les aventures estivales en souvenirs agréables au fil de nombreux voyages.