

 Top Lake Travis -vesilautailuretket – Parhaat ajelut & vinkit">

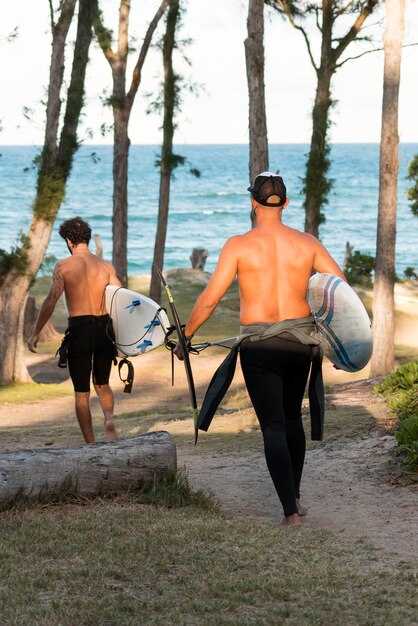
Choose a premium Lake Travis wakeboarding trip with an official guide and a tube for beginners. Start in a calm cove where the boat can tow you with a clean wake, without sacrificing safety, while the crew keeps lines anchored and a bimini shade overhead. weve optimized the schedule for stable water: book a 9:00–11:00 a.m. session when winds are light and the lake is quiet, a reliable window for first-timers and seasoned riders alike. In years of guiding guests, weve learned that this window minimizes chop and maximizes progression.
Pack light: a spare t-shirt, water, sunscreen, and a pick of optional add-ons like gloves or a beanie for cooler mornings. Wear comfortable swimwear and you’ll move quickly from boat to board. Access to a shaded deck with a bimini helps you enjoy long sessions in the sunshine. For beginners, your instructor will keep the pace at about 15–20 mph while you learn, and the 65–75 ft rope length keeps you in a comfortable zone. This should feel accessible for riders of all levels. If you want to stay active between pulls, surfboards and a short tube ride give a quick reset.
Three ride patterns work well here: anchored-cove laps for a steady wake; marina-side runs to keep turns tight; and an offshore push to practice speed and distance. Maintain a 65–75 ft tow rope and around 18 mph for most riders; adjust to experience. Use anchor buoys for reference, and rotate between wakeboard, surfboards, and a tube to stay fresh. If you pilot your own boat, check fuel before you head back to dock, and plan zero downtime between pulls to maximize every minute of boating.
Practical Plan for Lake Travis Wakeboarding: Tours, Rides, and Gear
Start with a two-hour guided wakeboarding session on Lake Travis with a pro guide who handles gear, safety, and on-water coaching. Youll get up fast, learn the right stance, balance, and edging, and soak feedback as the boat keeps a comfortable pace that matches your level. This base approach keeps vibes high and sets you up for quick progress on every ride.
Choose a tour package that blends a scenic boat ride with a wakeboarding session. If looking for options, pick a plan that starts in calm coves, then moves into the main channel for longer pulls. The guide knows how to pace the ride for riders of different levels, keeping you comfy while you gain skill. Each pass focuses on form and control, so you can nail starts and maneuvers, and you can add tubing for variety or a short shore break for photos.
Levels span zero to confident riders. For zero, emphasize basics: stance, balance, and a clean pop off the wake. For others, add maneuvers from toe-side to heel-side cuts, 180s, and short spins as you look to advance. Itll feel natural once you lock in timing, and you can repeat runs until you feel ready for the next step. Here you can push a little, then soak up the water and sun between passes.
Gear and setup: a USCG-approved vest is standard; most operators provide a wakeboard and bindings, with rope and handle on deck. If you bring your own board, confirm it fits the boat’s line length. The base setup usually runs 60–75 ft. To keep things comfy, stash a cooler with water and snacks on the back deck, and wear a dry-fit or quick-dry outfit. For family days, floaties help youngsters stay relaxed on shore, and surfboards offer a light warm-up when the water is calm. Youll also want a small bag for keys, sunblock, and a spare change of clothes. The process of gear handling stays simple so you can focus on the ride.
Prep and tips: arrive early to secure gear and choose the right boat angle for the wind. Bring plenty of sunscreen and a hat, plus a comfy towel. Pack a quick snack and a reusable bottle in a cooler you can refill from the base station. This plan works for a birthday ride or year after year for a recurring treat, and you can finish with a dock-side toast to celebrate. For speed, request a setup that starts slow and then builds pace as you master balance.
Best Wakeboard Boat Tours on Lake Travis
Book a 2- to 3-hour guided wakeboard boat tour on Lake Travis with a licensed captain who prioritizes safety; youll get a legitimate driver who tailors sessions to your level and keeps the line tight for clean wake. These tours are designed to prioritize safety, skill development, and fun.
Choose operators that provide a thorough safety briefing, quality gear, and a prep checklist. A seasoned captain knows how to adjust speed, line length, and wake conditions to maximize your riding time while keeping everyone safe on the water. youll gain confidence reading the waves and executing basic maneuvers during cruising time.
Look for guided options that pair you with a patient instructor; partnering with a local crew gives you flexible scheduling and real-time feedback. A legitimate tour offers a structured plan, including warm-ups, stance tweaks, and progression signals so youre clear on what comes next.
For beginners, plan mornings around 8:00–11:00 when glassy water and lighter boat traffic make for smoother starts. If you crave longer wake sessions and more variety, 2- to 3-hour slots in the late morning or late afternoon deliver extended ride time, more exposure to different waves, and opportunities to practice new maneuvers while floating near lily pads.
Before you ride, ask about the driver experience, the boat type, rope length, and safety gear, including life jackets and quick-release systems. Ensure the operator offers insurance and a legitimate operating license, and confirm the schedule aligns with your riding needs so you maximize the opportunity to progress with a patient, knowledgeable guide, and ever-improving tips.
Beginner Routes and Quick Progress Checks
Begin with Route 1: Marina Cove Calm Start. Stay in sheltered, shallow water for the first 60 minutes to build balance and a reliable stance right away. This is the recommended path for most beginners and creates a baseline you can measure every session. If youve never tried wakeboarding before, youve got an official, easy-to-follow approach with rodrigo or carrillo guiding you at the official access points. Birthday milestones can be used to mark your progress as you log improvements.
-
Route 1: Marina Cove Calm Start
- Access: Launch ramp at Marina Park, easy parking nearby
- Conditions: water smooth with light breeze (below 8 mph)
- Equipment: wakeboard 134-138 cm for most riders; ensure a snug, secure binding
- Right setup: rope length 50-60 ft; target speed 10-12 mph during balance drills
- Purposes: balance, stance width, edging, and controlled starts
- Tips: keep shoulders square to board, eyes forward, knees lightly bent
- Schedule: plan hourly blocks of 20 minutes with 5 minutes rest between blocks
-
Route 2: Sandy Beach Pace Line
- Access: Sandy Beach access point, gentle slope for easy water entry
- Conditions: light chop, sun favorable; wind under 12 mph
- Equipment: 136-140 cm board; adjust bindings for comfort
- Right setup: rope length 60-70 ft; pace pulls to maintain balance
- Purposes: build controlled edge-to-edge movement, shallow water turns
- Tips: relax grip, breathe steadily, keep hips over the board
- Schedule: hourly blocks of 20 minutes with 5 minutes rest between blocks
-
Route 3: Long Glide Progress Point
- Access: North Shore launch point with official access
- Conditions: water smooth with light breeze; good visibility
- Equipment: 138-142 cm board; choose size based on height and weight
- Right setup: rope length 70-75 ft; slight speed increase for balance drills
- Purposes: refine carved edges, smooth transitions, longer pulls
- Tips: keep a steady cadence, shoulders facing forward, head up
- Schedule: hourly blocks of 20 minutes with 5 minutes rest between blocks
Quick progress checks help you stay on track with matching goals. Use these steps after each hourly block to verify gains and adjust gear or route focus if needed.
- Balance and stance: hold a neutral position on the board for 30 seconds, adjusting stance width to hip width as you feel stable
- Rope handling: keep the handle at hip height with relaxed elbows and consistent tension
- Edge control: perform toe-side and heel-side carv in straight lines for 10 meters on each pass
- Stand-up reliability: complete a clean stand-up after a fall within 3 attempts
- Progress log: record improvements and the purposes each hourly block served, noting any equipment tweaks
- Matching goals: ensure the next session aligns with your personal aims and the recommended setup
Gear Rental Checklist: Boards, Vests, and Extras
Here is a specific, concrete start: rent a 136-142 cm wakeboard sized to weight, a USCG-approved vest that stays covered and functional, and a 50-60 ft tow rope with handle, plus a tube for lakes sessions. This process keeps gear simple, faster to set up, and ready for adventure. Add a bimini for sun protection, a float for quick recoveries, and snacks to fuel the day. If you ride this year, consult jose gonzalez for sizing tips and a quick gear check before you head out.
Boards should be sized by weight and skill, with specific ranges: beginners 136-139 cm, intermediates 139-142 cm, bigger or more aggressive riders 142-144 cm. The board design should emphasize a stable rocker, supportive bindings, and a reinforced edge. Look for a forgiving, wide profile that speeds recovery and helps every rider pop up cleanly.
Vests should be designed to stay in place during wake moves; choose USCG-approved models that fit snugly with a zipper and secure side straps. Test mobility by lifting arms and twisting; ensure the vest stays flat across the chest when you float. Bright colors help visibility on lakes trips, and a larger size should be available for growing riders.
Extras and safety: rope lengths include 50 ft and 60 ft options; tubes come in single- or dual-rider designs; verify inflation and carry a patch kit. A bimini shields you from sun, towels and a compact bag hold snacks, water, and sunblock. Golden rule: inspect gear before every session, and keep a small first-aid kit and spare leash. Also check for a technique card that covers basics and techniques to speed up your learning on the water.
Bluetooth Stereo Setup on the Boat: Pairing, Volume, and Safety
Pair the boat’s Bluetooth stereo with your device before you depart; operate the system with one hand on the wheel and the other on the mic to stay tuned to wakeboard cues from the captains on the lake.
To pair, put the stereo in pairing mode (check the display or press the Bluetooth button). On your phone or tablet, choose the stereo name from the list, then follow prompts to complete the pairing; if asked for a code, try 0000 or 1234. Flores and Gonzalez advise testing with a short track before the first ride, and keeping the device within line of sight to reduce dropouts which affect the ones waiting for a turn.
Volume guidance: set the stereo at about 60-70% of max, test with a bass-heavy wakeboard track, and adjust upward only if you’re on calm water; in conditions with chop, drop to 50% to prevent distortion and fatigue after days on the lake. Keep beverages away from the amp and power cables, and use covered compartments to stash phones and other gear when not in use.
Safety and operation: never operate the stereo while the boat is moving at high speed; keep the helm area clear so a captain can call out cues while others adjust volume. Ensure the device is in a water-resistant pouch, route cables away from the rope zones, and secure loose cords to prevent tangling with the anchor or wakeboard lines. If something spills, power down quickly and check that the speaker placement won’t cause distraction during runs.
Tailored setup for lake features: place speakers in a covered, weatherproof spot to protect electronics; with a double-decker wake boat, position upper-deck speakers to spread sound evenly across the wake area and spectator spot. Test after adjusting to ensure the balance covers the lake sites perfectly and remains steady in changing conditions, which you’ll notice on days with gusts.
Extra tip: for years, crews keep the audio simple and reliable by linking a single source that operates well with the boat’s electronics; this helps the ones directing the rides stay focused on the water. If you need to re-pair, re-open Bluetooth settings on your device and re-run the pairing process so that the connection stays solid, which saves time between runs. flores and gonzalez have noted that keeping the setup simple helps the ones running beverages and rope tasks stay engaged with wakeboard sessions.
Lake Rules, Weather Windows, and Strategic Wakeboarding Spots
Lock in a dawn session at Devil’s Cove to catch glassy water and minimal boat traffic; picking that window ensures youve got access to the best ramp times and a high-quality experience, designed for quick starts and safe handling. Absolutely check the local rules before you head out, and thank the crew who keeps launches orderly.
Weather windows: calm mornings typically yield the clean wake and a safe start for getting up on a board; planning with your provider ensures youve got a smooth experience, definitely an awesome start for first-timers. Plan for 6:00–9:00 a.m. or 9:30–12:30 p.m. when forecasts show under 12 mph winds and light chop. If a seabreeze builds after lunch, switch spots to minimize waves and maximize time on the water. Always check the latest forecast and lake advisories, including notices about closures.
Strategic spots and how to ride them: Devil’s Cove gives you a controlled start with easy access and repeatable lines; Pace Bend offers long stretches of flat water for multiple passes and transitions; Volente Beach is convenient for access to snacks and beverages and quick re-rigs; Mansfield Dam delivers higher wakes for more aggressive turns. veronica and gonzalez from the local provider can help you pick where to start, depending on wind, water level, and your hours on the water. If youve got the energy and are ready, ask for a deal on coaching time or gear rentals.
| Spot | Ideal Weather Window | Access Tips | Why It Works |
|---|---|---|---|
| Devil’s Cove | Calm mornings; wind under 12 mph | Ramps near the marina; arrive early to lock in parking; drop gear by the dock | Glassy water and light traffic support consistent beginner runs |
| Pace Bend | Mid-morning or late afternoon; 5–12 mph winds | Flat water zone; watch for boat traffic; parking improves midweek | Long stretches for multiple passes and clean transitions |
| Volente Beach | Late morning to early afternoon; light to moderate winds | Easy access from the Volente area; nearby kiosks offer snacks and drinks | Convenient refuel and social vibe; good for mixed groups |
| Mansfield Dam | Afternoon into sunset; winds ramp up | Ramps up or down the spillway area; follow posted signs | Higher wakes for more advanced turns |