

 Night Fishing for First-Timers – Top Tips and Essential Gear">

Start with a simple setup: a red-light headlamp for clear visibility without spooking wildlife, and a compact rod-and-reel combo paired with weight that stays in balance at the surface. For first-timers, choose a bank edge with calm water and an easy access path, so your first night sessions stay comfortable and you can focus on the basics rather than gear failures. This approach helps them stay focused on the basics and the shoreline rhythm, making the night safer and more enjoyable.
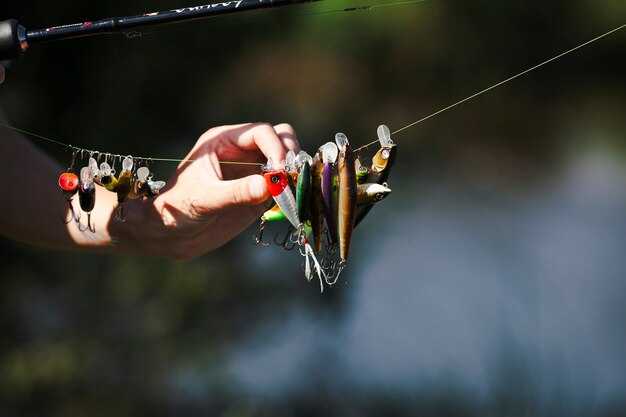
Choose specific gear that remains easy to handle in low light: a reel with smooth drag, a versatile line in the weight range, and a simple slip rig that works on species near the bank. Aim for superb presentation on the surface so bait sits naturally and bites show up quickly. Pack spare batteries and a backup light to stay on top of the heat of the night, especially during warm evenings when insects swirl around the bank and you want to keep hands steady.
Use simple navigation cues to move between spots, noting landmarks and GPS coordinates or high-contrast markers, so your return trip is easy and safe. If you rely on technology like a basic GPS app or a waterproof map, keep it simple and test it during daylight. Remember to observe wildlife behavior and avoid disturbing birds or mammals while you move along the bank. The night air heightens senses; tracking specific sounds helps you identify fish activity, and keeping your presence quiet makes your night sessions more fruitful for anglers.
As you gain confidence, you can expand to more activities and try different rigs for each species. Share tips with fellow anglers and respect local rules, because sharing the bank with others keeps sessions safe and enjoyable. Track weight of your catches and note heat or cold nights; a single, consistent setup will make night fishing easier for first-timers and help you build a repertoire for future sessions when you want to chase a broader range of wildlife.
Night Fishing for Beginners: A Practical Guide
Use a proper headlamp and a compact saltwater rig to cast confidently from night one.
Plan around the moon phase and tide to align your first casts with surface activity and bait movement; check local tide charts and set your plan for the darkest hours when visibility is modest.
Apparel should be layered, waterproof, and flexible. Wear gloves for grip on the reel and a breathable base layer; reflectors or a small safety light improve visibility for others on the shore.
A compact brolly can shield gear from drizzle and spray. Position it to protect your line and keep your setup accessible without crowding your stance.
Tackle selection matters: pick a simple saltwater rig, with a single-hook or two-hook bottom setup, a 1/0 to 3/0 hook range, and 1/2 to 2 oz weight depending on current. Keep a spare spool and a compact rig for quick changes. An excellent habit is to tie a secure knot (Palomar or improved clinch) and test on land before getting to the water.
Safety first: set alarms on your phone to remind you when to check lines, move with the tide, and head back if conditions worsen. Always keep a charged flashlight and a whistle close at hand.
Camouflage apparel and low profile gear help you stay undercover at night. Choose dark, matte colors and avoid bright logos that reflect light along the water.
Technique tips: start with short, controlled casts down the bank or along the surface edge; aim for depths that match the channel or gut you see on maps. Maintain a steady pace and monitor line tension to detect bites quickly. thos that plan, thats a simple rule: practice casts from shore before stepping into deeper water.
| Item | Use | Specs / Notes |
|---|---|---|
| Headlamp | Hands-free lighting | 200–400 lumens; red mode to protect night vision |
| Layered apparel | Warmth and moisture control | Base layer + windproof shell; waterproof boots |
| Brolly | Weather shelter | 2 m canopy; position to avoid line interference |
| Tackle | Saltwater-ready rig | One- or two-hook bottom setup; 1/2–2 oz sinker; 15–40 lb line; spare spool |
| Alarms | Bite cues and safety prompts | Phone alerts or compact buzzers |
| Camouflage apparel | Stealth on shoreline | Matte dark tones; avoid bright logos |
Night Fishing for First-Timers: Top Tips and Lighting Equipment
Start with a reliable lighting setup: a headlamp offering 350-500 lumens, a dedicated red night mode, and a compact handheld backup. Ensuring you can move, tie knots, and read tackle labels without breaking your rhythm keeps you fully focused as night settles.
Choose a kit with an adjustable beam and multiple modes. Use bright white for setup and a dim red or amber for fishing; colors matter because they preserve night vision and help you observe line movement around the rig.
Battery strategy matters: carry at least two fully charged packs, favor USB-C rechargeable options, and keep spares in a dry pouch. Weight matters on longer sessions, so balance your pack and secure tools to prevent rattling during movement. Plan a break every two hours to stretch, re-tie, and re-check knots.
Control the light volume to minimize glare on the water. Keep the beam angled toward the bank or shoreline rather than directly at the surface. This improves your feel for bites while avoiding spooking most fish and reducing attention from predators around the water’s edge.
Moon phase and time affect feeding windows. Expect more action around dusk and in the first couple hours after moonrise; adjust venues accordingly. Select spots with easy access, plenty of structure, and safe exits; keep lighting low when moving to a new area to avoid alerting them to your presence.
Apparel and comfort matter: wear cool, breathable fabrics and layer for temperature shifts. Quiet apparel reduces noise when moving along the bank. Pack a lightweight sleeping bag for chilly nights and keep gloves handy for line handling and knot tying. A hat and reflective accents increase visibility without spooking fish.
Practical starter tips for first-timers: practice casts at home, then test a nearby, easy venue with slow current and good access. Bring plenty of hooks, weights, leaders, and spare line; keep a simple rig on hand for quick changes. Most anglers find success by staying patient, adjusting tactics, and logging what works for different ponds, rivers, and lakes.
Bottom line: stay alert, dont sleep on the job, and respect wildlife. Don’t push into rough conditions; use the moon and time to plan sessions, and keep a calm, methodical rhythm. Always remember that great lighting and smart prep dramatically raise your chances of a solid night bite.
Choose the Right Headlamp: Brightness, Beam Pattern, and Weight
Choose a waterproof headlamp with 350–420 lumens, a mixed beam (flood for surface scanning and a tight spot for distance), and a weight under 90 grams on the head. This setup is comfortable for hours and normally keeps the beam bright enough to spot movement near the surface. This is a great baseline for night fishing.
These beam options give beginners confidence: begin in flood mode to locate tackle, knots, and banks, then switch to spot to read reflections and track a spinnerbait at distance. A red light helps preserve night vision and reduces glare; many models include alarms to signal low battery or mode changes.
Battery life and charging: look for a model that runs 2–6 hours at full brightness, with lower modes delivering 8–20 hours. Choose rechargeable packs, and carry a spare in your packing for long sessions. Fully charge before heading out, and test the snooze and lock features so the light won’t sag when you snooze a timer.
Heat and weather: in summer, a compact, cool-running unit keeps heat buildup down and comfort up. Verify IPX7 or IPX8 waterproofing to survive spray or a dunk. A beam that switches between flood and spot makes it easier to scan the water surface for ripples and detect targets without losing focus.
Packing and usage: keep the headlamp in a dedicated pouch inside your tackle bag for quick access. This approach helps beginners who are learning to read water feel more confident in low light. Plan around the night hours, practice with the gear, and remember to check the vibration of your reel as you cast.
Red Light vs White Light: When to Use Each
Start with red light for the initial setup and during long nights; red light isnt harsh on night vision and helps you detect obstacles while keeping the deck visible for safe movement. It reduces insects around the deck and stays comfortable for someone sharing space with others.
When you switch to white light for specific tasks that require detail: tying knots, reading charts, inspecting hooks, and checking gear around the deck. White light reveals colors on shirts and labels and improves accuracy; use an adjustable, focused beam to prevent glare that could alert fish or confuse other anglers.
- Use an adjustable red-light headlamp on the deck; keep the beam low and angled to illuminate the line and obstacles without blinding anyone.
- Pidä mukana valkoista valoa, jossa on kapea, kohdennettu valokeila tiettyjä tehtäviä varten; vältä hajavalotiloja, jotka vesittävät veden ja saattavat säikyttää saaliiksi aiotun kalan.
- Pidä varalla punainen suodatin tai pieni punainen valaisin (osoittautuu käteväksi, kun jonkun täytyy vaihtaa menettämättä pimeänäköä).
- Ota hyönteiset huomioon; punainen valo auttaa estämään hyönteisten houkuttelua laitteiston ympärille työskennellessäsi.
- Jaa vinkkejä ja koordinoi signaaleja aloittelijoiden kanssa kannella, jotta pysyt valppaana kaikkien ympärillä olevien suhteen.
- Kun käytät prologic-asetuksia, yhdistä punainen ja valkoinen tila vakaiden ja sujuvien tehtävien välisten siirtymien saavuttamiseksi.
Seuraavat retket voivat kasvattaa itseluottamusta: ympärivuotinen harjoittelu molemmilla tiloilla tekee sinusta nopeamman ja mukavamman pimeässä taivaan alla. Ympärivuotisilla retkillä vaihda sujuvasti punaisen ja valkoisen välillä tilanteen mukaan.
Virransyöttövaihtoehdot: Akut, varaosat ja USB-lataus
Lataa kaikki USB-ladattavat laitteet täyteen ennen lähtöä ja pakkaa vara-akkusarja vedenpitävään pussiin.
Valitse virtajärjestelmä, joka sopii varusteillesi ja yösuunnitelmillesi. USB-lataus pitää valot toiminnassa auringonlaskun jälkeen ja vähentää kokoa, kun taas vaihdettavat paristot tarjoavat itsenäisyyttä, kun laturi ei ole saatavilla. Näitä paristoja on kahta yleistä mallia – suurtehoiset 18650-akut suurempiin valoihin ja CR123-paristot pieniin otsalamppuihin; AA/AAA toimivat hyvin perusmalleissa. Säilytä varaosat aina erillisessä vedenpitävässä kotelossa ja merkitse ne tyyppien sekoittamisen estämiseksi; tämä vähentää laitteiden vaurioitumisriskiä. Tämä ei ole aikaa pelata yhdellä paristolla, joten ota varakappaleita mukaan ja suunnittele vaihtoja istunnon puolivälissä. Monille kalastajille luotettavuus on tärkeämpää kuin himmenevän valon kanssa pelaaminen.
- Paristot ja kapasiteetti: 18650-paristot tyypillisesti 2500–3500 mAh ja noin 45 g; CR123-paristot noin 1400–1600 mAh ja 34 g; AA/AAA-paristot vaihtelevat suuresti (1500–3000 mAh suuritehoisille). Valitse valon virrankulutuksen ja painotavoitteen perusteella.
- Paristumisajat: litiumkennot säilyvät avaamattomina usein 5–10 vuotta; alkaliparistot 5–7 vuotta; kierrätä käyttöä niin, että vanhempia paristoja käytetään ensin; säilytä varaosat viileässä, kuivassa paikassa poissa kuumuudesta ja kosteudesta vuotojen välttämiseksi.
- USB-lataus: 10 000–20 000 mAh:n varavirtalähde voi ladata tyypillisen otsalampun 2–4 kertaa; USB-C-pikalataus lyhentää käyttökatkoja; pienikokoinen 5 W:n aurinkopaneeli voi lisätä 1–2 tuntia valoa, kun siihen osuu suoraa auringonvaloa. Pidä kaapelit järjestyksessä taskussa tai pienessä pussissa majapaikkasi lähellä; nämä ominaisuudet yksinkertaistavat paikan päällä tapahtuvia lisälatauksia.
Vinkkejä kenttäolosuhteiden luotettavuuteen:
- Käytä vedenpitävää, iskunkestävää valoa, jossa on säädettävä valokeila, jotta valaistus on sinulle sopiva ja pysyt näkyvissä muille vesistön lähellä oleville; vähennä kirkkautta, jos hyönteiset tai puremat aiheuttavat epämukavuutta.
- Säilytä varavirtalähteitä ja akkuja suojatussa, kuivassa paikassa, etäällä lämmönlähteistä; kuumuus heikentää kennoja ja vähentää kapasiteettia.
- Kun petoeläimiä on lähellä, suuntaa valo pois siimastasi ja pidä varusteet suojassa; tämä auttaa pysymään turvassa ja säilyttämään pimeänäkösi.
- Testaa järjestelmäsi ennen matkaa: varmista latausjakson päättyminen ja varmista, että järjestelmä vaihtaa sulavasti USB-latauksen ja akkuvaravoiman välillä.
Käytännön järjestelytähdet:
- Valitse järjestelmä, jossa on säädettävä otsalamppu, jonka kirkkaustasoa voit säätää luku-, heitto- tai solmimishetkeä varten. Se on joustava ja voi vähentää hyönteisten aiheuttamaa haittaa.
- Pidä akkupaketti sille tarkoitetussa, helposti ulottuvilla olevassa suojassa, mutta suojassa suoralta auringonvalolta; näin se pysyy kuivana ja valmiina seuraavia heittoja varten.
- Säilytä paristoja taskussa tai pussissa, joka pysyy kuivana ja on helposti saatavilla, jotta voit vaihtaa ne huomiota herättämättä valon houkuttelemilta pedoilta.
Valojen sijoittelu: Varusteiden sijoittelu rannalla tai veneessä
Sijoita päävalo 1,5–2 metrin päähän taaksesi, 30–40 asteen kulmassa kohti vettä, jotta se valaisee syöttikalat ja iskuvyöhykkeen häikäisemättä silmiäsi. Käytä punaista tai lämpimän valkoista tilaa säilyttääksesi hämäränäön ja minimoidaksesi eläinten häiriöt. Pidä varaparistoja saatavilla äläkä luota yhteen pakettiin; siksi sinulla on varajärjestelmä. Jos olet rannalla, suuntaa valo veteen, älä kohtiペン岸岸, jotta vältät eläinten valaisemisen ja yökykysi heikentämisen. Tämä järjestely auttaa tarjoamaan vakaan näkyvyyden pyyntialueella.
Rantakuvauksissa pieni valo pienellä jalustalla tai puristimella toimii parhaiten. Lisää sateenvarjo suojaamaan tuulelta ja sateelta sekä hallitsemaan valon leviämistä, erityisesti luontoalueille päin. Naamioi kotelo tai peite sulautumaan ympäristöön ja vähentämään villieläinten huomiota. Käytä suolavedenkestävää varustusta ja aseta valosi siten, että syöttikalat pysyvät vetäytyneinä kohti vettä ennemmin kuin kohti rantaa.
Veneessä kiinnitä valot kaiteeseen tai sängynrungon, varmistaen tasaisen painon jakautumisen välttääksesi keinumista yöllä. Valitse kompakteja yksiköitä matalaprofiilisilla akuilla ja säilytä saatavilla olevaa varapakkausta kuivassa laatikossa. Pyydystystä varten pidä valokeila matalalla ja eteenpäin, jotta näet siimat ja veden ilman häikäisyä miehistön silmiin.
Pidä ääni mahdollisimman pienenä: hiljennä moottori, vältä kolinaa ja hallitse veteen suuntautuvia siimoja. Auringon laskiessa käytä täyttä tehoa vain silloin, kun tarvitset lisänäkyvyyttä, ja luota tarvittaessa varavalon apuun. Varmistamalla, että varusteesi ovat valmiina käyttöön, autat sekä ranta- että veneongelijoita pysymään keskittyneinä ja mukavina, jolloin voit maksimoida pyyntiajan.
Turvallisuus ja pimeänäkö: Häikäisyn vähentäminen ja valmius sääolosuhteisiin
Käytä punaiseksi suodatettua, säädettävää otsalamppua, joka on asetettu 5–20 lumeniin, jotta näkökyky säilyy pimeässä ja häikäisy on vähäistä. Pidä valot sivulla ja suuntaa ne 45–60 asteen kulmassa näkölinjasta; vaihda himmeään, lämpimämpään asetukseen, kun tarvitset luettavuutta. Tämä valaistusjärjestelmä luo luottamusta ja mahdollistaa syötin liikkeiden seuraamisen monissa paikoissa ja sen, mitä lajeja tavoittelet.
Käytä tummia vaatteita ja vältä heijastavia pintoja työskentelyalueesi ympärillä. Sijoita valot niin, että ne valaisevat työskentelyalueesi ilman, että vesi haalistuu, ja käytä punaista tai oranssia suodatinta mahdollisissa veneen kansinäytöissä. Syötti- ja elävien syöttien virityksissä pidä valaistus himmeänä ja käytä erillistä, matalakontrastista lamppua liikkeen seuraamiseen.
Säänkestävyys alkaa suunnitelmasta: tarkista sääennuste, pakkaa lämpimämpiä kerroksia ja ota mukaan hätäsuoja, kuten kompakti pressu tai makuupussi. Älä luota onneen puuskassa, joten ylläpidä vakaata, ankkuroitua asennusta kantamalla mukana ylimääräistä ankkuriköyttä ja varakiinnitysnarua; tämä auttaa kestämään tuulenpuuskia ja roiskeita. Riippumatta siitä, missä kalastat tai mitä lajeja tavoittelet, pysy valmiina säänkestävillä varusteilla ja nopeasti saatavilla olevalla hätävarustepakkauksella.
Ankkurointi- ja turvajärjestelmä: testaa jokainen ankkuripiste ennen laitteiden käynnistämistä, kiinnitä varusteet suojattuun paikkaan ja pidä löysien linjojen määrä mahdollisimman pienenä tarttumisriskin vähentämiseksi. Pidä mukanasi varaparistoja, taskulamppu ja pieni ensiapupakkaus, jotta voit päättää illan turvallisesti.