

 Lake Powell Watersports Tour – Jet Ski, Wakeboard & Kayak Adventures">

Begin with a 90-minute Jet Ski session to feel the wake and the clear views along the rocky coves. Ashley, our seasoned guide, explains safety steps, right-of-way rules on the lake, and tips for protecting the shoreline. This recreation-focused start sets a high-energy tone for the day and invites you to explore Powell’s expansive scenery. This plan will help you pick the best mix of jet ski, wakeboard, and kayak to fit your energy level.
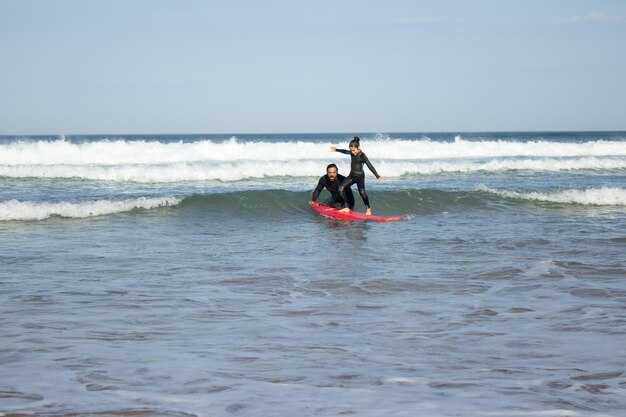
Next, set aside 2 hours for a wakeboard session with a coach who tailors the technique to your skill level. Expect lines in the 60–80-foot range and coaching on edge control, with an option for a gentle invert for beginners who want a touch of flair. All riders wear PFDs and helmets, and a spotter keeps you secure on the boat.
With two-person kayaks, explore sheltered coves and a beach stretch where the water stays calm and clear for easy paddling. Glide along the northwest shoreline, pass hidden arches, and learn to read wind shifts that influence the wake and currents. This leg emphasizes steady technique and calm, scenic immersion.
Our brochure describes types of routes from tranquil glides to high-energy sessions, and it highlights protecting the lake environment. We caution about invasive species like quagga mussels and provide rinse stations to minimize spread; always rinse gear after trips and respect shoreline buffers.
For groups or families, the Lake Powell Association coordinates bookings with a maximum capacity to keep waters safe and enjoyable. Book a multi-day package that pairs jet skiing, wakeboarding, and kayaking, with mornings on the water and afternoons for beach time or exploring scenic canyons. Ashley can tailor a plan that fits your schedule and skill level, ensuring the experience remains amazing and accessible for beginners while still challenging for seasoned riders.
Planning and Logistics for a Lake Powell Watersports Day
Reserve a public launch slot at Wahweap Marina or Bullfrog the day before and arrive 90 minutes early to secure a ramp, parking, and check-in.
For a day that covers different types of activities: skiing, wakeboarding, and kayaking, plan a simple loop starting from a public launch, following buoy markers, and finishing at a nearby campground or beach to rest and rehydrate. Lake Powell, located in arizona, features dramatic mountains and wide coves, and stands as one of the largest man-made lakes in the region.
- Launch options and hours: choose Wahweap, Antelope Point, or another public ramp located along the shore; verify posted hours with the county park service before your start and adjust plans for seasonal closures.
- Parking, ramps, and access: arrive early to secure a parking spot and ensure ramp capacity for motorized and nonmotorized craft; carry exact payments if fees apply.
- Equipment and safety: everyone wears a USCG‑approved PFD; bring a whistle, a throw bag for wake sessions, and dry bags for electronics; attach a lanyard for wakeboard or skiing lines; check that your boat’s safety gear is in place; if you run multiple sessions, recheck gear between uses.
- Navigation and markers: follow buoys and shore markers; keep a safe distance from wildlife and avoid restricted zones; know that motorized traffic has right of way in busy corridors.
- Hydration and weather: summer heat is high; drink water routinely and pack electrolyte drinks; monitor weather as afternoon winds can rise quickly; have a plan to cut sessions if storms form, unless you want to limit exposure.
- Wildlife and protection: observe wildlife from a distance, avoid approaching nests, and pack out all trash to protect the entire ecosystem.
- Food, rest, and lodging: stay hydrated during breaks; if you plan to stay around, check campgrounds near the lake and consider a stay at a nearby hotel in the county for the night; travelers from Kootenai or other placid counties often choose early starts and arizona mornings calm.
- Logistics for guests: if traveling with tourists or a large group, coordinate with the local association for tips on waste disposal, parking, and ramp etiquette; unless you have a private launch booked, respect public launch rules and common courtesy.
Tip: prepare an emergency plan with a water-safe contact; share your route with a friend and set checks at different times during the day; this keeps safety high while you explore the lake’s canyons and coves.
Jet Ski Route Options Around Glen Canyon Reservoir
Begin at Wahweap Launch Ramp and commit to the South Shore Family Loop for a quick, protected circuit. Stay in buoyed channels, enjoy sheltered coves, and return with time to refuel at nearby ramps or a lakeside resort. Plan 2–3 hours at a steady 25–40 mph.
- South Shore Family Loop – Start Wahweap launch, cruise south along the east shore through calm coves, follow buoys into the main channel, reach the Antelope Point area, then loop back through additional sheltered bays. Highlights include kid‑friendly spots for a snack, crappie near shallow pockets, and low‑wind pockets shielded by the mountains. This route stays below busy traffic peaks and preserves the watershed while remaining close to ramps for quick breaks.
- North Shore Explorer Circuit – Launch from Bullfrog or Hall’s Crossing, head north along the north shoreline, and weave through finger coves with clear buoy lines. Expect longer stretches of open water, dynamic winds from the canyon walls, and several spot options for moving between shade and sun. Time guidance: 3–4 hours at 28–42 mph. Keep to marked channels near buoys and respect local launches for refuel or a quick snack at a lakeside resort.
- Fishing‑Focused Loop (crappie and wildlife) – Start at a convenient ramp, then target coves known for crappie presence in the watershed’s gentler bays. Move between sheltered spots, pause at a quiet point for a bite, and return along the same buoyed line or a slightly inland path. This route suits a small group seeking an ad‑hoc bite and a longer, relaxed pace, 4–5 hours at 20–35 mph. Hungry anglers can time their runs for dawn or dusk when activity rises.
lakethis tip: map your spots before launching and keep a quick refuel schedule in mind. There are multiple ramps and buoys that help you stay in protected water, especially below the dam footprint. Always monitor weather and wind shifts from the surrounding mountains and avoid exposed stretches. Protecting the watershed matters for the community and for future adventures.
Important safety notes: start launches near the ramp zones, move in a group when possible, and respect local speed limits near coves and spots used by shore visitors. By planning these options, you keep the ride smooth, enjoyable, and accessible for visitors from Montana or any nearby locale, supporting a lasting community of lake enthusiasts.
Wakeboard Setup, Gear, and Rider Skill Considerations
Start with a 136–139 cm wakeboard for most riders under 170 lb; switch to 139–142 cm if you weigh 170–210 lb, and 142–146 cm for riders over 210 lb. Bindings should be mid-stiff with a secure heel cup and snug closure to keep your ankle steady. For rope length, begin at 60 ft and move to 65–75 ft as your balance improves. In addition to board size, ensure your bindings match a comfortable stance width. lakethis tip helps you lock in before you hit the water, and youre ready for a smooth ride. The setup has been refined by guides and rental shops, but comfort comes from tuning to your body and wind.
Develop a consistent stance: knees bent, hips centered, shoulders square to the boat. Edge into the wake with the lead foot about halfway; pop smoothly when the boat pulls you forward. Keep moving your weight from heel to toe edge as you approach the wake; practice four reps per session to build rhythm. Crossing wakes requires a steady pull and a controlled pop; focus on small, controlled jumps rather than big leaps. As you gain confidence, alternate between toeside and heelside to balance both sides of your body.
Located in the northwest states near Glen Canyon, this outdoor recreation area spans acres and miles of shoreline. The montanas region adds a mix of lake options that keep recreational riders hungry for new terrain. The skis and wakeboards used here range from rental setups to pro-level gear; in addition, bring your own vest to ensure a snug fit. The rocky shoreline and changing wind demand a setup that stays moving without slipping, and a properly tightened binding helps you stay centered. Visitor halls and ranger stations offer quick safety refreshers, and four nearby boat ramps keep access easy. The area remains accessible year-round for your crew.
Weather and water conditions shift with the season; check local forecasts at the marina before a run. Always wear a PFD and helmet when conditions demand, and inspect gear for wear after each session. For first-time riders, start with short intervals and focus on balance drills; with each outing, your control grows and moving through the wake becomes natural.
Kayak Choices: Single vs Tandem, Paddling Gear, and Accessory Picks
Valitse tandem useimmille Powellin retkille kumppanin tai perheen kanssa ja varaa yksikkö sooloseikkailuun tai vauhdin tavoitteluun avoimilla poukamilla.
Yksikkö vs. Kaksikko: Nopea opas valintaan. Yksikkökajakit ovat 3,6–4,3 metriä pitkiä, noin 63–71 cm leveitä ja painavat noin 16–25 kg. Niiden kantavuus on 113–159 kg sisältäen melojan ja varusteet. Kaksikkomallit ovat 4–5,2 metriä pitkiä, 71–84 cm leveitä ja painavat 27–41 kg. Niiden yhteenlaskettu kantavuus on noin 204–272 kg. Tuulisissa olosuhteissa tasapainoinen paino tekee kaksikosta vakaamman, kun taas vankka yksikkö tuntuu ketterältä kanjonin kapeikoissa ja jokimaisissa osuuksissa. Ylityksiin ja pitkiin päiviin vesillä kaksikko auttaa pitämään kumppanit yhdessä jopa 9–16 kilometrin matkoilla. Nopeisiin siirtymiin poukamien välillä ja patikointiin yksikkö tarjoaa kevyemmän käsittelyn ja nopeamman kiihtyvyyden. Kun suunnittelet retkiä etelärannan lomakeskuksista vesistöalueen varrelle, ota laukaisusuunnitelmassasi huomioon toinen meloja, varusteet ja ylimääräinen mela.
Melontavarusteet: Valitse hiilikuitumela, jonka pituus on 210–230 senttimetriä yksikkökajakkiin ja 230–240 senttimetriä tandemkajakkiin. Valitse säädettävät holkit, jotta voit säätää pituutta matkan varrella vesillelaskuun. Käytä hyvin istuvaa kelluntaliiviä jokaisella retkellä ja pakkaa kuivapusseja, joiden koko on 10–20 litraa, vaatteita ja välipaloja varten. Ota mukaan pieni pilssipumppu tai sieni, melan naru ja ylimääräinen O-rengassarja tai venttiilit kajakkityyppejäsi varten. Jalkineiden tulisi olla vettä hylkiviä kenkiä, joissa on hyvä vedenpoisto, jotta ne kestävät pesua ja roiskeita venesatamien lähellä. Lisää kansilaukku karttoja ja välipaloja varten sekä kompakti ensiapupakkaus rauhallisia poukamia ja vilkkaita jokisuistoja varten sekä vedenpitävä puhelinkotelo, jolla voit seurata kilometrejä ja sijaintia kelluvien tutkimusretkien aikana.
Lisätarvikevalikoima: Rakenna paketti turvallisuuden, navigoinnin ja käyttömukavuuden ympärille. Vedenpitävä kartta tai GPS-laite sekä poijumerkintä- tai kanavakartta auttavat sinua pysymään erossa vanavesistä ja poijuista venesatamien lähellä olevilla vilkkailla väylillä. Pidä mukana lyhyt heittopussi ja hinausnuora, jotta voit auttaa ystävää, jos hinaaminen tulee tarpeelliseksi lähtöpisteiden, kuten Wahweapin, Glen Canyonin tai Antelope Pointin välillä. Ankkurisarja tai ankkurikärry on kätevä hiljaisiin pysähdyksiin joen varrella olevissa rauhallisissa poukamissa; käytä sitä suojaisissa lahdissa loitolla joen virtauksista. Ota mukaan pienikokoinen otsalamppu tai pieni taskulamppu aamu- tai iltahämärässä pidettäviä sessioita varten sekä varaparisto tai aurinkolaturi, jotta puhelin pysyy käynnissä sijainnin tarkistamista varten. Kalapaikkojen osalta tiedä, että basso ja muut kalat ovat lähellä kivikkoisia rantoja, ja ole tietoinen veneistä, jotka käyttävät samoja vesiä; poijukanavat ja merkityt väylät auttavat sinua pysymään erossa niistä. Jos valitset opastettuja tai kapteenin johdolla tehtäviä vuokrauksia, sovi oppaan kanssa varusteiden tarkastuksista ja tieyhteyksistä lähtöalueille.
Käytännön vinkkejä valmisteluun: Vuokraa ensin testattu yhdistelmä Glen Canyonin alueen venesatamasta, jotta voit vertailla tuntumaa ja suuntavakavuutta. Testaa yksi- ja kaksikko kanootti 2–3 mailin lenkillä lähellä itärantaa vakauden arvioimiseksi ja vertaa sitten, miten keula käsittelee aallokkoa ja tuulta. Tyypilliseen päivään kuuluu 3–4 mailia melontaa 45–60 minuutin lounastauolla suojaisassa poukamassa, jota seuraa 2–3 mailin paluumatka, jolloin kokonaisponnistus pysyy alle 3 tunnissa rentouttavan Powell-kokemuksen saavuttamiseksi. Kun lähdet vesille, muista tarkistaa polttoaineet ja polttoainelaiturit läheisistä lomakohteista, jos liikut moottorikäyttöisten alusten seassa, ja pidä mielessä tieyhteys vesillelaskupaikkoihin. Pidä miehistösi tietoisena ohikulkevien veneiden aiheuttamasta aallokosta ja valitse rauhallisia poukamia pois venesatamista klo 17:00 jälkeen, jotta Halls-alueella on tyynempi vesi ja paremmat mahdollisuudet tähtien katseluun.
Muistilista satamassa: Varmista valitun kajakkityypin ja melan pituuden vuokraukset, tarkista painoraja ja tarkasta venttiilit ja aukkopeitteet ennen vesille lähtöä. Pakkaa pieni kuivapussi varavaatteille, kevyelle sadetakille ja välipaloja järvipäivää varten, joka venyy iltapäivään. Huomaa, että Powelljärvi kattaa laajan valikoiman maisemia; vuoret kohoavat kanjoniseinien yläpuolelle, ja etelärannan läheinen sijainti tarjoaa maisemallisia näköalapaikkoja ja pääsyn useisiin lomakohteisiin ja venesatamiin. Aloita lyhyellä pyörähdyksellä lähellä vesillelaskupaikkaa varmistaaksesi istuvuuden ja valitse sitten pidempi reitti joenvartta pitkin saadaksesi täydemmän Powell-kokemuksen.
Turvallisuusohjeet ja hätätilanteet Lake Powellilla
Käytä aina oikein istuvaa pelastusliiviä ja varmista se ennen laiturilta lähtöä; varmista, että jokainen matkustaja pysyy kiinnitettynä Powel-järvellä matkan ajan. Tämä perusvaihe pienentää loukkaantumisriskiä, kun herätysaallot osuvat tai rannikolla tehdään nopeita liikkeitä. Pidä pieni vedenpitävä pussi, jossa on pilli, taskulamppu ja perusensiapupakkaus käden ulottuvilla, ja varmista, että varusteesi täyttävät turvallisuustarkastukset.
Laadi kelluntasuunnitelma ja jaa se leiriryhmäsi tai paikallisyhteisösi kanssa; sisällytä siihen reittisi, odotettu paluu ja tarkistusajat. Etäisyydet venyvät maileiksi Powell-järvellä, joten ilmoita jollekin suunnitelmasi. Jos suunnittelet neljän tunnin retkeä, määritä alku- ja loppuajat sekä suunnitellut pysähdykset.
Sää voi muuttua nopeasti; tarkkaile tuuliennusteita ja vesiolosuhteita, huomioiden keskimääräisen tuulennopeuden ja -suunnan. Käytä leveitä väyliä minimoidaksesi muiden alusten aiheuttaman häiriön ja vältä matalia riuttoja lähellä rantaa; toisinaan olosuhteet vaativat pysymään lähempänä järven keskustaa sen sijaan, että pyrkisit rannalle.
Jos vene kaatuu, pysyttele mahdollisuuksien mukaan veneen luona ja anna merkki avuntarpeesta pillillä ja peilillä; jos pääset takaisin veneeseen, suuntaa lähimmälle turvalliselle rannalle tai venesatamaan. Harjoittele kuivalla maalla pelastautumista, jotta ryhmäsi osaa toimia epäröimättä.
Pidä mukanasi kaksi luotettavaa tapaa kutsua apua: VHF-radio kanavalla 16 ja satelliittiviestinlaite, jos kenttä on heikko. Pysy aluksesi luona, jos erkanet siitä; merkitse sijaintisi ja kommunikoi pelastajien kanssa. Powellin käytävän varrella olevat lomakeskukset ja rantayhteisöt, mukaan lukien McGregorin ja Bigforkin lähellä olevat alueet, tarjoavat maamerkkejä pelastajille.
Huuhtele varusteet jokaisen käyttökerran jälkeen välttääksesi vieraslajien leviämisen uusiin vesistöihin; käytä erillisiä kuivapusseja varusteille estääksesi ristikontaminaation. Tarkista huuhteluasemat sisäänkäyntipaikoissa ja noudata paikallisia ohjeita puhdistuksessa.
Kunnioita luonnonvaraisia eläimiä ja kalojen elinympäristöjä; pidä melutaso mahdollisimman alhaisena pesimäpaikkojen lähellä ja vältä tunkeutumista suojelluille rantaviivavyöhykkeille. Pidä turvallinen nopeus ja vältä aggressiivista vesihiihtoa tai wakeboardingia lähellä rantaviivoja, joissa veneet lastataan leirintäalueilla. Tämän ulkoilusuunnitelman tavoitteena on säilyttää upeat kokemukset noudattaen samalla määräyksiä ja turvallisuuden parhaita käytäntöjä.
Overview turvallisuusvaiheita: tarkista varusteet, jaa reittisuunnitelma, tarkkaile olosuhteita, harjoittele paluu, ylläpidä luotettavia yhteyksiä ja noudata ympäristöohjeita. Turvavarusteiden hinnoittelu vaihtelee varustajittain, joten varmista, mitä pakettiisi sisältyy. Jos pysyt Powellin ympäristössä, asuinalueet ja reitit yhdistävät yhteisöjä, kuten Ennis, McGregor ja Four Winds, leveitä vesiväyliä pitkin ulkoiluseikkailuihin, kuten hiihtoon, melontaan ja wakeboardingiin, jotka kaikki ovat järvenrantalomakohteiden ja leirintäalueiden ulottuvilla.
Huomioi: Ole aina valppaana, pidä silmällä muita veneitä ja suunnittele reitit niin, että vältät vilkasta liikennettä lähellä rantaviivaa. Muistamalla nämä askeleet, olet valmis mihin tahansa tilanteeseen samalla kun nautit upeista maisemista, kalastuspaikoista ja laajoista Powell-järven alueista.
Pakkauslista: Mitä mukaan Lake Powellin vesiurheilupäivään
Pakkaa vedenpitävään pussiin perustarvikkeet: aurinkorasva, vettä ja varavaatteet myöhempää käyttöä varten.
Säilytä arvoesineet erillisessä kuivapussissa ja aseta välipalat pieneen kylmälaukkuun, joka on helposti ulottuvilla päivän aikana.
Valmistaudu varusteiden nopeaan saatavuuteen: aurinkohattu, aurinkolasit nauhalla, kompakti ensiapupakkaus ja varavirtalähde.
| Item | Huomautukset | Qty |
|---|---|---|
| Aurinkovoide SK 30+ (vedenkestävä) | Lisää uutta kerros voidetta kahden tunnin välein tai uinnin jälkeen | 1 pullo |
| Lierilieri vai lakki | Varjo keskipäivän auringolle | 1 |
| Sunglasses with strap | Suojaa tuulelta ja roiskeilta | 1 pair |
| Water bottle | 1–2 l, eristetty on suositeltava | 1 |
| Kuivasäkki (10–20 l) | Puhelin, avaimet ja lompakko turvaan | 1–2 |
| Towel | Nopea kuivuminen toivottavaa | 1 |
| Swimwear | Pakkaa mukaan varavaatteet | 2 |
| Water shoes or sandals | Pito märillä pinnoilla | 1 pair |
| Kevyt sadetakki | Jos ruiskua tai pilviä esiintyy | 1 |
| Ensiaputoimet – perusasiat | Siteitä, antiseptistä ainetta, tarvittaessa lääkkeitä | 1 kit |
| Puhelinlaturi vai varavirtalähde | Pidä laitteet ladattuina karttoja ja valokuvia varten | 1 |
| Pelastusliivi (jos ei ole saatavilla) | Sopiva koko henkilöä kohden | 1 per person |
| Snacks | Energiapatukoita, pähkinöitä, hedelmiä | 2–3 annosta per henkilö |
| Roskapussi | Vie kaikki jätteet pois | 1 |
Pysy nesteytettynä, tarkkaile sääolosuhteita ja pidä kulkureitti veneelle selkeänä, jotta jokainen kyyti on sujuva ja turvallinen.