

 The Only Boat Safety Equipment Checklist You Need for Safe Boating">

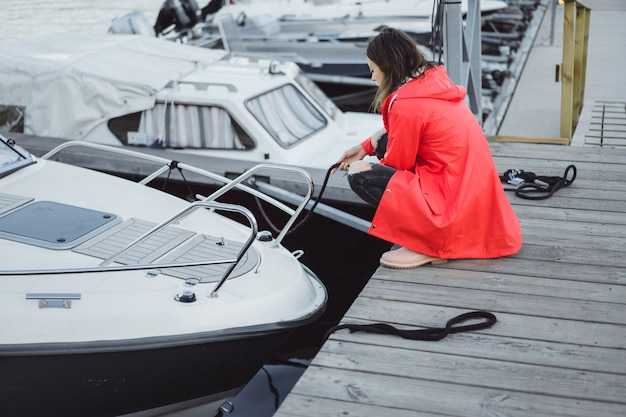
Start with a single, compact safety kit you can build and check before every outing. Label each item for quick access, and store the kit in a waterproof box so you can ensure readiness on busy waterways. Include a bottle of water for each person, a compact blanket, and at least one signaling device–these essentials create a unique, reliable baseline for any trip.
For the core gear, include three categories: PFDs for everyone, a battery-operated light or beacon, and a medical kit with bandages, antiseptic wipes, and pain relievers. Label these items clearly and keep them in a single pouch, so you can grab the kit manually if conditions deteriorate. Usually, a compact first-aid kit plus a small flashlight covers most on-water medical needs.
Next, add signaling and flexible gear you can tailor to your route. Include a whistle, a compact signaling mirror, and a small patch kit for quick fixes. For longer trips, coordinating with other boats helps: outline who carries what and where to meet if trouble arises. In rocky conditions, pack a dry bag with extra clothing, a blanket, and a spare battery to keep radios and lights running through the range of weather. Carry cost considerations for replacements and upgrades into your april planning.
Before launch, perform a quick operating check of all electronic gear, including navigational devices and battery levels. A simple checklist on paper–or a small notepad–helps you run through items manually and avoid relying on memory. With proper maintenance, you usually avoid surprises and are ready for a smooth ride along the waterways.
Tip: Treat this kit as a living setup–update labels, swap expired items, and adjust for new boaters and routes. A unique approach keeps you prepared for april trips, long weekends, and sudden weather changes, while keeping overall costs predictable and low.
Comprehensive Boat Safety Equipment Checklist for Safe Boating and Emergency Lighting
First, perform a pre-departure check that covers lighting, signaling, life-saving gear, and communications to manage hazards and ensure coverage through offshore passages aboard any craft. Do this every trip to keep operations safely within planned limits and to promote peace aboard.
For nighttime operations, verify that at least two working forward navigation lights are visible, plus a bright handheld light for crew tasks. Keep a spare shelf of batteries and a charged device to respond immediately if visibility drops. This practice reduces risk when weather turns, and it supports visual signals when passing ships or offshore platforms.
Table below divides items by category and notes recommended types of equipment, including chemical extinguishers and a range of signaling types.
| Category | Recommended items and notes |
|---|---|
| Emergency Lighting and Power | Two working LED flashlights, one headlamp; one waterproof lantern; spare batteries; portable power bank; check before departure; shelf storage near exits; ensure the devices allow hands-free operation when needed; verify backup power covers hours of operation. |
| Signaling and Rescue | VHF radio (handheld or fixed), charged and within reach; registered EPIRB or PLB with current position registration; signaling aids: flares of different types for day and night; signal mirror; whistle; EPIRB positioned for rapid access; replace expired flares; keep visual signals ready for offshore and international operations. |
| Lifesaving Equipment | Personal flotation devices for all aboard; throwable flotation device; rescue line or throw bag; boarding ladder; immersion suit for offshore trips; ensure every piece remains accessible and in good condition. |
| Seguridad contra incendios | Chemical extinguishers (ABC or equivalent) with current inspection, pressure gauge in correct range, mounting brackets, and a suppression plan; train crew on use; replace after expiry and keep near the galley and engine space. |
| First Aid and Medical | First aid kit with CPR mask; antiseptics, bandages, burn treatment, pain relief; waterproof medical guide; times to review contents and refresh supplies; assign a lead responder aboard. |
| Navegación y seguridad | Charts (paper and electronic), compass, depth sounder or depth navigator, and GPS; spare bulbs and fuses; keep a current position fix and update navigation gear; maintain awareness for international routes and coastal coverage. |
| Tools and Spares | Rope, fenders, knife, multi-tool, duct tape; spare parts for safety gear; battery tester; keep on a shelf or in a lockable box for quick access during repairs. |
| Maintenance and Documentation | Maintenance log with test times and replacement dates; manuals aboard; EPIRB/PLB registration up to date; keep records of inspections and compliance with international and local regulations; set a yearly review cadence to maintain coverage and readiness. |
PFDs and Throwable Devices: fit, inspection, and quick-access storage
Fit every PFD snugly and keep a throwable device within arm’s reach of the helm on every trip. Size the vest or jacket to the wearer, adjust all straps, and test by lifting the wearer’s chin slightly while you move to mimic boat motion. If you can slide more than two fingers between the strap and chest, tighten; if you can’t insert fingers at all, loosen slightly. Ensure bottoms of belts sit flat and don’t ride up when bending or reaching for lines.
Regular inspections prevent failure under pressure. Check foam integrity, seams, and buckles for signs of cracking or loosening after exposure to sun, salt, and spray. For inflatable PFDs, verify the status indicator, inflator cartridge seal, and valve operation; replace cartridges as recommended by the manufacturer and perform a manual test in a controlled environment. Keep a testing log and schedule servicing through authorized centers before the boating season begins.
Store throwable devices where they deploy quickly while staying dry and ventilated. Mount ring buoys or throw bags in accessible compartments near the cockpit and at the bottoms of seating areas, not behind bulky gear. Use marine-grade containers or pouches that allow ventilation to reduce moisture buildup and odors. Do not stack gear in a way that blocks access to the device; designate a dedicated list of locations and a second set of hands for deployment if needed during an overboard incident, so responders can reach a device without delay.
Selection and maintenance require ongoing training. Keep a ready-to-grab kit that includes PFDs, a throwable device, a compass, and a simple list of steps for quick checks–these are key for regular courses and drill practice. In busy tourism operations, assign a specific crew member to respond to gear checks, verify enough devices are on board, and document replacement dates. Victoria crews and other boaters benefit from practicing deploying a throwable device during drills, reviewing the removal process from storage, and confirming that all equipment remains ready for action.
Unique, well-ventilated storage supports preparedness and helps you get enough air and visibility while checking gear. Make sure every boater understands the quick-access locations, and incorporate a short training loop into every course or refresher session. By testing, adjusting, and documenting, you maintain a reliable arsenal for responding to an overboard situation and protect everyone aboard with confidence and calm.
Navigation Lights: battery checks, bulb replacements, and power sources
Start with a simple rule: test navigation lights before you depart and replace any dim or flickering bulb immediately. This action creates excellent visibility in choppy conditions and helps persons on deck notice your vessel quickly in all weather.
- Battery checks
- Test resting voltage with a multimeter; a healthy 12V battery reads about 12.6V, while charging may show 13.8–14.4V. This source quality indicates the bank is ready to support the lighting division across the boat.
- Inspect terminals for corrosion; clean with a baking soda solution, rinse, dry, and reseat firmly. Ensure all connections are labeled for easy maintenance.
- Look for bulges, leaks, or foul odors in the case; replace weathered batteries without delay to prevent sudden failures open to the atmosphere.
- Verify charging sources–engine alternator, shore power, or solar panels–are delivering current; use a surge arrestor on the circuit to shield lights from spikes.
- Document the battery type and capacity (Ah) on the labeled shelf or panel so this knowledge travels with the crew, not just one person.
- Bulb replacements
- Prefer LED navigation bulbs labeled for marine use; they draw far less current and offer longer life, allowing excellent reliability in real-world trips. Keep a spare set in a labeled division near the galley or cockpit for quick access.
- Ensure compatibility with color-coded classifications (red, green, white) and replace in matched pairs if the fixture design requires balanced illumination.
- When replacing, open the fixture, remove the old bulb, insert the new one without touching the glass with bare fingers, and test with the switch on. If a bulb flickers, it’s a sign to replace the fixture or the entire circuit.
- Test each light after replacement to confirm uniform brightness across all open housings; revisit connectors if a lamp shows dimming while others stay bright.
- Power sources and backups
- Maintain at least two sources: a starting battery for the engine and a house battery for electronics; keep a spare battery registered within the system for emergencies. This practice helps when moderate loads occur under open-water conditions.
- Use a solar charger with a proper controller to sustain a steady trickle charge when you’re away from shore power; monitor the charge state to avoid overcharging the source.
- Install a surge arrestor on the nav-light circuit to guard against voltage spikes from switching or regulator faults.
- Carry extra lighting options: a compact emergency lantern and a headlamp; place these in an accessible location in the galley so the crew can respond quickly during an emergency.
- Keep spare bulbs, fuses, and a small tools kit in a labeled shelf; verify they are marine-grade and compatible with your registered lighting fixtures.
- In real-world use, test the full system during a controlled drill to confirm the atmosphere on deck remains safe and the open cabin stays lit under varied conditions, including a simulated smoke scenario or other alerts.
Iluminación de emergencia: lámparas que funcionan con baterías, barras luminosas, ubicación y tiempos de funcionamiento
Dado que esto es sencillo de gestionar para la mayoría de las flotas, utilice lámparas alimentadas por batería como iluminación de emergencia principal, con barras luminosas como respaldo. Esta configuración ayuda claramente a localizar la iluminación durante los apagones y no sustituye a un plan de señalización completo. Verifique siempre que cumple con los requisitos legales y mantenga un plan detallado para las embarcaciones a motor intraborda y otras embarcaciones.
- Selección de lámparas y tiempos de funcionamiento: Elija lámparas LED robustas de grado marino, diseñadas para uso en cabina (40–80 lúmenes) con un ajuste más brillante para salidas. Los tiempos de autonomía son de aproximadamente 8–12 horas en bajo y 2–4 horas en alto; planifique un uso prolongado llevando baterías de repuesto y permitiendo la recarga USB-C. Guarde las unidades en un compartimento dedicado cerca del timón o las áreas de la tripulación, y etiquete cada una con su estado de energía para que la tripulación pueda localizarlas rápidamente.
- Barras luminosas, sustitutos de bengalas y rotulación: Mantenga una provisión de barras luminosas con una visibilidad de 12+ horas. Use etiquetas de categoría 20-b en cada paquete para simplificar el reconocimiento. Las barras luminosas pueden servir como una opción de señalización que no sea bengalas cuando no hay energía y ayudar a localizar un camino en mares agitados. Guarde los estuches en lugares accesibles para que pueda localizarlos rápidamente y revise sus fechas de vencimiento anualmente.
- Placement and mounting: Instale lámparas en cada compartimento y a lo largo de los pasillos principales en las áreas interiores de las lanchas a motor. Utilice soportes robustos y resistentes a la corrosión; asegure una sujeción firme al vástago sobre una superficie sólida. Evite colocar unidades cerca de motores o fuentes de calor para prevenir daños; posicione las lámparas para minimizar el deslumbramiento y para facilitar líneas de visión rápidas durante los simulacros.
- Equipo dañado y mantenimiento: Inspeccione si hay carcasas, sellos o baterías dañadas en cada viaje. Si una unidad muestra grietas o corrosión, retírela del servicio y reemplácela. Mantenga un kit de reparación compacto y registre los reemplazos en la carpeta de mantenimiento de la embarcación.
- Cumplimiento legal y revisiones anuales: Manténgase en cumplimiento con las regulaciones locales que rigen la iluminación de emergencia. Actualice sus registros anualmente y ajuste el sistema a medida que cambien las leyes o la categoría del buque. Documente los simulacros y el uso real para mejorar las respuestas futuras, y asegúrese de que las etiquetas y las ubicaciones de las cajas reflejen los diseños actuales de todas las flotas.
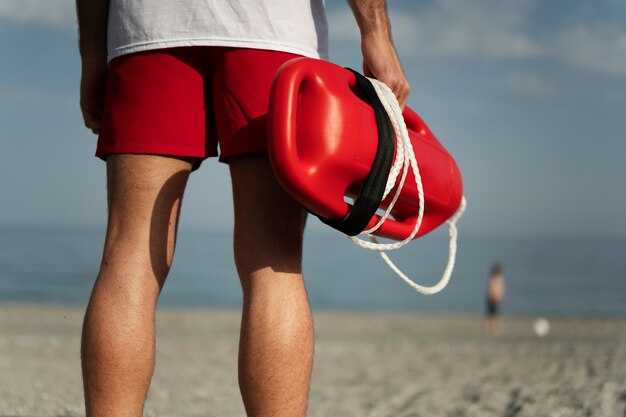
Flares, Whistles, and Signaling Gear: expiration checks and proper storage
Verifique todos los dispositivos de señalización antes de cada viaje y reemplace cualquier cosa que haya pasado su fecha de caducidad. Este primer paso aumenta la fiabilidad y le mantiene en cumplimiento con las regulaciones que rigen la seguridad náutica. Lea la etiqueta o la guía para confirmar el mes y el año exactos de validez; muchos artículos muestran una fecha de caducidad, como julio de 2025, lo que significa que es necesario sustituirlos antes de esa fecha.
Inspeccione el embalaje, los sellos y el estado general de cada artículo. Look for dampness, corrosion, or obvious damage to the case. If a flare’s shape is distorted or a whistle’s mouthpiece is cracked, remove it from service. For electronic signaling gear, verify the output by checking the wattage rating on the device; a visible indicator or test mode should confirm operation without discharging the unit. This second check helps boaters assess reliability and ensures you have a visible signal when needed.
Keep which artículos que llevas sencillos y accesibles: carry una combinación de herramientas de señalización no pirotécnicas y pirotécnicas, y asegúrese de poder alcanzarlas mientras está sentado en la cabina. Para los artefactos pirotécnicos, nunca pruebe ni encienda los dispositivos a bordo. which podría poner en peligro a la tripulación o los sistemas de combustible; confíe en pruebas certificadas y reemplace las unidades caducadas. Mantenga esenciales al alcance para que pueda actuar rápidamente si surge una situación de peligro.
Guarde los equipos de señalización en un lugar específico, seco y fresco, lejos del combustible, los disolventes y el calor directo. Utilice un contenedor o estuche extendido y claramente etiquetado, colocado fuera del suelo para evitar la humedad y las salpicaduras. Mantenga estos artículos alejados de los motores fuera de borda y del escape para evitar la exposición al calor que pueda degradar los materiales o el brillo visible. Guarde los artículos pirotécnicos en su embalaje original con los sellos intactos y separados de los equipos no pirotécnicos para reducir el riesgo de contaminación cruzada.
Legal los requisitos varían según la jurisdicción, pero una buena práctica es increase readiness by rotating stock at least once per year and performing a quick first y second check before any trip. Refill or replace items as needed and document expiration dates in your boat’s safety log for easy reference during July inspections or at the dock. By keeping signaling gear Aquí están las reglas para traducir texto: - Proporcione ÚNICAMENTE la traducción, sin explicaciones - Mantenga el tono y estilo original - Mantenga el formato y los saltos de línea y adecuadamente positioned, usted mejora reliability and ensure you can carry los dispositivos adecuados cuando te dirijas mar adentro en nature or at the marina.
Botiquín de primeros auxilios y suministros médicos: contenido, rotación y acceso
Keep a compact, reliable first aid kit aboard and implement a strict rotation schedule. Inspect stored items monthly, replace expired goods, and log changes in your checklists; youve built a safer routine for every voyage.
Contents should cover wound care, infection prevention, and basic meds, plus tools to help you respond quickly. For wound care, stock sterile gauze pads, assorted bandages, medical tape, triangular bandages, and adhesive dressings. For infection prevention, add antiseptic wipes, povidone-iodine or chlorhexidine solution, and antibiotic ointment. For medications, include analgesics suitable for your crew, oral rehydration salts, and a compact digital thermometer. For tools, include disposable nitrile gloves, a CPR barrier device, scissors, and tweezers. Include an arrestora AED if available, with current batteries and electrode pads; store in a b-11 bracket inside the kit to keep small items organized. Label the kit with acma-compliant tags or a checklist sticker so it remains traceable.
Access and placement ensure fast reach during activity. Position the kit in a weatherproof bracket mounted near the helm or main cabin entry, at hand height for rapid access. Keep the container closed and stored away from heat, solvents, and liquids that could spill nearby. Assign one person to regularly verify that the kit is intact and accessible on every trip. Keep these ones visible and within easy reach.
La gestión de la rotación y el vencimiento mantiene los artículos frescos. Establezca una verificación mensual para registrar las fechas de vencimiento y rote los artículos según el vencimiento más próximo. Mantenga un estante rotatorio o un registro digital que indique la fecha de reemplazo y el próximo reemplazo programado. Incluya artículos inflables como una férula inflable para estabilizar una extremidad cuando sea necesario; inspeccione el dispositivo e ínflelo solo durante el uso o en escenarios de entrenamiento. Para los medicamentos almacenados a bordo, reemplace los artículos que alcancen los límites de vida útil dentro de un período de 12 a 24 meses según la etiqueta, y retire cualquier artículo que muestre fugas o manipulación. Tenga en cuenta los peligros conocidos y separe los líquidos de los medicamentos en el botiquín.
Los simulacros de capacitación y acceso aseguran que todos puedan actuar. Realice simulacros breves antes de viajes largos para practicar la ubicación del kit, la recuperación de elementos y el seguimiento de acciones paso a paso para responder a incidentes comunes. Mantenga una guía práctica y breve con las listas de verificación y asegúrese de que toda la tripulación sepa dónde se encuentra el kit y cómo acceder a él en menos de 30 segundos. Revise la preparación del DEA Arrestora y verifique las comprobaciones de la batería del mismo día como parte del proceso de la etiqueta ACMA.
Líquidos y bolsillos laterales: No guarde líquidos cerca de aparatos electrónicos o medicamentos; reserve un bolsillo lateral aparte para líquidos como solución salina estéril o soluciones antisépticas para minimizar derrames. Asegúrese de que cada artículo tenga una ubicación conocida para poder recuperarlo rápidamente durante un evento inesperado. Utilice una bolsa exterior protectora para contener fugas y proteger los artículos almacenados de las salpicaduras de agua de mar.
On maintenance: Keep a sealed, stored backup kit at a second location so you can respond even if primary kit is compromised. Use the checklists to track usage, expiry, and restocking needs to avoid gaps in availability.