

 PNW Crabbing Tips – Essential Guide to Dungeness Crabs">

Secure the pot with a rugged wire rig and check lines every 15 minutes. In the Pacific Northwest, wind can push gear off target fast, so keep tension on the line and turn the pot gently toward the wind to maximize where crabs come up. This routine boosts your success and reduces the chance of lost gear.
Set up two pots on separate lines to compare pull and catch quality. Usually, larger pots hold more crabs and keep them securely inside when lifted. Place bait onto the bottom of the pot or into a bait bag filled with hamachi scraps or lobster pieces, tied firmly with strings so the scent travels through the grate and onto the surrounding water, attracting crabs from the field.
When the pots surface, keep the line taut and pulled gently so crabs stay on the line. Inspect the catch for legal keepers and separate them from released or undersized crabs. If you encounter a wild crab with damaged claws, release it carefully back into the water. A quick, careful release preserves the stock, making future trips more successful.
After the haul, rinse the crabs and keep them on ice or freeze promptly. For best flavor, process within 24 hours; if you freeze, lay them in a single layer until solid, then bag to prevent freezer burn. Whether you’re cooking by steam, boil, or sauté, control the heat: high-quality crab meat stays white and tender when not overcooked. If you crab with friends, join early and plan to share; keeping the workload evenly distributed makes the day enjoyable and ensures everyone gets a taste. When packing for the freezer, label frozen portions so you know what you have for later meals.
PNW Crabbing Tips Series
Begin every crabbing day by inspecting gear before you drop traps: check lines for wear, confirm the traps are attached, and tighten hardware so the ends stay secure; keep your kit clean and ready.
View the tide and current before you set out, then place traps where crabs are known to forage–middle-depth shelves with steady flow. This setup will give you better catching opportunities and shorter soak times.
Use a bait mix that draws Dungeness: two pieces of oily fish and a single oyster, securely attached to the bait board so the scent stays strong as the trap sinks. White fish meat helps visibility in murky water and can boost interest from crabs passing by. If the bait shifts, poke it back gently to keep it evenly distributed.
- Trapping strategy: position traps with the entrance facing the current and ensure they land tightly on the bottom to reduce escape risk.
- Handling and safety: when retrieving, keep claws away from hands; lift firmly, and watch for missing limbs or damaged parts that could allow a crab to bolt from the trap.
- Times and cadence: check during ebb tide or early morning when Dungeness are most active; shorter soak times maintain bait quality and reduce bycatch.
- Business and sustainability: keep a tight log of catch and release modestly, so the local stock remains healthy for the long run.
- Left vs right orientation: mark each trap with a left/right tag so you can rotate placement and cover more area without overlap.
PNW Crabbing Tips: Dungeness Crabs; Step 2 Caution; PNW Crabbing Tips; Crabbing 10 Trot-Lining Tips; Step 4 Areas for Crabbing; Step 7 Types of Traps and How to Use Them; Step 3 Equipment; Step 8 Cleaning the Crab; Step 5 How to Hold a Crab; Step 1 Warning; Step 6 Types of Bait; Crabbing for Beginners; Crabbing Off a Boat 4 Tips for Beginners
Inspect gear before leaving the road to the water: secure lines, check weighted pots, and attach a bright basket for storage. Keep the amount of gear tight and manageable, then test knots and buoy tags to prevent loss in saltwater. With dungeness in mind, set a clear plan and move efficiently to the first pull.
Step 2 Caution: Stay aware of currents and nearby boats. Secure yourself to rails, keep your party spaced well, and leave room for others to work. Avoid overloading traps-this and watch where you place gear to prevent snagging lines on propulsion or motors.
Step 3 Equipment: You need bottom pots or baskets, a trot-lining setup if you choose that method, a weighted line, and cotton or synthetic weight, plus sturdy strings and a bright buoy. Keep bait close at hand and attach it firmly to the hook or clip. Have a chef-ready knife and a clean bucket for later handling, plus a small knife for quick cleaning on site.
Step 4 Areas for Crabbing: Target sheltered structures like rock piles, weed beds, and eelgrass edges where crustaceans gather. Look for channels with steady current and deeper pockets where dungeness tend to hold. Check local market reports for current hot spots, then adjust based on recent catches and boat traffic in those areas.
Step 5 How to Hold a Crab: Approach from behind the crab’s carapace, grab just behind the claws, and gently tilt to free the legs from the suction. Keep the claws pinched and away from the chef’s fingers, then transfer the crab slowly into a basket or bushel for safe handling. When releasing or stacking kept crabs, place them level and evenly to avoid crushing the legs or claws.
Step 6 Types of Bait: Use fresh whitefish chunks or scraps, attached securely to the bait clip. For trot-lining, lay several baited hooks along the line, spacing them to reduce tangles. Change bait every few hours if it softens, and keep bait pieces neat to encourage consistent feeding by dungeness and other crustaceans.
Step 7 Types of Traps and How to Use Them: Two common options are square pots and trot-line setups. For pots, position on the bottom with steady weight and a clear tether to the buoy. For trot-lining, run a straight line with evenly spaced hooks; keep the line taut and moving slowly to avoid snagging. When deploying, attach a bright marker and ensure the line is secure and visible to other water users. If you run into a snag, cut losses quickly to prevent larger losses later.
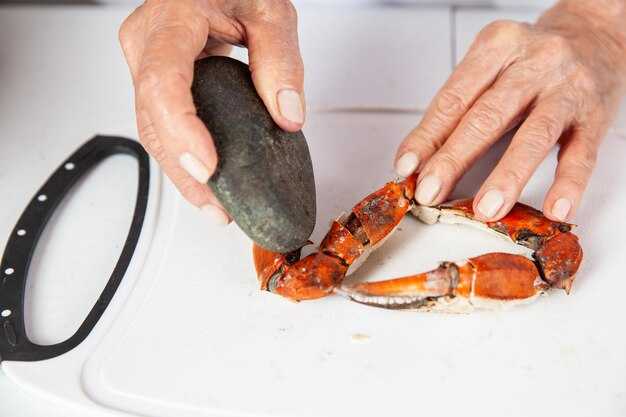
Step 8 Cleaning the Crab: Rinse the crab in saltwater, then remove the apron and gills. Separate the claws and legs, crack the shell, and extract the meat in clean, even pieces. Keep the meat on ice or in a cooler, and store in a well-ventilated space away from direct sun. For eating, extract the white meat and collagen-rich parts later, and remove any remaining grit before serving to guests.
Step 1 Warning: Always monitor weather, tides, and local regulations. Wear life jackets when crabbing off a boat or in rough water, and avoid crowded lanes. Keep kids and pets safe, and leave no trash behind on the road or boat ends. Check license rules and bag limits to prevent penalties and protect your business and the market supply.
Step 6 Types of Bait (revisited): For best results, rotate bait between whitefish and other crustacean scraps, and adapt with the season and area. Secure bait so it cannot fall off during moving tides, and avoid bait that quickly dissolves, which can cause wasted effort and reduced catches.
| Aspect | Consejo práctico | Common Mistakes |
|---|---|---|
| Gear check | Inspect traps, lines, weights, and baskets; replace worn cotton or rope | Leaving gear attached and forgetting to secure |
| Safe handling | Hold crabs by the back of the carapace; keep claws pinched | Pinching the claws or dropping the crab |
| Implementación | Mark pots with a bright buoy; place on good bottom and check often | Dropping gear in heavy current |
| Bait choice | Use whitefish chunks; attach firmly and rotate if needed | Using soft bait that falls off quickly |
| Area selection | Focus on areas with structure and current; adapt to recent catches | Crabbing in open flats with little habitat |
| Cleaning | Rinse, trim apron, remove gills; chill meat promptly | Leaving guts or grit in meat |
Step 1 Warning: Coastal hazards, weather checks, and personal safety
Take a moment to check the NOAA marine forecast and tide charts 24 hours before you go, and verify again two hours prior to departure. If gusts reach 25–30 mph or seas rise above six feet, better to postpone. Put on a Coast Guard–approved PFD, keep a whistle, and have a VHF radio within easy reach. They should agree on a buddy system and a clearly scheduled check‑in time so a missed signal doesn’t become a rescue scenario.
Weather checks are ongoing. Monitor wind direction, swell height, and current. Use a reliable app plus official bulletins. Taking a moment to confirm changes saves risk, and simply re‑check on site when you arrive. If visibility drops below two miles or fog thickens, delay departure and reassess your plan.
Coastal hazards present in types you should know: sneaker waves, rip currents, slick rock, and rockfalls. Stay off wet, algae‑covered ledges and avoid standing in line with breaking surf near jetties. Be mindful of mushroom‑shaped rocks that can redirect water flow and tether or knock gear. Keep hands on rails when near the edge and watch for sudden surges that can pull you off balance.
Dress for traction: heavy duty, slip‑resistant boots, gloves, and a life jacket. Carry a dry bag for valuables, plus a waterproof flashlight and first‑aid kit. If you’re using a trotline or other long‑line setup, maintain slack and keep the line away from your body; test tension before deploying. When handling heavy gear, treat it like a chef handles sharp tools–careful, precise, and deliberate. Before you move, check that the line is secure and that you can release quickly if a line snags. Also be ready to release the line if something goes wrong and retreat to a safe spot.
Nearby commercial activity adds risk. They may be targeting sablefish, hamachi, or mahi, so give their gear ample space and avoid crossing lines or nets. If you see wire‑mesh pots or other gear, do not pull or cut lines; signal for help and wait for a safe moment to act. If a pot is released and drifts, mark its position and recover later with a partner. Keep a clear path to your own gear to prevent entanglement and stay aware of where you are in relation to others.
Pre‑crab season safety checklist: maintain a high level of situational awareness on every outing. You want a defined route, ETA, and emergency contacts, plus a plan to abort if conditions worsen. Taking these steps reduces risk and keeps the focus on a productive crabbing session. Re‑check conditions before each set and again after reloading gear, so you’re ready to adapt instead of reacting to a sudden change.
Step 3 Equipment: Gear checklist and setup for crabbing
Utilice un montaje compacto y rápido: una nasa para cangrejos pesada con malla de 3-4 pulgadas; la boya está unida al cabo principal y un peso evita que el equipo derive debido al flotador azul. Aunque es compacto, este montaje soporta corrientes constantes y mantiene sus manos alejadas de aparejos sueltos.
Lista de equipo: nasas con revestimiento reforzado, 2-3 líneas de repuesto, un peso pesado, una cesta de pesca del tamaño de un cesto, una boya blanca y una boya azul de repuesto, un cuchillo o herramienta para pinchar el cebo y sujetadores de repuesto para asegurar los bloques de cebo. Se mantienen listos para cambios rápidos en el muelle o en el agua.
Preparación: despliegue trampas a lo largo de una línea recta o una curva suave, dejando márgenes izquierdo y derecho libres del tráfico de embarcaciones; utilice la línea principal para bajar las nasas y una línea de plomo más corta para minimizar los enganches; una vez que establezca la línea, marque una ruta fija y anote qué nasa se encuentra a la izquierda o a la derecha. Cada trampa tiene un peso y un pequeño anillo que ayuda a asegurar la línea; funcionan mejor cuando se mantienen tensas.
Cebo: Use cebos como pescado azul, cabezas o calamar troceado; se pueden usar ostras donde lo permitan las normas del mercado; coloque el cebo cerca del revestimiento para evitar la pérdida de olor.
Advertencia: verifique las regulaciones locales, evite mezclar trampas con nasas para langostas en canales estrechos; nunca deje el equipo sin vigilancia; asegure siempre las cuerdas y guárdelas en un lugar seco.
Gestión del tiempo: pruebe los tiempos de inmersión; en agua tranquila, revise después de 20 a 30 minutos; en corrientes o olas, revise cada 15 minutos; más adelante, puede ajustar según la captura y las condiciones.
Consejos de manejo y seguridad: agacharse con las piernas separadas; evitar meter las manos en la trampa; pinchar para comprobar si los cangrejos están vivos; juntarse con un compañero para levantar las nasas pesadas. Este plan de juego te mantiene eficiente y reduce la fatiga.
Transporte: utilice una cesta o un cesto para transportar los cangrejos; forre la cesta con un revestimiento blanco para reducir la fricción; coloque una tapa suelta para ventilar.
Consejos finales: mantener el equipo sujeto y etiquetado; reemplazar siempre la malla desgastada; después de cada uso, inspeccionar nudos y conexiones; consejos: configuraciones más rápidas reducen el tiempo en el agua.
Paso 5 Cómo sujetar un cangrejo: agarre seguro, posición de la mano y cómo evitar que escape
Sujeta el cangrejo por la parte posterior del caparazón, con el pulgar en un borde y los dedos abarcando el lado opuesto. Mantén el caparazón plano contra la palma de la mano y repliega las patas andadoras bajo el cuerpo para limitar el movimiento. Apunta siempre las pinzas lejos de ti y mantén el cuerpo estable al levantarlo. Lo que importa es un agarre limpio y controlado que reduzca las fugas repentinas.
Coloque la base de las últimas patas ambulantes bajo la palma de la mano para crear un soporte de cuatro puntos. Extienda los dedos para cubrir el centro del caparazón y luego deslice ligeramente el cangrejo hacia la parte posterior para que las pinzas primarias no toquen sus dedos. Si tiene una herramienta de mango largo, utilícela para mover el cangrejo sin exponer la mano. La posición de sujeción debe sentirse segura, pero no constrictiva. Para la manipulación de mariscos, este agarre mantiene los dedos seguros y facilita el movimiento del cangrejo más adelante en el proceso.
La evasión de escape proviene de un ritmo tranquilo y deliberado: si el cangrejo se retuerce, mantén la firmeza y mueve tu agarre un poco en lugar de girar la muñeca. Baja el cangrejo a un recipiente con el caparazón hacia abajo para recuperar el control, luego vuelve a agarrar y continúa. Evita movimientos rápidos y repentinos que provoquen un pellizco o una caída.
El equipo y la preparación facilitan esto: ten un pequeño kit de utensilios en casa o en tu bolsa de mercado con guantes resistentes a cortes, unas pinzas de alambre largas, un cubo resistente y una red estilo Netarts u otros accesorios. Si empezaste a pescar cangrejos en línea o en el mercado, localiza estos artículos rápidamente y mantenlos cerca para futuros usos. Un equipo de cuatro elementos acelera las transferencias durante una fiesta y alrededor de la mesa.
Una vez sujetado con seguridad, puedes pasar a la limpieza o la cocción. A continuación, encontrarás recetas e ideas para servir, y este agarre ayuda a que la mayoría de los cangrejos permanezcan controlados, lo que se traduce en traslados rápidos y mejores resultados en el plato. Como has estado practicando, te sentirás más seguro al comprar utensilios en el mercado o en línea, y podrás mantener el mismo enfoque para futuros mariscos, qué cocinar a continuación y cómo compartir consejos con tus invitados. Más adelante, este método se convertirá en tu opción preferida para cualquier manipulación de cangrejos que hayas comenzado desde que te uniste a la actividad.
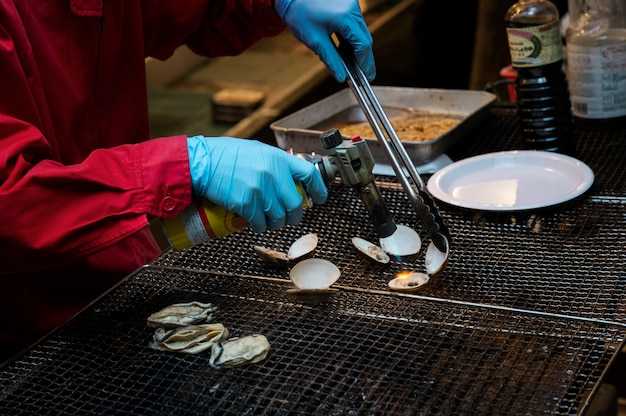
Paso 6 Tipos de cebo: Las mejores opciones por temporada y especie (consejos para la preparación del cebo)
Utilice cabezas de bacalao negro vivas como cebo principal, luego añada mariscos como ostras u ostiones de bahía como atractivo adicional. Use una línea madre para una cobertura amplia y mantenga el cebo listo en los barcos en una nevera portátil para re-cebar rápidamente.
Primavera: Mantenga a mano cabezas de bacalao negro vivas y corte cualquier pescado entero en trozos planos de diez centímetros. Combínelos con ostras frescas o netarts para estimular la mordida en aguas más frías. Sujete las piezas de forma que queden planas en el soporte del cebo; esto facilita su manipulación y reduce los enganches cuando corre la línea. Trabaje la marea reposicionando las anclas y el cebo a lo largo de la línea para una exposición uniforme y nivelada.
Verano: Cambie a cabezas o restos de pescado de buena calidad, cortados en porciones más cortas de 3 a 4 pulgadas. Mantenga el cebo en una nevera portátil a la sombra a bordo de las embarcaciones y refrésquelo cada pocas horas si está pescando cangrejos activamente. El olor viaja bien con la corriente y un suministro constante le ayuda a mantener el cebo tanto para cangrejos machos como hembras en la línea.
Otoño: Los mariscos brillan, especialmente las ostras y las netarts. Use conchas enteras o carne descascarada; retire cualquier arena y enjuague antes de colocarlas en los anzuelos. Mantenga los trozos alrededor de cuatro pulgadas de largo para que permanezcan en la línea, y átelos de forma segura para que no se deslicen mientras pesca con trampas o una troza. Este enfoque parece atraer una gran tasa de picadas cuando el agua verde corre hacia la costa.
Invierno: Los restos de pescado congelado o preservado funcionan bien cuando los viajes son cortos y los días son lentos. Utilice trozos de diez centímetros de pescado limpio para rellenar los huecos en las bolsas de cebo, y cambie a estaciones de cebo sólido para mantener un fuerte olor. Guarde el cebo en una nevera cerrada y rote los materiales para mantener la frescura; esto permite que los barcos sigan pescando a pesar de los frentes fríos y los mares agitados.
Paso 7: Tipos de trampas y cómo usarlas: Nasas, palangres y sedales de mano; conceptos básicos de colocación
Empiece con nasas para obtener rendimientos fiables; coloque de 2 a 4 nasas por sitio con líneas de descenso lastradas y flotadores azules, luego agregue palangres o sedales según sea necesario en función del acceso al agua y el clima. Si desea un comienzo sencillo, las nasas son lo más fácil de manejar.
Estas cosas trabajan en conjunto para aumentar la fiabilidad y mantener el equipo organizado.
- Preparación y ubicación de la maceta
- Elija nasas de fondo plano de 20 a 30 cm de ancho; asegúrese de que tengan un revestimiento duradero; asegúrese de que la nasa esté sujeta a la línea lastrada para que se asiente en el fondo; selle la tapa después de colocar el cebo para mantener el olor dentro y evitar que entren los mariscos más pequeños.
- Bases para la colocación: colocar sobre fondos arenosos o de grava a una profundidad de 2–5 m, con las entradas orientadas aguas arriba; dejar 4–6 m entre las nasas; dejar espacio para la recuperación; marcar cada aparejo con flotadores azules para poder localizarlos fácilmente al regresar del mercado o muelle; evitar zonas con mucho tráfico de embarcaciones o algas que puedan enganchar las líneas.
- Cebos y recetas: prepara el cebo en la cocina de tu casa; mantén las recetas sencillas; utiliza subproductos de mariscos y restos de pescado con un olor fuerte y colágeno para ayudar a que el olor se adhiera; sujeta el cebo de forma segura para que no se caiga; comprueba hasta que encuentres cangrejos en cada revisión; retira la captura rápidamente y vuelve a colocar la nasa en su sitio.
- Cadenas de pesca
- Estructura: tender una línea principal larga con bajantes espaciados uniformemente; sujetar líderes de 15–30 cm con pesos para mantener cada bajante cerca del fondo; un revestimiento resistente en la línea principal la protege y ayuda a reducir los enredos; asegurarse de que la línea esté sujeta a flotadores para marcar los extremos; en una instalación comercial, inspeccionar la línea diariamente.
- Colocación: anclar cerca de elementos estructurales como pilotes, escombros de roca o lechos de zostera donde se encuentran mariscos; mantener la tensión de la línea para evitar enganches; usar flotadores para marcar los extremos; no sobresalir de amarres o boyas; revisar y restablecer después de las tormentas.
- Sedales de mano
- Equipo: sedal de mano con cebo en un sedal pequeño con cebo o señuelo; añada un peso; puede tirar del cangrejo con la mano desde una zona tranquila; mantenga el sedal bajo para evitar los vientos de la superficie.
- Colocación: bahías y líneas de vegetación, cerca de muelles o bordes de estructuras; muévase a lugares nuevos después de varias comprobaciones; use una pala para quitar el cangrejo; evite dejar líneas atadas cuando no estén en uso durante largos períodos.