

 Choosing the Best Beginner Sailboat – A Practical Guide for New Sailors">

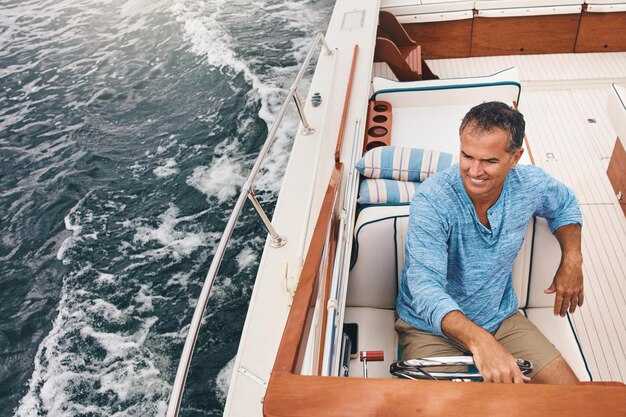
Start with sailboats in the 16–22 ft range that have a retractable centerboard. This size balances stability, ease of handling, and affordable maintenance. For a new mind on the water, this option keeps helm effort reasonable and reduces fatigue after a day on the waters. For learning, these sailboats offer a forgiving ride. What you need is a hull that resists tipping, simple controls, and a cockpit space that fits you and a partner.
Choose brands with broad support, such as Catalina, Capri, or Hobie. The crafts of beginner sailing improve quickly with such hulls. A typical 16–22 ft model from these makers often uses a centerboard or daggerboard and carries around 150–200 sq ft of sail. Displacement sits in the low thousands of pounds once gear is added, yet the balance remains approachable for beginners. These boats, por lo tanto, offer ready-to-sail performance and a cabin small enough for overnight stays if the winds stay gentle. Note the wight of the keel and how it affects stability.
What to inspect when evaluating used boats: hull integrity, rigging wear, sail condition, and the centerboard mechanism. Look for core moisture in the deck, check the mast step, and test the rudders. Under sail, verify that the lines move freely and that winches turn smoothly. Develop a budget for upgrades you can work on with time, such as new lines, a depth finder, or a simple anchor kit.
Build your skills with short practice sessions in calm waters, using your legs and a balanced stance to stay upright as you tack and gybe. Learn to reef, manage wind shifts, and keep the boat balanced with smooth sail trim. Use a local club or sailing school to compare rigs and options, and pick the option that fits your view of sailing and your wallet. Assemble a basic safety kit: life jacket, throw line, whistle, and a waterproof pouch with a phone.
Therefore, prioritize a brand with parts availability and a clear path for upgrades. If you aim for overnight trips, verify the cabin size, headroom, and the stability of the lifting keel. For a first-season use, limit sailing to sheltered waters and build confidence before venturing farther.
Match boat size to your weight and planned crew
Go with a 16–18 ft sloop-rigged daysailer for solo or two people; target a displacement of roughly 1,000–1,500 lb (450–680 kg). This keeps weight on deck manageable and gives predictable balance in a coastal setting. The keel or centerboard should add ballast around 200–400 lb, which supports upwind performance and helps it suits light and modest crews. If you’re keeping costs reasonable, look for a used model with a modest sail area (120–180 sq ft) rather than a large, expensive rig. Only choose a setup you can manage with your weight and planned crew. There, most common setups balance ease of handling with safety, and this size means you can learn quickly while staying within time and budget. To start your learning, take a calm day on the water and practice trim with a light crew. This choice will also help you improve quickly.
If your planned crew grows to 3–4, move up to a 20–24 ft boat with displacement around 1,800–3,000 lb (820–1,360 kg). A moderate ballast keel between 600–1,100 lb provides early stability and keeps the craft predictable as wind shifts across coastal waters. A rudder that’s proportionate to the keel helps maintain control, especially when the crew is aboard. A solid sailing plan with a sloop-rigged layout remains simple to trim, and most rigs can be reefed to reduce sail area in gusty seas; this means safer handling for a mixed crew. Consider a hull with a practical cockpit layout so you can keep the weight low and gear accessible for a scuba outing after a day on the water. This setup also helps you improve quickly as you gain confidence.
Apply these principles on the water: choose a size that matches your weight and planned crew, then run practical checks on a calm day. There, you’ll learn how ballast, hull form, and rig balance influence speed and turning. Test across a range of loads–solo, with one partner, and with two passengers–to see how the helm and rudder respond. Avoid sudden load shifts that push the boat down; instead, distribute weight smoothly. Gather feedback from your community; their experiences in similar coastal settings help highlight what to expect. Keep spare marlow lines, a small toolkit, and a backup rudder pin to handle minor repairs quickly. This habit gobeyond the basics as you advance your skills over time, and set you up for safer, more confident sailing. This approach also helps you keep the crew balanced across varying conditions.
Stability and beam: selecting a forgiving hull for beginners
Start by choosing a trailerable hull with a larger beam for forgiving stability; in the market you’ll see many models, and mike, a local instructor, notes that rounded hulls are the easiest for beginners. That setting delivers form stability, which means less tendency to heel and easier steering at light loads. These hulls also handle choppy water better, allowing you to practice tacks and gybes without overcorrecting.
To compare options, look at beam-to-length ratio and displacement. For typical 12–16 ft trailerables, aim for a beam around 0.40–0.50 of the length and a light dry displacement in the 150–350 kg range. Sail area in the 6–12 m2 range keeps speed modest while still delivering responsiveness. A soft bilge and rounded hull bodies increase ease of righting; beware hulls with sharp chines that bite into chop and feel wrong in rough water. Also check that the boat can be stored and launched easily, since trailerability allows you to start and practice more often, then you’ll see progress and it literally makes the learning process faster.
Key hull shapes and why they work for beginners
Rounded hulls and soft chines provide better initial stability and a forgiving feel when moving from standstill to sailing. This gives you the right handling as wind shifts. A beamy underbody helps you stay upright as wind picks up, which yields righting moments with less speed loss than a narrow racer. For learning, a full keel or shoal keel stabilizes the boat in light chop and reduces sudden steering corrections; although deeper keels improve performance, they add cost, weight, and launching complexity–factors that slow progress for new sailors. In practice, the market has many beamy, trailerable hulls that suit beginners’ needs, making it easier to find a balance between ease and performance.
Practical checks before purchase
When you demo a model, test steering response at light and moderate angles and observe how the boat handles into gusts. Check the sail handling for single-handed operation; sails that reef easily and a jib that supports simple tacking help your learning curve. Verify the trailer setup and weight distribution so that launching and retrieval are straightforward. Look for a light, well-kept hull and well-fitted hardware; not only looks, but performance and durability matter. If possible, talk to current owners to compare what works in the market and with real sailors–finding a forgiving hull that literally makes the learning process smoother pays off across weather, trips, and all season. The process takes time, but not only does it suit your need, it also broadens the market options you can consider.
Keel and draft options: fixed keel vs centerboard for new sailors
Choose fixed keel for most new sailors; its stability and predictable handling takes the guesswork out of early sailing, easing skill development. This simplicity lets you focus on trim, steering, and basic knots. It will work well for a crew that includes beginners, and offers something you can rely on as you begin boating. For those just starting, fixed keel boats provide a reliable platform to build confidence while you practice turns, tacks, and basic reefing. This intro comparison helps set the baseline for what to expect with centerboard later. It also feels simpler to learn on, which is why it takes many new sailors just into a comfortable rhythm, especially when your legs stay planted and your weight stays centered.
Centerboard boats shine when you sail in shallow waters, near beaches, or on inland lakes. You’ll spend less time worrying about depth and you’ll find it easier to beach and slip into slips along the west coast or in international harbors. The retractable board adds flexibility for different habitats, but it also means more moving parts and slightly more maintenance. You need to inspect the trunk, pivot, and lines regularly to prevent snagging and to keep the board responsive in choppy conditions. This offering of flexibility helps those who want to test sailing into shallows while balancing safety and performance. And if you share waters with scuba divers or swimmers, centerboard boats reduce the risk of hitting a heavy keel unexpectedly.
Draft figures help compare real-world options: fixed keel boats commonly show a draft of about 0.9–1.3 m (3–4.5 ft); centerboard boats offer roughly 0.2–0.8 m (0.7–2.6 ft) with the board up and about 1.5–2.2 m (5–7.5 ft) with the board down, depending on hull design. If your legs and balance are still developing, the simplicity of the fixed keel often makes it the safer first choice. For beginners who want to explore shallower lagoons or beaches, centerboard offers the major advantage of shallower access. For intro practice, a single-sail rig on a small dinghy can feel more responsive–just keep your weight low and your sail trim consistent. When you compare with a dory or a catamaran, the fixed-keel option often makes handling easier for those learning basic sailing skills, and catamarans can offer a very stable platform for sailors who want to build confidence quickly.
What should you pick? If your sailing will stay on larger inland lakes or shores with moderate depth, go fixed keel. It’s more forgiving when gusts hit and when you’re learning to trim the sails; this makes for a smoother early experience. Those new to sailing who want to crew with a friend or family will benefit from the stable, predictable ride of a fixed keel. If you expect to navigate very shallow lagoons or to stage a beach launch, take the centerboard path, knowing you’ll spend more time learning to manage the board under sail and during reefing. For intro practice, a simple single-sail rig on a smaller boat can feel more responsive and reassuring, helping you stay balanced with your legs planted and your weight centered. Some sailors opt for a catamaran or a dory style with fixed ballast for steady performance, while others prefer the portability and lower draft of centerboard dinghies. The choice is a personal one, but the core goal remains the same: keep sailing simple and steadily build confidence, and remember that you’re choosing something that will make your boating experience more approachable, not just faster.
| Aspect | Fixed keel | Centerboard |
|---|---|---|
| Draft (in water) | 0.9–1.3 m (3–4.5 ft) | Board up: 0.2–0.8 m (0.7–2.6 ft); Board down: 1.5–2.2 m (5–7.5 ft) |
| Stability | High ballast, strong tracking | Lower righting moment; gains when board is down |
| Handling | Progreso predecible y sencillo contra el viento | Más maniobrable en espacios reducidos; la gestión del tablero añade matices |
| Mantenimiento/piezas | Mínimas piezas móviles | Orza, eje, cabos; más revisiones |
| Cost | Típicamente mayor inversión inicial (cascos más pesados) | Menor ángulo de desmoldeo pero mayor complejidad y coste de las piezas |
| Best use case | Aguas abiertas, lagos interiores con profundidad moderada | Bahías muy |
En resumen: para la mayoría de los principiantes, la quilla fija ofrece el camino más sencillo para aprender a navegar con confianza. Si sus aguas son constantemente poco profundas o desea explorar lugares cercanos a la costa donde varar es importante, la orza abatible añade versatilidad; solo prepárese para invertir un poco más de tiempo en el mantenimiento y para manejar la orza durante las maniobras. La elección correcta dependerá de la profundidad del agua local, el viento típico y el tipo de tripulación con la que espera navegar, ya sea en el oeste o en una travesía internacional, y ya sea que prefiera un dory, un bote de vela simple o un catamarán. El objetivo está claro: mantenga la navegación simple, gane confianza y elija la opción que mejor se adapte a su situación, no solo la velocidad.
Lista de verificación para la evaluación de un barco usado: qué inspeccionar antes de comprar
Comience con una inspección del casco y la cubierta, porque los daños ocultos se encarecen más adelante. Busque puntos blandos, grietas, problemas con la capa de gel y humedad debajo del piso. Revise las empuñaduras a lo largo de la borda y los rieles; asegúrese de que permanezcan firmes bajo carga. Inspeccione debajo del piso de la cabina en busca de humedad y busque huecos entre las uniones del casco y la cubierta. Observe en las esquinas estrechas y los compartimentos de almacenamiento en busca de signos de fugas. Examine el poste del timón y los soportes para ver si tienen juego, y verifique que el timón se mueva suavemente en su dirección. Para los barcos de quilla, inspeccione los pernos de la quilla, el conducto y los accesorios en busca de corrosión o movimiento. Los signos de entrada de agua alrededor de las escotillas o rejillas de ventilación indican daños en el núcleo. Un casco duradero y los herrajes bien sujetos se traducen en un manejo más seguro en las olas y hacen que la evaluación general sea menos desalentadora. Observe cualquier indicio de desgaste en el aparejo o los accesorios de la cubierta. Si puede, coordine una revisión rápida en West Marlow con un tasador marino local para validar los hallazgos y tomar la decisión correcta sobre el precio. Si le encantó cómo se comportó un modelo en las lecciones, este enfoque lo mantiene avanzando para mejorar su conocimiento sin exceder el presupuesto, y lo ayuda a realizar la compra correcta con confianza.
Cascos, cubierta y accesorios de la quilla
Perfeccione la inspección del casco: busque grietas, ampollas en el gelcoat o signos de reparaciones anteriores. Las pruebas de golpeo ayudan a identificar áreas huecas que indican daños en el núcleo. Revise la cubierta en busca de deslaminación alrededor de escotillas, respiraderos y la base del mástil. Inspeccione las placas de cadena y el apoyo del mástil para detectar corrosión o movimiento. Evalúe la unión casco-cubierta para determinar su rigidez; busque flexión al presionar la brazola. Para los barcos de quilla, verifique que los pernos de la quilla estén apretados, que el túnel esté sólido y que no haya movimiento significativo. Inspeccione el timón y el varillaje de la dirección para asegurar un funcionamiento suave; asegúrese de que la pala esté bien asentada y no se atasque. Observe las áreas de la sentina en busca de humedad, manchas o un olor a humedad que indique fugas. Los herrajes duraderos (cletas, cabrestantes y rieles) no deben mostrar un desgaste excesivo. Un casco y una cubierta limpios y sólidos reducen los problemas de apalancamiento cuando las olas golpean la proa.
Aparejo, gobierno y sistemas
Inspeccione el aparejo: drizas, escotas, estayes y tensores; compruebe si hay corrosión, deshilachados y rigidez. Mueva los cabos de control a través de los mordedores para comprobar la fricción; asegúrese de que los winches giren suavemente y vuelvan a mantener la tensión. Compruebe la capacidad de respuesta del mecanismo del timón y del sistema de dirección; gire la caña a babor y estribor y asegúrese de que se centre limpiamente. Pruebe el motor: que arranque de forma fiable, el estado de carga de la batería y la carga. Inspeccione el sistema eléctrico para detectar corrosión alrededor de los terminales; las bombas de achique y las alarmas deben funcionar. Confirme que los pasacascos y las válvulas de fondo son sólidos y no tienen fugas; asegúrese de que las mangueras estén bien sujetas y no rocen. Para los barcos de quilla, verifique que el mecanismo de la quilla funciona sin problemas y que los cilindros hidráulicos o los engranajes no muestran fugas. Revise el inventario de velas: estado, desgaste por rayos UV, costuras y antigüedad; incluso las velas más antiguas pueden ser útiles si se cuidan adecuadamente. Si le encantó el modelo en las clases, debería tener una idea del equilibrio adecuado entre precio y estado y estar preparado para marcharse si aparecen señales de alarma.
Equipo y entrenamiento básico: artículos imprescindibles y recursos de aprendizaje
He aquí una recomendación: crea un paquete de equipo básico, compacto y manejable que cubra la seguridad, la señalización y el manejo básico de las velas; esto te mantendrá concentrado y listo para aprender técnicas en sesiones reales, ya que puedes añadir equipo gradualmente, y ese enfoque resistió el uso regular en salidas en veleros de día y barcos de quilla a medida que empiezas, con una configuración que funciona para barcos de quilla, veleros de día y tipos de botes. Esa simplicidad también te permitirá empezar a encontrar el camino que se ajuste a tu horario y a tu tripulación, mientras que el equipo en sí sigue siendo estándar y fácil de mantener.
Equipo inicial
- Chalecos salvavidas para cada miembro de la tripulación: USCG Tipo III o equivalente, del tamaño adecuado, con correas ajustables y un silbato adjunto.
- Señalización y visibilidad: linterna impermeable, espejo de señales y una radio VHF portátil compacta o una funda impermeable para teléfono en la cubierta.
- Cabos, defensas y kit de atraque: 6–8 cabos de amarre, 2–4 defensas, un cabo de lanzamiento corto y una pequeña bolsa con cornamusas de repuesto y kits de enganche.
- Elementos básicos de seguridad y reparación: un botiquín de primeros auxilios bien surtido, una cuerda de repuesto, un juego de herramientas sencillo (multiherramienta, destornillador, alicates), cinta americana y un pequeño kit de reparación de velas; tenga una caña de timón o una extensión de rueda de repuesto si es necesario.
- Navegación y clima: una carta náutica o aplicación a prueba de agua, una bolsa estanca para mapas y dispositivos electrónicos, y un anemómetro compacto o una aplicación meteorológica confiable.
- Extras específicos para embarcaciones: si estás listo para veleros de día o quilla, lleva una extensión de timón si es necesario, drizas y garruchos de vela de repuesto, un kit básico de reparación de velas, una bomba pequeña y un achicador compacto.
- Kit específico para botes auxiliares para práctica: bomba, kit de parches, remos (cuando corresponda) y una cuerda de remolque para seguridad cuando se mueva a puertos cercanos.
- Comodidad y almacenamiento: agua, refrigerios, protector solar, sombrero, una capa ligera para la lluvia y una bolsa seca para mantener los objetos de valor seguros en la cubierta.
No te saltes las comprobaciones de seguridad ni los simulacros; una breve rutina previa a la navegación te ayuda a mantener la coherencia, especialmente cuando estás lidiando con equipos y tripulación. Duerme bien antes de los días de entrenamiento para mantener la concentración y la energía altas. Un almacenamiento adecuado tiende a prolongar la vida útil del equipo.
Recursos de capacitación
- Curso para principiantes en un club de vela local o programa comunitario: espere dos o tres días en el agua con un instructor, cubriendo aparejo, manejo básico de velas, nudos, seguridad y fundamentos de marinería; la opción de velero de día goza de popularidad entre los principiantes debido a su estabilidad y manejo indulgente.
- Práctica en el agua con un mentor o instructor: planificar 6–8 sesiones centradas en virar por avante, trasluchar, gobernar (con rueda o con caña) y la comunicación de la tripulación; avanzar desde la navegación en solitario hasta la navegación con tripulación ligera.
- Lecturas y videos: Annapolis Book of Seamanship, Sailing for Dummies y las guías de US Sailing Getting Started; complementar con los tutoriales proporcionados por el club que cubren los conceptos básicos del aparejo y la interpretación del clima.
- Licencias y certificados: en algunas regiones se pueden requerir licencias o certificados para manejar ciertas embarcaciones; su club puede orientarlo, y muchos programas emiten un certificado que cuenta como prueba de competencia.
- Plan de progresión: hay opciones disponibles para cada horario; si no está seguro, comience con un bote pequeño para aprender equilibrio y control, luego pase a los barcos de quilla a medida que gane confianza.
Tienes un camino claro: pregunta a los clubes cercanos sobre programas para principiantes, horarios y el equipo que recomiendan. Mantén al equipo involucrado con ejercicios cortos y prácticos, y rutinas repetibles, y construirás competencia manteniendo la seguridad como constante. Si has empezado hace poco, este plan te ayudará a mantenerte enfocado y a mejorar constantemente.