

 Πώς να Βάψετε την Εξωλέμβια Μηχανή σας – Ένας Οδηγός Βήμα προς Βήμα">

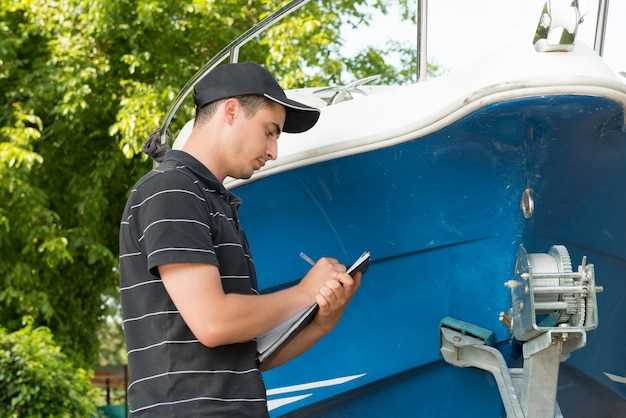
Begin with removing the cowling and cleaning the unit. I recommend beginning with this action as the foundation: remove the lower cover from the outboard motor, rinse with a bucket of warm water and mild detergent, then wipe dry. That first action reveals any corrosion or peeling paint and gives a clean canvas to work from. If you sail a dinghy or similar craft, this prep helps prevent grit from getting trapped in later coats.
Rough up the surface with sanding to create a key for primers. Use 180–220 grit to abrade the old painted layer until the surface feels matte. A scraper helps lift flaking spots, then switch to a finer grit to smooth feather edges. Wipe away dust with a damp cloth, and let it dry completely before proceeding.
Follow with primers and a gloss topcoat Apply marine primers to seal bare metal or fiberglass, then lay down the top layer in thin, even coats until the color blends. For best results, aim for a smooth gloss; gloss levels become clear after a light sand with 320 grit between coats. Painted surfaces usually benefit from a light tack cloth between steps, and a final coat is usually shinier than the first. Whether the air is humid or dry, follow the label’s guidance for drying times.
Let the finish cure and check the ending appearance Allow the final coat to cure in a shaded shop area for days until it reaches full hardness. Check for drips, uneven coverage, or thin spots; touch up carefully and re-coat if needed. Follow the product label and weather conditions to avoid peeling later.
Tools, timing, and shop setup Gather a bucket, sanding block, a scraper, a small brush, and respirator. This process requires proper ventilation and good lighting; plan a workflow you can follow, making the job smoother on a dinghy or other small craft. If you’re unsure, consult a local shop for primers and compatible gloss; this saves days and reduces rework.
Step 5 Mask Off Areas You Don’t Want to Paint
Mask off zones that should not receive paint using blue painter’s tape and masking paper. Start at seam edges around fasteners and along the throttle housing; press tape firmly to create a clear line and prevent bleed between coats. theres a simple margin to follow: set tape about 1/4 inch from the edge and maintain a consistent gap along the entire length, making crisp lines easier to achieve.
Areas to shield include cooling passages, water intake openings, thermostat housing, electrical connectors, sensor ports, wiring harnesses, fuel fittings, and gauge openings. Mask large curved surfaces with masking paper; tape edges to lock them in place for a final, crisp edge. Available options for coverage include pre-cut curves and flexible masking tapes designed for irregular shapes.
When a propeller shaft or gearcase is exposed, masking the surrounding surfaces is essential; if removal is possible, mask those parts separately and cover with paper and tape. If removal is not possible, lay tape along the boundary and apply masking film to keep coats confined to intended zones. Before applying any coats, verify that masking is secure to prevent stray paint.
Margin guidelines: aim for a 1/4 inch gap between masked edge and painted surface; for rounded areas, use pre-cut curves or fold the tape to follow contour; check edges with a straight edge to ensure level lines and a clean final result. Follow this approach along the entire project for consistency.
Winter considerations: keep surfaces dry and within normal coating temperatures; ideal range is 60-75F (15-24C). If a heated workspace is available, use it and run a small fan after masking to promote air movement; later coats require extra time to cure, which will likely extend the overall schedule. This ensures clear adhesion and reduces the risk of peel later.
Tips and servicing notes: after masking, inspect for gaps or lifting edges; if any bleed appears, pause and adjust before applying next coat, which helps avoid frustrating issues later. Following these steps preserves a smooth finish and a reliable gauge of alignment, helping the final look stay clean and consistent along every seam.
Choose marine-grade painter’s tape and protective film
Use marine-grade painter’s tape with a light, low-tack adhesive and a film backing to protect bare surfaces while you mask edges. For a dinghy or small craft, select 2-inch tape for broad panels and 1-inch tape for tight curves behind fittings and around the thrust area. Choose film that stays clear under UV and chemical exposure so coverage remains sharp and the final line stays crisp. This approach costs less than a full paint job, and tapes last longer than cheap options; they resist lift and keep lines clean, making the finished result easier to achieve during servicing between sessions.
Prep surfaces first: clean with mild soap and water, rinse, and dry completely; if wax or residue remains, wipe with isopropyl alcohol and ensure dryness. Use a plastic scraper to remove old grime from bare surfaces before masking. Apply the tape evenly along the edge; press edges firmly with a card to seal and prevent air pockets. Place film behind major areas such as the gearbox and the lower unit to ensure final coverage, tucking film behind seals to avoid seepage. Work in a warm workshop (65-75°F) and adopt non-slip footing to avoid slips that could move tape. If the engine is Mercury-powered, keep tape away from the powerhead to prevent heat or adhesive transfer. After finishing, remove masking at a shallow angle while the finish is still tacky to maintain a crisp line; this helps the finished look and reduces adhesive pull. Then reassemble components and perform a light servicing check to confirm masking did not trap solvents or moisture.
Mask around the cowling seam, mounting hardware, and trim
Mask around the cowling seam, mounting hardware, and trim with two layers of low-tack painter’s tape along the seam, then apply a third strip inward to guard the painted edge. For long runs, smooth the tape with a plastic card to prevent air bubbles and keep the internal surfaces protected. These practical steps are kept simple and will yield a gloss that stands up to salt, heat, and sun. Check online for material recommendations; if in doubt, consult manufacturers’ guidance to tailor the masking for this model. Though rare, if a mercury component sits near the seam, avoid masking over it and shield with foil-backed tape to prevent chemical contact. Use a pair of gloves to prevent skin oils from affecting the finish, and maintain pride in the finish, looking the same on both sides. If any edge lifts, you could press it back with a clean card. Doing this for yourself ensures a professional result. Then inspect the masking: look for leaves or creases, ensure last edges align, and address any gaps before applying paint or sealant. About edge transitions, ensure masking lines stay straight.
| Masking tape (2 in, low-tack) | Seals seam and protects painted surface | Apply along seam; press edges with a card; avoid over-stretching |
| Masking film or lightweight paper | Covers mounting hardware and trim | Secure with tape; avoid folds that expose edges |
| Foil-backed tape or shield | Extra protection near sensors or complex hardware | Place around any mercury components if present |
| Nitrile gloves | Minimize skin oils | Keep a pair handy during masking and removal |
Protect decals, logos, and serial numbers with precise masking
Mask decals with precision by laying thin painter’s tape along the outer edges of each element. Press the tape firmly to the surface–topsides, deck, and transom–and trim with a sharp hobby knife to create a clean edge. If any edge lifts, re-press and re-trim before applying primer or paint. This offers protection for decals, logos, and serial numbers while the surrounding area is prepped in general terms.
specifically placing masking to follow the curve of logos and numbers; the pieces should look evenly placed along the contour, and the edge follows the curve smoothly. For complex shapes, cut narrow strips that bend to follow the line and use multiple segments that follow the curve. For more options, masking film or reusable stencil sheets offer additional protection without edge bleed. This protects them during antifouling or general topsides paint on the hull, and keeps the side and deck surfaces clean as seen when looking at the finished line.
During prep, remove nearby screws if possible or mask around them to avoid seepage under edges. If hardware cannot be removed, place a second mask at the screw line and seal with a thin overlap. Where decals sit δια των αρθρώσεων–πλευρά προς κατάστρωμα ή έγκαυμα προς τα πλαϊνά–η απόκρυψη ακολουθεί την καμπύλη για τη διατήρηση των αιχμηρών γραμμών και την αποτροπή της εισροής χρώματος στα γράμματα ή τους αριθμούς. Η τοποθέτηση αυτή μειώνει τα λάθη και βοηθά στη διατήρηση της ακεραιότητας των γραφικών.
Ασύμμετρες άκρες can fail during sanding; check every corner and press down to prevent lifting. Masking is driven by hull geometry, not random placement; use low-tack tape on delicate edges to maintain a clean boundary while looking for thin lines in logos. This plan helps keep them intact during the process and ensures the masking remains in place until the final coats, especially on a dinghy or smaller craft during long sessions on the dock. To avoid overspray on nearby hardware or screws, extend the mask slightly beyond the decal boundary.
Μετά την μάσκαρισμα, αφαιρέστε τη μάσκα με μία κίνηση μόλις το βερνίκι στεγνώσει, για να αποφύγετε το σχίσιμο των άκρων των αυτοκόλλητων. Εάν εμφανιστεί οποιαδήποτε διαρροή, ξαναμάσκαρε και ξαναβελόνησε· κάνοντας αυτό χωρίς πόνο επιδιόρθωση και σφράγιση των κενών πριν συνεχίσεις με το επόμενο τμήμα της γάστρας. Δώσε προσοχή στις βίδες και τα καλύμματά τους, διασφαλίζοντας ότι δεν παραμένει κανένα υπόλειμμα που θα μπορούσε να φανεί στις πλευρές ή την πρύμνη.
Οι διαδικτυακές οδηγίες συχνά στερούνται συγκεκριμένων βημάτων· αυτή η προσέγγιση επιφέρει σταθερά αποτελέσματα στην προστασία των αυτοκόλλητων κατά τη βαφή. Δεν υπάρχει μαντεψιά σε αυτό το σχέδιο, και υπάρχει σαφής καθοδήγηση για την απόκρυψη της πλευράς, της καταστρώματος, της πρύμνης και των πλαϊνών επιφανειών, με την απόκρυψη να ακολουθεί ομοιόμορφα την καμπύλη του σκάφους. Κατά την αφαίρεση των μασκών, επιθεωρήστε τις άκρες και κάντε μια τελική ελαφριά διέλευση για να εξασφαλίσετε την μακροπρόθεσμη προστασία των αυτοκόλλητων, των λογοτύπων και των σειριακών αριθμών και ότι παραμένουν ευανάγνωστα καθ' όλη τη διάρκεια της ζωής του σκάφους.
Καλύψτε καμπύλες επιφάνειες και δυσπρόσιτα σημεία.
Καλύψτε τις καμπύλες επιφάνειες με εύκαμπτη ταινία μάσκας και χρησιμοποιήστε μικρά κομμάτια για να ακολουθήσετε την καμπύλη της πλευράς της λέμβου και τις ακτίνες του καπό. Τοποθετήστε τις άκρες σφιχτά κατά μήκος κάθε καμπύλης και πιέστε με μια πλαστική κάρτα για να σφραγίσετε χωρίς να σηκώσετε. Μην τεντώσετε μια μόνο λωρίδα σε σφιχτές στροφές· επικαλύψτε αρκετές μικρές ενότητες έτσι ώστε η ταινία να ακολουθεί την καμπύλη. Η υγρασία μπορεί να σηκώσει τις άκρες, οπότε εργαστείτε σε ξηρό μέρος· πιθανότατα θα χρειαστείτε δύο έως τρεις στρώσεις στις καμπύλες περιοχές για να επιτύχετε πλήρη κάλυψη. Εφαρμόστε δύο ή περισσότερες στρώσεις σε λεπτές στρώσεις, κάτι που κάνει την κάλυψη ευκολότερη στις καμπύλες επιφάνειες.
Ετοιμάστε καθαρισμό και προστασία των ακμών: ακετόνη για τυχαρή κόλλα και ένα μπολ με νερό για γρήγορα σκουπίσματα. Κρατήστε την ακετόνη μακριά από τις στεγανοποιήσεις και τα εσωτερικά περάσματα. Έλαφριο λίπανση στις άκρες της ταινίας βοηθά στην απομάκρυνση αργότερα, ειδικά γύρω από σύνθετες καμπύλες. Αφαιρέστε την ταινία μόνο αφού η επίστρωση φτάσει στο κατάλληλο επίπεδο συγκόλλησης· αν τραβήξετε πολύ νωρίς, κινδυνεύετε να τραβήξετε την στρώση και να δημιουργήσετε ανύψωση των ακμών.
Κάλυμμα γύρω από τα εσωτερικά μέρη: καλύψτε τις οπές που οδηγούν στο εσωτερικό κιβώτιο ταχυτήτων και το περίβλημα της τουρμπίνας· σφραγίστε τις εισόδους νερού και τις διόδους για να αποτρέψετε την είσοδο χρώματος. Χρησιμοποιήστε λεπτά κομμάτια για να αποφύγετε κενά μεταξύ των μερών· τοποθετήστε ταινία πάνω από το επίπεδο της βαμμένης επιφάνειας για να διατηρήσετε μια καθαρή άκρη. Μετά από ημέρες στεγνώματος, επιθεωρήστε τις καμπύλες άκρες τους για ρωγμές ή διαρροή· αν χρειάζεται, τρίψτε ελαφρά για να αναμίξετε τις μεταβάσεις πριν εφαρμόσετε την επόμενη στρώση.
Απομάκρυνση, τελικοί έλεγχοι και συντήρηση: αφαιρέστε απαλά τη μάσκα με μια ομαλή κίνηση? εάν παραμείνει κόλλα, σκουπίστε με ακετόνη και ξεπλύνετε με ένα μπολ καθαρό νερό. Ελέγξτε την άκρη πάνω από το επίπεδο της επιφάνειας αφού στεγνώσει η επίστρωση? κρατήστε τα εξαρτήματα στεγνά και αποθηκεύστε σωστά τα προϊόντα μάσκας για την επόμενη χρήση. Βεβαιωθείτε πάντα ότι αφαιρείτε τη μάσκα πριν από οποιαδήποτε μακροχρόνια έκθεση στη θερμότητα για να αποφύγετε την παραμόρφωση ή την στρέβλωση στην επίστρωση.
Καλύψτε τα στόμια εξαερισμού, τις οπές ψύξης, τις εξόδους εξάτμισης και τις εισόδους νερού
Καλύψτε και σφραγίστε τους αεραγωγούς, τις οπές ψύξης, τις εξόδους εξαερίωσης και τις εισαγωγές νερού πριν από το γυάλισμα για να διασφαλίσετε την προστασία της βάρκας και των θαλάσσιων επιφανειών. Χρησιμοποιήστε χαρτοταινία, ταινία μάσκαρης και, όπου απαιτείται, ένα ασφαλιστικό υλικό δύο συστατικών κατάλληλο για θαλάσσιες συνθήκες για να δημιουργήσετε ένα στιβαρό φράγμα έναντι της εκτός ελέγχου ψεκασμού. Οι θερμές, ξηρές συνθήκες βοηθούν την ταινία μάσκας να παραμείνει επίπεδη και να αποτρέψουν την παραμόρφωση σε παχιά στρώματα.
- απλώς εντοπίστε όλα τα αντικείμενα: αεραγωγοί, εισροές νερού, αγωγοί εξάτμισης και ανοίγματα ψύξης· καθορίστε ποια από αυτά αφαιρούνται και ποια πρέπει να παραμείνουν στη θέση τους.
- αφαιρέστε τις αφαιρούμενες σχάρες ή τα πλέγματα· αποθηκεύστε τα αφαιρεθέντα εξαρτήματα σε ένα στεγνό, επισημασμένο κουτί για να αποφύγετε την απώλεια και την παραμόρφωση.
- Καλύψτε με ταινία και χαρτί για μικρά ανοίγματα· προστατέψτε μεγαλύτερες περιοχές με αλουμινένια προστατευτικά αγκυρωμένα στο κατάστρωμα ανάλογα με τις ανάγκες· βεβαιωθείτε ότι η καλύψη είναι παχιά και ομοιόμορφη, σαν ένα μόνο στρώμα γύρω από την άκρη.
- για στενούς διαδρόμους, χρησιμοποιήστε έναν αισθητήρα κενού και μια μικρή βελόνα για να ελέγξετε το κενό· γεμίστε τυχόν κενά με ένα συμβατό στεγανωτικό για να αποτρέψετε την εισχώρηση του χρώματος.
- ξεκινήστε με τις μικρότερες ανοιγές και επιθεωρήστε από πολλές γωνίες· επαληθεύστε ότι η προβολή απόκρυψης είναι καθαρή και, εάν οι άκρες φαίνονται παραμορφωμένες, επανα-αποκρύψτε πριν προχωρήσετε.
- ακολουθήστε μια απλή ακολουθία: μάσκα, σφράγισμα, άμμος, βαφή· κάνοντας αυτό διατηρεί τις γραμμές καθαρές και μειώνει την επανεργασία· το ίδιο αποτέλεσμα είναι ευκολότερο να επιτευχθεί σε πολλές ανοιγές.
- μην καλύπτετε την περιοχή γύρω από τη θήκη του έλικα ή άλλα κρίσιμα εξαρτήματα· διατηρήστε την πρόσβαση στο κατάστρωμα και την περιοχή του κινητήρα καθαρή για μεταγενέστερη συναρμολόγηση και δοκιμή της ροής ψύξης.
- Κατά τη διάρκεια της επικάλυψης, τεντώστε καλά την προστατευτική ταινία και αποφύγετε την υπερβολική διάταση· αυτό μειώνει το ξεφλούδισμα και διατηρεί την προστασία από ψεκασμό άθικτη.
- Μετά το στέγνωμα της επίστρωσης στο καθορισμένο πάχος, αφαιρέστε προσεκτικά την ταινία μάσκας ενώ το χρώμα είναι ακόμα κολλώδες· αυτό ελαχιστοποιεί το σήκωμα και διατηρεί καθαρές τις γραμμές.
- Αποθηκεύστε τα υλικά απόκρυψης σε ζεστό, ξηρό μέρος και πραγματοποιήστε πολλαπλούς ελέγχους για να βεβαιωθείτε ότι δεν παραμένουν υπολείμματα και ότι οι γραμμές του κατάστρωματος παραμένουν καθαρές.
- βεβαιωθείτε ότι οι εισροές νερού και οι έξοδοι εξαερισμού είναι απαλλαγμένες από μεμβράνη μπογιάς· ελέγξτε για φράξεις και αφαιρέστε τυχόν ίχνη ταινίας μάσκας.