

 Boat Maintenance for Beginners – Essential Tips &">

Κανόνας: clean, dry, and inspect every sortie. After rinsing with soft water, wipe with a soft cloth, then apply a gentle cleaner to remove salt and grime. This least effort keeps surfaces protected from residue, minimizes hidden corrosion, and sparks confidence in the upkeep routine.
Follow up with a tactile inspection: examine all joints for cracks, test the integrity of fittings, and verify that soft spots do not indicate swelling. The leading indicators of trouble include corrosion around fasteners and peeling coatings; tackle these when noticed, not later. Mentioned routines say re-seal damaged seams with a compatible caulk; this protects structure and keeps upkeep predictable.
Choose a mild, marine-grade cleaner, then rinse and dry thoroughly. After cleaning, apply a cleaner-safe wax or protector to the exterior surfaces; this provides a protective layer that reduces salt adhesion and keeps the surface protected longer. At least annually, inspect and refresh the wax to maintain a level of spark between cleanings.
Guard against neglecting electrical components: check batteries, cables, connections, and fuses; keep terminals clean and dry with a soft brush, and use silicone grease to protect metal contacts. Ensure the union of battery and charger is free from corrosion; clip on a protective cover. When storing, keep equipment dry, shielded from sun, and use protective covers to preserve finishes for the next outing.
Boat Maintenance for Beginners
Starting season tasks: inspect hull, deck, and fittings; replace worn gaskets to prevent leaks. Follow the schedule below and perform tasks in a logical order. If you’re unsure, consult the manufacturer instructions. You’re aiming to keep surfaces protected and functioning, not letting minor issues escalate.
-
Exterior surfaces: rinse with fresh water to remove dust, then wash with a mild soap using a soft cloth. Dry thoroughly to avoid water spots. Check gel coat for scratches; buff shallow marks with a compatible polish. Deep damage requires professional repair.
-
Vinyl surfaces: use a vinyl-safe cleaner, test first in a hidden area, then wipe and dry. Apply conditioner to maintain flexibility; avoid petroleum-based solvents. Gentle blasts of water can help remove stubborn dirt, but avoid harsh sprays near seams.
-
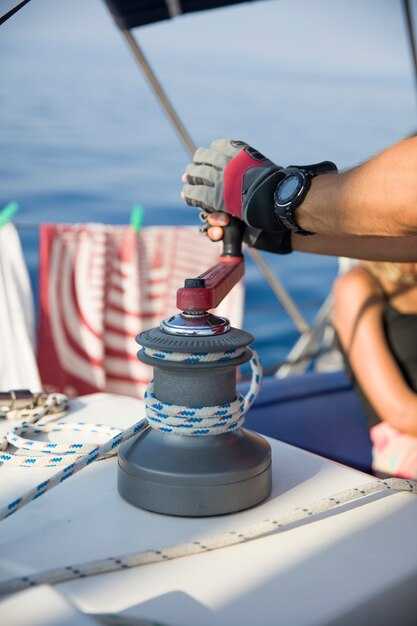
Fittings and hardware: inspect hose clamps, deck fittings, and anchor hardware for signs of corrosion. Tighten loose fasteners by hand, then with the appropriate tool. Apply a light coat of silicone-based lubricant to hinges and latches to keep operation smooth and protect metal from corrosion.
-
Electrical safety: clean battery terminals with a baking-soda solution, rinse, and dry. Verify bilge pump and key electronics operate correctly. Check fuses and wiring; follow manufacturer instructions for any replacements. Keep the battery compartment dry and inside a ventilated area.
-
Inside storage: remove moisture from compartments, place desiccant packs, and vacuum dust from upholstery and carpeting. Inspect seating surfaces for wear or cracking; wipe down with a mild cleaner. Ensure lids seal properly to prevent dampness inside.
-
Freshwater rinsing after use: flush through wash-down lines to remove salt or mineral residues. This addition protects surfaces, reduces corrosion risk, and preserves color and texture on vinyl and gel coat.
-
Rust and metal parts: treat minor rust spots on deck fittings with a non-metallic pad and rust remover. Wipe dry and apply a protective coating. Neglecting spots can lead to corrosion that spreads under paint and seals, compromising integrity.
-
Schedule and records: establish a cadence with monthly checks, seasonal deep cleans, and pre-trip inspections. Log results, mileage, and any parts replaced; use a simple notebook or calendar reminders to stay timely with upkeep. Consistency reduces loss of performance and safety margins.
-
Safety-minded storage: secure all gear to avoid shifting blasts during rough conditions. Verify lights, horns, and signaling devices work. Keep a compact safety kit accessible and review its contents periodically.
-
Starting-season quick-upkeep: run the engine or motor idle test, listen for unusual noises, and check fuel lines for cracks or wear. Test indicators, ignition, and kill switch. If anything sounds off, pause, inspect, and address before next trip.
Boat Maintenance for Beginners: Practical Tips and the Need for Regular Maintenance

Here is a great, concrete recommendation to start immediately: perform a 15-minute week check of critical elements, including seals, hose clamps, electrical connections, and bilge pump operation; this maintenance helps prevent major failures and protects water quality.
here is a quick note to reinforce this approach: a regular cycle of checks reduces risk and improves performance.
- Inspect fasteners, clamps, and seals: look for cracks, corrosion, or looseness; replace worn elements and tighten connections to protect performance. Keep short pliers handy to adjust clamps if needed.
- Check hoses and fittings: verify hoses bend without kinks, clamps are tight, and there is no leakage; maintain a supply of spare hoses and clamps in the supplies kit.
- Assess electrical system: test battery voltage, clean posts with odourless cleaner, and confirm wiring insulation is intact; use a multimeter to verify continuity and mark any suspect cables as protected.
- Test the bilge and pump: run the pump briefly, confirm the float switch operation, and listen for unusual odour or noise; this prevents water accumulation and keeps operation smooth.
- Prepare spare supplies: store seals, gaskets, fuses, and fuel-filter elements in a waterproof case; having supplies on hand makes repairs faster here and reduces downtime.
- Document routine actions: keep a simple log noting date, actions taken, and parts replaced; this knowledge helps ensure consistent maintenance and is easy to review later.
Preventive care schedule: set reminders, check several items each week, and adjust the plan as season changes. Keep products properly stored in a dry, odourless environment; this step protects performance and reduces break risk.
Regular attention yields sure results, and the habit becomes almost impossible to skip over time. This approach can be repeated several times a season to cover different conditions and reduces the chance of major failures, which saves costs and extends the life of your gear.
Pre-Season Inspection Checklist: What to Inspect Before the First Launch
Start with a hull check: look at cracks, punctures, gouges, or oxidized patches along the gel coat; this aspect shapes safety here and builds understanding of risk.
Check bilge area: presence of leaks, dampness, mildew, or grime signals moisture intrusion; remove standing water, blot dry, and note any persistent dampness.
Inspect propulsion and steering: examine propeller for dings, bent blades, or oxidized spots; verify shaft seal; ensure steering moves smoothly.
Fuel system: inspect hoses, clamps, and connections; search for cracks, hardened rubber, or any odor; verify right venting; leaks demand immediate repair.
Electrical network: include clean terminals, check corrosion, test battery, verify fuse status, inspect wiring insulation; secure loose cables and test devices.
Safety gear: verify life jackets, throwable devices, and fire extinguishers expiry dates; check signaling devices; ensure accessible storage here. Be aware of accidental fires risk and safe operation.
Ventilation and fueling safety: document fueling procedures; use the right nozzle, monitor fill rate, avoid overfill; ensure proper venting and spill containment.
Exterior care: washing, drying, and polishing surfaces; remove grime; addition of protective wax helps preserve shine and reduce oxidation risk. Check rub rails and hardware for corrosion.
Documentation and planning: compile a concise list of checks, assign responsibility, investing time now reduces risk; beginners should perform this check before each launch.
If you notice anything abnormal: unusual odors, noises, or changes in performance indicate a risk; if something life-threatening appears, stop and arrange repairs before proceeding. Do this to keep yourself safe and avoid costly fixes later.
Battery and Electrical System Care: Safe Startup and Basic Troubleshooting
Connect clean terminals and verify polarity before starting. Tighten clamps to manufacturer spec, ensure cables are free of grease, and remove any loose insulation that could cause a voltage drop during starting.
Inspect posts for stain or corrosion; remove buildup with a nylon brush and wipe residue with a dry cloth. If resin or varnish shows around contacts, use a marine-grade contact cleaner and reapply sealants only after the area is dry.
Freshwater and commercial setups differ in venting and electrolyte considerations; select products labeled for marine service and read the instructions on the container regarding charging requirements.
For cells with removable caps, check water levels and keep the vicinity dry; in sealed AGM or gel packs, rely on the charging system to maintain electrolyte levels and avoid opening caps.
Safe startup hinges on a few checks: disconnect the negative terminal before heavy work; reconnect after confirming clean contacts. Avoid sparks and smoking near the battery; hydrogen notice can trigger explosions when vents are exposed. Neglecting proper venting raises risk at times.
Voltage checks provide a quick health read: resting voltage should be about 12.6V or higher; during starting the voltage must not collapse below 9V; when running, the alternator output should be in the 13.8–14.4V range. If values differ, inspect connections, grounds, or the charging circuit.
If starting is sluggish, run through a basic troubleshoot list: clean and re-tighten terminals, verify the main and starter fuses, test the ground strap to the engine block, and measure voltage between the positive post and the starter lead. Observe changes over a few times to confirm the root cause.
Care cadence and signs to notice: wipe posts every few hours of operation during longer trips, and schedule a deeper check weekly or monthly depending on workload and freshwater vs commercial use. Theres a broad spectrum of products available, but select those that align with your battery type and requirements. Regular care with knowledge from commercial guides extends life and reduces surprises.
Table: quick reference for steps and expectations
| Item | Check/Action | Expected Result | Time | Σημειώσεις |
|---|---|---|---|---|
| Terminal Clamps | Clean, tighten, inspect corrosion | Solid contact, no visible stain | 5–10 min | Use nylon brush; wipe dry; reseal if needed |
| Polarity and Fuses | Verify polarity; inspect main fuse near battery | Correct orientation; fuse intact | 2–3 min | Replace blown fuse immediately |
| Voltage Readings | Resting 12.6V+, starting not below 9V, running 13.8–14.4V | Battery health and charging status | 5–7 λεπτά | Use a multimeter; check after full charge |
| Ground and Cables | Inspect engine-ground to battery negative | Reliable return path | 2–3 min | Clean contact area; inspect insulation |
| Charging System | Run engine; observe alternator output | Consistent charging current | 10–20 min | Theres a note on venting during long runs |
Engine Care Basics: Oil, Filters, and Cooling System Checks
Replace engine oil every 50 hours or yearly, whichever comes first; install a new oil filter at the same time; use the grade recommended by the maker according to ambient temperatures; fill to the dipstick’s clear mark; start and run minutes to warm, then recheck the level.
Theres a basics routine that protects durability across years of use. In dust-prone environments, filtration and oil condition matter more; thats why selecting the right viscosity per manual spec matters. Synthetic blends maintain film strength in hot or cold cycles, reducing carbon buildup and the risk of failure; always maintain the level within the marked range. These forces test seals and gaskets under load. Theres more: keep spare oil and replacement filters on hand to simplify servicing.
Then inspect filters as part of the service cycle: oil filter and air filter keep contaminants down. Change oil filter with every oil change; inspect air filter; if youre unsure, replace when dust is visible on the element; ensure the housing seals cleanly to avoid unmetered air entering the intake. Just follow the replacement schedule to make clean intake and clear airflow.
Cooling system checks: check coolant level when the engine is cold; use standard 50/50 premix with demineralized water; inspect hoses for cracks, swelling, or soft spots; test thermostat operation; verify the radiator cap seals correctly; flush and replace coolant every 2 years or 2000 hours, whichever comes first; keep coolant supplies clean and clear to prevent corrosion and break in hoses; engine serviced on schedule supports reliability; in lifeboat settings, a reliable cooling loop protects durability across similar environments.
Hull, Propulsion, and Safety Gear: Visual Inspections and Replacement Guidelines
Begin with a focused preflight: wipe visible surfaces, scan for leaks, and confirm safety gear is in date. These checks should be done before each trip and again after heavy seas or prolonged use; ignoring them raises risks and can turn a routine outing into a disaster.
Hull assessment targets visible cracks, gelcoat delamination, and blistering on υαλοπίνακας ή fiberglass skins. Look along the waterline, transom, and keel for changes in texture or colour. Inspect rub rails, deck penetrations, and through-hull fittings for tightness and seal integrity; wipe away algae or salt deposits to reveal hidden damage. In environments with salt or brackish water, corrosion accelerates, so treat fittings with appropriate sealants and re-bed if you notice movement. If you detect soft spots, delamination, or cracks that penetrate the core, mark the area and plan a short-term repair or professional evaluation; worry about long-term integrity instead of hoping it will hold. Winterizing steps should include a dry, complete hull check to prevent frost-related stress on fittings and seals.
Propulsion inspection covers the propeller, shaft, coupling, and engine drives. Examine the propeller for nicks, bends, or corrosion; even small dings can demote efficiency and increase vibration. Check the shaft and stuffing box for play or leaks, and verify the engine mountings remain firm. Inspect hoses, clamps, and hose routes for abrasion or heat damage; replace worn clamps and hose segments promptly. Have a pliers set and a basic tool kit handy to remove cotter pins, inspect quick-disconnects, or torque fittings as needed. If you notice unusual vibrations or noise, perform a quick hours-based check and consider professional servicing if alignment or bearing wear is suspected. These steps help maintain μακροζωία και μειώστε τον κίνδυνο αποτυχιών πρόωσης σε αντίξοες στοιχεία.
Εξοπλισμός ασφαλείας Η ετοιμότητα επικεντρώνεται σε σωσίβιες λέμβους, πυρόσβεση, σηματοδότηση και φωτισμό. Ελέγξτε τη φορετότητα και την ακεραιότητα του υφάσματος· αντικαταστήστε οποιοδήποτε αντικείμενο με σκισμένες ραφές ή ελαττωματική πλευστότητα. Επαληθεύστε τις ημερομηνίες λήξης των πυροσβεστήρων, των φιαλών πυρός και των κιτ πρώτων βοηθειών· αναπληρώστε σύμφωνα με τις οδηγίες του κατασκευαστή requirements. Ελέγξτε τις ακουστικές συσκευές σηματοδότησης και βεβαιωθείτε ότι ο φωτισμός θαλάμου ή καταστρώματος συμμορφώνεται με similar πρότυπα ασφαλείας. Αντικαταστήστε τα φθαρμένα ή παρωχημένα αντικείμενα· διατηρήστε μια συνοπτική λίστα των these αντικαταστάσεις ώστε να μην βασίζεστε ποτέ σε κάτι αναξιόπιστο σε καταστάσεις έκτακτης ανάγκης. Τα άοσμα διαλυτικά ή καθαριστικά που χρησιμοποιούνται σε εξοπλισμό δεν πρέπει να καλύπτουν βασικά ζητήματα – εντοπίστε προβλήματα έγκαιρα και σκουπίστε τα υπολείμματα για να αξιολογήσετε με ακρίβεια την πραγματική κατάσταση.
Αντικατάσταση ρυθμού και πρακτικές σημειώσειςτα εξαρτήματα εξοπλισμού ασφαλείας έχουν συνήθως πρακτική διάρκεια ζωής που εξαρτάται από τη χρήση. hours και περιβαλλοντική έκθεση. Οι άνοδοι στα συστήματα πρόωσης συνήθως χρειάζονται ετήσια αντικατάσταση σε heavy περιβάλλοντα αλατιού· επιθεωρήστε και αντικαταστήστε μετά από κάθε κύκλο χειμερινής συντήρησης εάν εμφανιστούν σημάδια διάβρωσης. Οι στεγανοποιήσεις κατά τη διέλευση του κύτους, οι σφιγκτήρες σωλήνων και οι αντικραδασμικοί εξοπλισμοί θα πρέπει να επανεξετάζονται τουλάχιστον κάθε short επίσης μετά από δύσκολες περιόδους. Για boats χρησιμοποιείται σε συχνή θαλάσσια υπηρεσία, προγραμματίστε μια επαγγελματική επιθεώρηση γάστρας κάθε 2–3 χρόνια για την πρόληψη της μακροπρόθεσμης υποβάθμισης. Αυτές οι ρουτίνες δεν αδύνατο να ακολουθήσουν· είναι πρακτικά βήματα που υποστηρίζουν μακροζωία και μειώστε τον κίνδυνο του καταστροφές στο πέλαγος. Εδώ, ένας πειθαρχημένος οπτικός κύκλος σας βοηθά να απολαύσετε ήρεμες διαδρομές αντί να αντιμετωπίσετε απρόσμενες αποτυχίες σε εχθρικό environments.
Συνήθειες καθαρισμού, αποθήκευσης και εποχιακής συντήρησης
Ξεκινήστε με έναν σχολαστικό καθαρισμό όλων των σκευών αμέσως μετά τη χρήση: ξεπλύνετε με φρέσκο νερό, τρίψτε με βούρτσες μέχρι οι επιφάνειες να φαίνονται φωτεινές, στη συνέχεια στεγνώστε καλά, φροντίζοντας να αφαιρέσετε όλη την υγρασία.
Αποθηκεύστε καθαρά δοχεία σε σκεπασμένο χώρο σε πολλά ράφια, κρατήστε τα μακριά από το έδαφος και εξασφαλίστε αερισμό· η ξηρασία αποτρέπει τη μούχλα και φθορές στην ακεραιότητα.
Η εποχιακή φροντίδα σημαίνει επιθεώρηση των στεγανοποιήσεων, λίπανση των μεντεσέδων με ελαφρύ λάδι, ανανέωση των επιστρώσεων στις gel coats και σημείωση ενδείξεων που θα μπορούσαν να εξελιχθούν σε μεγάλα προβλήματα πολύ γρηγορότερα.
Ορίστε έναν απλό κύκλο: μετά από κάθε ταξίδι, καθαρίστε, ελέγξτε για ρωγμές ή ζημιές, παρατηρήστε τυχόν ασυμφωνίες, και στη συνέχεια κάντε έγκαιρες επισκευές ή αντικαταστάσεις με τη μικρότερη δυνατή καθυστέρηση για να αποφύγετε πονοκεφάλους και κινδύνους που απειλούν τη ζωή. Η αγνόηση διαρροών μπορεί να καταστήσει τις επισκευές αδύνατες.
Κρατήστε τα καύσιμα σε εγκεκριμένα, καλυμμένα δοχεία μακριά από τη θερμότητα· οι ατμοί είναι απειλητικοί για τη ζωή και απαιτούν κατάλληλο αερισμό κατά τη φόρτωση και το χειρισμό.
Διατηρήστε ένα συμπαγές κιτ: πένσα, κατσαβίδια, βούρτσες, πανιά και ένα μικρό φακό χειρός· αυτό το κιτ επιταχύνει τον χειρισμό των εξαρτημάτων και των σφιγκτήρων, ενώ αποφεύγει τους κινδύνους στον άνεμο ή τη βροχή.
Παρατηρήστε κοινές αιτίες φθοράς: υγρασία κάτω από τα καλύμματα, άλγη στα εξαρτήματα ή διαρροές καυσίμου στους σωλήνες· ακόμη και μικρά σημάδια απαιτούν έγκαιρη δράση για την πρόληψη καταστροφών και μεγάλων ζημιών, μειώνοντας τον πονοκέφαλο.
Επιλέξτε σκεπαστή αποθήκευση με προστασία από τον άνεμο και ήπιες πρακτικές φόρτωσης· χρησιμοποιήστε πολλά καλύμματα για να μειώσετε την έκθεση στον ήλιο ενώ παράλληλα επιτρέπετε τον αερισμό γύρω από φρεάτια και καταπακές, προστατεύοντας την ακεραιότητα της επιφάνειας.
Τουλάχιστον δύο φορές το χρόνο, αναθεωρήστε μια γραπτή ρουτίνα: πλύσιμο, στέγνωμα, επιθεώρηση και επαναφορά προστατευτικών επικαλύψεων· η δημιουργία αυτής της συνήθειας εξασφαλίζει ότι τα σκάφη παραμένουν αξιόπιστα και έτοιμα καθώς αλλάζουν οι εποχές.
Οι τακτικοί έλεγχοι μειώνουν την πιθανότητα κρυφών κινδύνων και πονοκεφάλων, διατηρώντας τα πλοία ασφαλή και έτοιμα όποτε δυναμώνει ο άνεμος.