

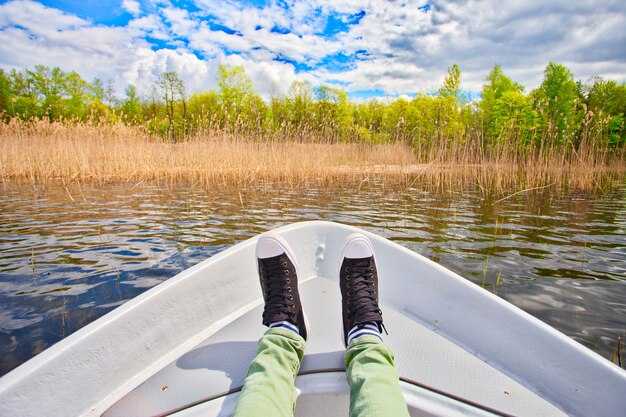
 Shallow Water Boats – 7 Essential Tips for Safe Boating in Shallow Water">

Step 1: Untersuchen Sie Tiefe und Bodentextur, während Sie sich Zonen mit geringe Tiefe; Sandbänke und Schlickschichten beachten; den Kiel mit langsamer Drift testen und die Geschwindigkeit anpassen; sie sind sicherer, wenn die Last ausgeglichen ist und man eine plötzliche Neigung in Flussmündungsnähe vermeidet.
Step 2: verteilen Sie die load gleichmäßig entlang der Mittellinie; vermeiden Sie es, schwere Ausrüstung auf einer einzigen Seite zu stapeln; eine unausgeglichene Gewichtsverteilung erhöht das Kenterungsrisiko, wenn Sie auf Wellen, Seitenwinde oder den Schatten ferner Türme entlang der Küstenlinie treffen, jedoch bleibt das Prinzip dasselbe.
Step 3: Halten Sie in engen Passagen einen minimalen Vortrieb aufrecht; falls Ihr Rumpf den Grund berührt, ziehen Sie sich langsam zurück; ein kurzes Ruckeln kann zum Sinken oder einem harten Aufprall führen; halten Sie sich im Leerlauf, wenn Sie sich innerhalb weniger Meter vom Ufer befinden, um bereit zu bleiben. float, und mit twin Außenborder Im Leerlauf hast du kaum Kontrolle.
Step 4: In Angelsegmenten Köder und Angelgerät sicher verstauen; beim Ausbringen der Leinen die Leine unterhalb der Bordwand halten, um Hängenbleiben zu vermeiden; wenn Sie Ausrüstung mieten, die Tragfähigkeit und Leinenlänge bestätigen; Meeräschen und andere Köder sollten in einem verschlossenen Behälter aufbewahrt werden, um things organisiert und gebrauchsfertig.
Step 5: Wenn Sie näher an der Mitte der Route bleiben möchten, vermeiden Sie Hindernisse entlang des Randes; wenn ein Ufer ansteigt, steuern Sie allmählich weg und achten Sie auf versteckte Felsen oder untergetauchte Baumstämme; die works Routinekontrollen helfen Ihnen, dies zu vermeiden: verloren und bleib away vor Gefahren.
Step 6: Sicherheitsausrüstung vorbereiten, Schwimmwesten überprüfen und Funkreichweite testen; falls Sie ein Boot mieten, inspizieren Sie den Rumpf und die Festmacher und erstellen Sie einen Plan mit einem Partner für den Fall, dass sich die Bedingungen ändern; said Verfahren beruhigen Ihre Crew, wenn sich die Bedingungen ändern und Sie in der Nähe von tieferen Stellen driften. Turm along the coast.
Step 7: Wenn Sie auf einer Sandbank stranden, bewahren Sie Ruhe; halten Sie die Passagiere in der Nähe der Mittellinie; beurteilen Sie die Ladung und den Treibstoff; geben Sie ein Notsignal, halten Sie die Bilge trocken und planen Sie eine kontrollierte Rückkehr, wenn es die Gezeiten und die Tiefe erlauben; dies case demonstriert, warum Routineüberprüfungen und eine Checkliste vor dem Start offer bessere Chancen auf eine sichere Rückkehr, selbst wenn Sie meilenweit von zu Hause entfernt sind und alles, was Sie sehen, Wellen um den Rumpf herum sind.
Flachwasserboote: 7 Tipps für sicheres Bootfahren in flachem Wasser; Was tun beim Bootfahren in flachen Gebieten
Tip 1: Verifizieren Sie immer die Tiefe, bevor Sie in Zonen mit geringer Tiefe einfahren. Verwenden Sie mehrere Seekarten, ein tragbares Echolot und überprüfen Sie, wenn möglich, mit Einheimischen gekreuzt. Wenn die gemessene Durchfahrtshöhe knapp ist, suchen Sie eine andere Route; passen Sie Ihre Pläne entsprechend an und verwenden Sie das Funkgerät, um die Bedingungen zu bestätigen. Dieser Ansatz reduziert das Risiko von Grundberührungen und Schäden.
Tip 2: Plane deine Passage mit Blick auf kartierte Gefahren. Wenn ein Kanal schmal ist, suche nach einer größeren Alternative oder Kantenlinien, die den Rumpf schützen. Sortiere Optionen nach Sicherheitsspanne und halte mehrere Notfallpläne bereit, falls sich Wind oder Strömungen ändern. Beachte beim Navigieren die Orte, vor denen Einheimische warnen, und passe deine Route an.
Tip 3: Reduzieren Sie die Geschwindigkeit, um Schäden zu minimieren und Wellen klein zu halten; ein gleichmäßiges Tempo hilft Ihnen, Unterwasserhindernisse vor Kontakt zu erkennen. Vermeiden Sie es, durch Krautfelder und Baumstümpfe zu fahren, und minimieren Sie Spritzwasser, das Hindernisse verdecken könnte. Verwenden Sie den Rückwärtsschub sparsam und bleiben Sie in statischer, kontrollierter Bewegung in Bodennähe, um Hängenbleiben zu vermeiden.
Tip 4: Balancieren Sie die Ausrüstung, um ein Kippen zu verhindern. Bewegen Sie schwerere Gegenstände nach hinten und halten Sie das Gewicht niedrig, um die Stabilität in unebenem Gelände zu verbessern. Wenn Sie eine Neigung feststellen, trimmen Sie schrittweise und manövrieren Sie mit Feingefühl durch schwierige Zonen, ohne abrupte Bewegungen.
Tip 5: Verwenden Sie beim Angeln in Bodennähe Finesse und wählen Sie Köder, die in flachen Bereichen funktionieren – Krebse oder Flusskrebse können an vielen Stellen Bisse auslösen. Untersuchen Sie die Graskanten auf sicherere Bahnen und nähern Sie sich mit vorsichtigen, langsamen Bewegungen, um Verwicklungen zu vermeiden oder Fische zu verscheuchen.
Tipp 6: Im Falle von Problemen: Bewahren Sie Ruhe und kommunizieren Sie klar. Rufen Sie per Funk um Hilfe und beschreiben Sie die betretenen Orte sowie die aktuelle Tiefe. Die Einsatzkräfte werden Sie zu einem sicheren Ausgang führen und Ihnen möglicherweise eine andere Vorgehensweise empfehlen, um Gefahren zu vermeiden. Halten Sie ein paar Signalgeräte bereit und setzen Sie diese bei Bedarf ein.
Tipp 7: Überprüfen Sie nach jeder Nutzungswoche Probleme und aktualisieren Sie Ihre Diagramme. Notieren Sie kartierte Standorte, die zu vermeiden sind, und teilen Sie die Ergebnisse mit Einheimischen und anderen Besatzungen. Führen Sie eine regelmäßige Planprüfung von Ausrüstung, Treibstoff und Sicherheitsartikeln durch, um Risiken zu reduzieren und verlorene Ausrüstung oder Ausrüstungsteile umgehend aufzuräumen.
Praktische Richtlinien für das Befahren von Flachwasserzonen
Tiefenkarten vor Abfahrt prüfen, um Grundberührung zu vermeiden; geplante Route mit nahegelegenen Seegraswiesen und Kanälen vergleichen; bestätigen, dass diese Markierungen mit den Wasserstandsanzeigen übereinstimmen und sicherstellen, dass die Passagiere vor der Abfahrt unterwiesen werden.
Wählen Sie Routen mit größeren Sicherheitsabständen und führen Sie Tiefenmessungen an mehreren Stellen entlang des Umfangs durch; passen Sie den Kurs gegebenenfalls durch kleine Versätze an und überprüfen Sie die Messwerte erneut; setzen Sie ein Suchtrupp ein, um die tatsächlichen Bedingungen zu überwachen.
Fahren Sie in trollingfreundlicher Geschwindigkeit in der Nähe von Seegraswiesen; halten Sie eine gleichmäßige Oberfläche ein und vermeiden Sie abrupte Gasstöße oder Wendungen, die das Heck anheben und das Risiko von Propellerschlägen erhöhen; halten Sie die Propeller frei von Schmutz und achten Sie auf tote Winkel in der Nähe, wo sich Unterwasserhindernisse an ihrer Position befinden könnten.
In beliebten Zonen sollten Sie vor dem Betreten auf Karten einen konservativen Kurs festlegen, Grasflächen und bekannte Hindernisse markieren und Lebensmittel sicher verstauen, damit sie nicht rollen. Diese Schritte helfen, Last-Minute-Entscheidungen zu vermeiden und das Gefährt unter Kontrolle zu halten.
Stand-by-Verfahren: Weisen Sie zwei Besatzungsmitglieder zum Wachen ein; führen Sie regelmäßig Messkontrollen durch; wenn die Messwerte unter sichere Margen fallen, stoppen Sie und bewerten Sie die Situation neu, bevor Sie fortfahren; diese Kontrollen reduzieren das Risiko und halten die Bedingungen für alle an Bord überschaubar.
| Scenario | Action | Kennzahl |
|---|---|---|
| Annäherung an Krautbänke und Grasflächen | Geschwindigkeit reduzieren; Wasserstandsanzeige beachten; Karten aktualisieren | Geschwindigkeit ≤ 6–8 Knoten; Tiefenabstand ≥ 0,6 m |
| Nahezu untergetauchte Hindernisse | Abstand halten; Messwerte mit Handtiefenmesser prüfen | Abstand ≥ 10 m; Tiefenrand ≥ 0,3 m |
| Mit Passagieren an Bord | Bestimme ein Paar Ausgucke; weise sie vor dem Ablegen ein. | Zwei Ausgucke aktiv; Einweisungen abgeschlossen |
| Bei Troll-Operationen | Fahren Sie mit konservativer Geschwindigkeit; halten Sie den Bereich hinter den Propellern frei. | Steady speed; no debris in the path |
Check Depth Charts and Local Depth Changes Before Entering
Recommendation: Pull authoritative depth charts and compare them with real-time mapping before entering zones with limited depth. If the chart shows a clear corridor, the navigator grinned and proceeded cautiously, keeping to deeper pockets.
When reading depth charts, note sections where depth dips below 4 feet; around lower-depth bars and bends, the lowest depth can drop rapidly, sometimes 2–3 feet within 20–30 feet. Here, mark the secure corridor and keep the route at 5–8 feet whenever possible. If the chart shows a falling gradient, take a detour to the outside edge of the bend before committing to the line, and never cross spots with less than 4 feet unless you have a plan and a heavy anchor ready.
Use a handheld depth finder, and consider renting one if your built-in unit doesn’t cover the area. Compare its live reading with the chart mapping, and look for discrepancies. This is particularly important near inlets where freshwater inflows create mapping anomalies and lures or craw habitats near structure.
Note how tide affects depth: larger tide cycles can increase depth around banks; a rising tide often helps when moving into pockets with greater depth, whereas a falling tide can leave you reading depths that are less deep. Plan a crossing during a higher tide window and be prepared to back out if you see depth approaching the lowest marked level on the chart.
Anglers should follow particular shoal lines: look for casts along the edge of a channel, where casting and trolling will still keep you within secure depth. When looking for catching opportunities, use close-range casting near the bank, but stay 2–4 body lengths from the edge and watch for submerged structures. If you’re using bait, choose small, slow-moving lures during the initial pass, then switch to heavier lures only if depth holds at least the lowest chart value.
Another idea is to map the route around the bend using a mapping circuit on your device. Theyre simple steps: compare chart data, then do live checks; take another pass to confirm, and if a depth reading sits around 4–5 feet, that area is safer to navigate at crawl or light trolling. Only when you confirm with real readings should you drift or cast into the target zone.
Choose Hull, Prop, and Load for Shallow-Water Use
Recommendation: Use an aluminum hull with a flat-bottom or mild-V and a short length-to-beam ratio, paired with a compact, high-thrust propeller. This setup dramatically improves maneuvering in confined, low-depth zones and lowers aground risk when moving near shoals. The design usually stays within the boat’s rated capacity, helping ones on board and passengers stay stable and avoid sinking in soft bottoms.
Weight and balance: aluminum hulls are forgiving, but load must stay within the manufacturer’s limits; dont ignore weight distribution when there’s much gear or several passengers. Balance forward and toward the center to prevent bow-down tilt. A forward bias usually reduces tilt and keeps the bow light, while a centered load improves maneuvering behind the wheel. Understand the effect of weight distribution; even small shifts can cause a case of unplanned movement, depending on how you stand or sit, and whether you’re moving bait or tools by hand. Always keep the load moving gradually to maintain control and avoid surprises for passengers.
Prop and electronics: choose a three- or four-blade aluminum prop with pitch matched to hull size and typical load. A smaller diameter helps prevent digging under soft bottoms and reduces the risk of sinking when you strike submerged hazards. If you’re carrying bait and gear for trout or other fish, ensure the setup allows quick adjustments without fouling lines, and that electronics remain functional under engine torque. Having electronics mounted securely helps you retain situational awareness and lets you adjust speed without losing control during moving operations.
Load distribution and trim: keep heavier items low and toward the center so the bow does not rise excessively and the stern doesn’t swing behind you. Usually avoid placing heavy gear behind the console; if there’s much weight behind, the tilt becomes huge and aground risk grows. Severely unbalanced loads severely limit maneuvering; fix by shifting toward the center and using tie-downs to keep gear under control. The effect of weight shifts is tangible, so plan longer trips with a mind to even balance. This approach allows safer operation and helps prevent sinking in soft bottoms or when encountering submerged obstacles.
Operational notes: bait boxes, tackle, and fish in boxes should be stored in accessible compartments to prevent shifting with passengers. whats more, longer trips with several stops demand steady load management so electronics stay visible and the craft remains stable. The approach to depth changes matters, so respect the terrain and avoid large, sudden moves that could trigger aground. With a robust aluminum hull, a matched prop, and disciplined load, you’ll enjoy fishing for trout and other species in tight spots while keeping the crew comfortable. This plan will allow safer operation and help prevent sinking in soft bottoms or when encountering submerged obstacles.
Keep Low Speed and Steer Strategically to Avoid Grounding
Reduce speed to idle in risk zones; steer toward deeper pockets shown on depth charts. This disciplined approach keeps you within margins and helps you traverse risk safely, as surface conditions shift, giving you reliable control.
- Aluminum hulls respond quickly to throttle and trim; maintain a slow, controlled pace to minimize bottom contact risk.
- Move the helm slowly with gradual corrections; avoid abrupt turns that push the keel toward soft bottoms.
- Plan moves using current, wind, depth information; next decisions reference these charts to stay mid-channel, within the deepest feasible trough.
- Keep at a longer stopping distance when approaching potential obstructions; this extra time helps you adjust without touching the bottom.
- When near platforms, baits, or lures, reduce speed further and keep a wide arc to avoid collisions; they present moving lines and moving fishs that demand extra clearance.
- If renting a vessel, confirm the operating area, known depths, and suggested routes with the operator; this prevents risky moves near unknown bottoms.
- Eastward and westward channel indicators vary; exploring maps and surface data, orient by charts and move toward the side with consistently deeper surface yields; exploration should stay within clearly marked routes.
- Understand that longer moves along conservative headings generally reduce grounding risk; sometimes taking these steps will deliver the gold-standard result and keep you moving.
Identify Bottom Type and Obstructions: Sand, Mud, Weeds, Rocks
Once you start, perform a quick bottom check in the channel using a finder and a hand probe to identify substrate type. The display should show sand, mud, weeds, or rocks; mark the result on your chart and note nearby features.
Sand beds look even, but texture can change with current; objects buried can shift as wakes pass; on sand, maneuver with steady throttle to avoid digging and to keep traction; if you see the sand edge, plan a route onto deeper spots in channels.
Mud offers soft support under load; it can trap the bottom and cause sudden loss of control; they tend aground if speed changes are abrupt.
Weeds wrap around prop and intake; they look natural but block flow; keep a weed edge on one side; if weeds are added beyond a patch, consider lifting or clearing to prevent injury and loss of steering.
Rocks create hard contact risk; they look like dark spots on the chart; submerged rocks require careful navigation along channels; use a finder and sonar to locate and keep off bottom.
Nearby johnson notes and local charts include buried objects placed nearby, dead trees, and man-made items; if you encounter a marked object, alter course accordingly; the lowest risk path tends to stay within clear channels. If something unexpected appears, treat it as obstacle and adjust.
Different substrate types demand different handling. Create a quick bottom type log: note sand, mud, weeds, or rocks; place a marker on the chart with the exact location; the finder can help you identify risk, and this help increases safety among boaters in competitive channels.
Balance Weight and Trim for Better Clearance
Recommendation: Achieve level trim by distributing load and ballast so the hull runs parallel to the bottom as tides draw toward shoal areas and reefs, improving clearance when venturing into restricted zones.
- Before launch, use a load card to log total mass, CG position, and expected trim; include notes from the manual and tides forecast; update after each week of operation or after any change in passengers or gear. Years of practice improve accuracy; keep a running record you believe you can rely on.
- Heaviest items go low and near midships; spread passengers along the side to avoid list; place gear along the centerline to create a balanced profile; adjust in craw increments to dial in the trim without overcorrecting while listening to hull feedback.
- Keep essential fuel and equipment as near the centerline as possible and balanced fore and aft; stay within the operator’s guidelines and the manual; if you venture into choppier waves, the trim response becomes more predictable and manageable, and this is highly beneficial.
- Approach shoal depths slowly; verify draft with depth gauges and tide information; if you draw near the bottom, pause and reassess load distribution and ballast before proceeding; avoid action that could strand you near reefs.
- Engage anglers and passengers in the plan; explain where to sit and how to move; theyre mindful of trim changes; local saltwater experience shows that weight spread along the length reduces lean and helps maintain clearance.
- Post-trip review: compare actual trim to predicted values, update the card and logs for the next outing; with practice over years and seasons, trim control becomes more precise and less guesswork.
Particular scenarios require quick adjustments: if you need to pass below a low edge or skim along a reef edge, move heavier items forward or aft by smaller amounts, staying within safe ranges; always prepare for changes in waves and winds, and keep stranded risk low with emergency action gear ready.
Grounding Response: Immediate Steps and Safe Recovery
Shut propulsion to idle, steer toward the shore in a controlled arc, and keep your weight quite low with knees bent to reduce tipping risk.
Once contact with the bottom is confirmed, step onto firm ground, naturally check hull integrity and traps, and remove entanglements; avoid standing in mud pockets that may trap ankles.
If the hull remains stuck, call assistance immediately because a damaged keel or bent fittings can worsen injuries; do not attempt to pull free from an awkward angle, instead secure lines to a nearby anchor and wait while recovery teams arrive.
In calm conditions, keep netbait or bait stowed and away from the hull; if a fishs sighting appears, note the kind and keep distance from the line to prevent damaging gear; a lightweight rig and even a gold lure should be secured to avoid snagging; this helps reduce additional damage while you wait.
Adjust course to the east if wind shifts, then come alongside the bank through channels nearby; draw toward the shore with an easy, steady motion; this only helps minimize longer exposure and prevents traps in soft places.
In morning checks, if you spot a Johnson twin anchor rig, verify it is secure before stepping away; the procedure called by guides lowers risk of further damage and helps anyone recover gear quickly; after release, move the boat gently to the dry area and recheck the hull for any imperceptible cracks.