

 Outboard Motor Maintenance Secrets – Simple Practices for Longevity">

Maintain the cooling circuit by inspecting the water pump and impeller each season; replace worn parts early to prevent costly overheating. A worn impeller reduces water flow, raising engine temperature and increasing vibrations. Regular replacement and a fresh gasket set extends life and reduces checkups later. Keep a spare impeller in the toolkit and follow the manufacturer’s recommended interval.
In freshwater operations, after a trip run the engine briefly with hose pressure to flush salt, dust, and condensation. Use stabilizers in the tank and switch to marine-grade lubricants where applicable. A number of small, smart changes will extend overall performance: replace fuel filters on schedule, keep the tank above half, and avoid cheap fittings that can fail early. This can save repairs later.
Checkups should be a monthly habit, with a focus on the electrical side: battery health, corrosion on terminals, and the charging system. A loose ground strap or a cracked cable multiplies heat and reduces efficiency; replace with marine-grade cables and ensure proper routing to prevent chafing. The number of connections matters; clean, tight joints will save energy and prolong reliability. The answer: keep terminals clean and secured to avoid costly failures. This requires attention to connection routing and clean terminals, preventing failures earlier; this will lead to longer uptime.
Lubrication discipline matters: tend to pivot points with marine-grade grease, ensure the gearcase oil is at the proper level, and inspect bearings for wear. If you sense unusual vibrations, you cant ignore it; stop and inspect the prop, shaft, and mounts. Regular checks extend life and prevent costly repairs.
Seasonal storage or long-term idle: drain the lower unit, rinse, and dry; fill the tank with fresh fuel and stabilizer; store with the tank topped up to minimize condensation. A straightforward routine reduces rust and corrosion; keeping a log of number of cycles and changes helps you plan early maintenance and avoid surprises when the season returns. This habit will save money and extend service life.
Check Impeller and Cooling System to Prevent Overheating
Starting checks on the impeller and cooling loop are essential; replace the impeller if blades show wear, cracks, or stiffness. A worn unit reduces water flow, boosting the risk of overheating in freshwater runs and in marine-grade setups alike.
tips during the inspection include removing the cover, cleaning the intake screen, and testing water flow by briefly running at a low idle while observing a steady stream. Including a spare impeller in the toolkit helps against unexpected failures, especially during longer trips. Key points cover flow, blade condition, and seal integrity to prevent a single fault from cascading.
Remember the answer hinges on keeping the cooling path clear: inspect propeller-side passages, the water pump, and all hoses. Use marine-grade clamps and fittings to resist aging. This approach supports combustion heat transfer and protects the engine during heavy loads.
Owners who love reliable boats understand that investing in regular cleaning and a disciplined schedule keeps the motor in top condition. Keeping the cooling system free of salt, sediment, and marine growth matters against corrosion and extra heat from combustion. Remember: stored units during winter, older designs, and still-used ports require routine attention, including flushing after freshwater or saltwater use. Such discipline plays into longevity, having a simple checklist helps maximise performance while keeping cost down. The result is less risk of overheating and easier starting in fresh and stored environments.
| Point | What to Check | Action | Cadence |
|---|---|---|---|
| Impeller | Blade wear, cracks, stiffness | Replace if any flaw | Seasonally or every 100 hours |
| Water intake | Screen clogging, debris | Clean with freshwater, reinstall | Before each trip |
| Hoses & clamps | Cracks, leaks, hardened clamps | Replace worn parts with marine-grade | Annual inspection |
| Cooling passages | Scale, sediment | Flush with cleaning solution | Every season |
Change Gear Case Oil on Schedule and Verify Seal Integrity
Change gear-case oil annually or after 100 hours of operation, which comes first, to protect bearings and extend the long-lasting service life. This proper interval reduces oil consumption, avoids potential contamination, and supports warranty compliance.
During the drain-and-fill procedure, perform the drain and refill in a clean area using the recommended gear oil. Warm the unit to improve drainage, remove the drain plug, capture oil in a labeled container, and inspect the drained oil: metal shavings or a milky appearance signal potential seal wear and require component evaluation. Reinstall the drain plug with proper torque and fill until the level reaches the fill mark, per OEM spec.
To verify seal integrity, inspect the propeller shaft seal and the gear-case gasket for signs of cracking or seepage. Check visually around the fill plug and the vent. Any visible leaks indicate seal replacement; after replacement, recheck torque and run the unit briefly while stationary to verify no leaks.
Ethanol in stored fuel can degrade gaskets and seals, increasing risk of leaks in the gear-case area. Use fresh, stabilized fuel, and avoid storing fuel long periods near the engine. If fuel has been stored, drain stale fuel and refresh the system before next run.
Checklist: oil type and quantity confirmed, oil level checked, drain plug and fill plug tightened to manufacturer torque, seals replaced if needed, visible leaks eliminated, vent clear, and compliance documented with warranty terms.
Owner tips: keep spare seals and gaskets in a dependable, stored location, take notes during every session, and maintain a long-lasting warranty by performing this routine during each boating season. These tips help extend bearings life, prevent surprises during owner trips, and ensure the entire gear-train remains efficient, with a spark of confidence during every voyage.
Protect the Fuel System with Stabilizer, Fresh Filters, and Clean Lines
Add marine-grade stabilizer at the recommended dose, replace the fuel filter, and inspect lines immediately. This action lowers moisture, prevents varnish buildup, and keeps fuel flow steady during turning and operating, protecting the life of the fuel system.
In marine settings, this approach supports uninterrupted operation and helps owners prevent fuel-system issues during extended boating seasons.
- Use stabilizer additive with every fill, including ethanol blends, to keep fuel stable across many months and reduce water separation.
- Replace the primary fuel filter yearly; fresh filters improve flow and spark reliability, investing in these parts now pays off during peak season.
- Keep lines clean and dry; inspect hoses and clamps for cracks, stiffness, or misaligned clamps; replace any worn or oil-soaked lines with marine-grade hose rated for fuel and ethanol.
- Early symptoms such as rough idle, hesitation, or strong fuel smell indicate neglected lines or stale fuel; act promptly to avoid becoming stranded.
- Establish a thorough, regular routine each season; many owners find that investing a few hours now leads to better reliability when operating in saltwater, even if the boat sits idle across many months.
Quick actions
- Keep a spare stabilizer and filter on hand; this keeps the plan ready during trips and reduces downtime.
- Answer to common questions: if fuel quality declines, add stabilizer, replace filters, and inspect lines; staying proactive preserves life and avoids costly failures, even if months pass.
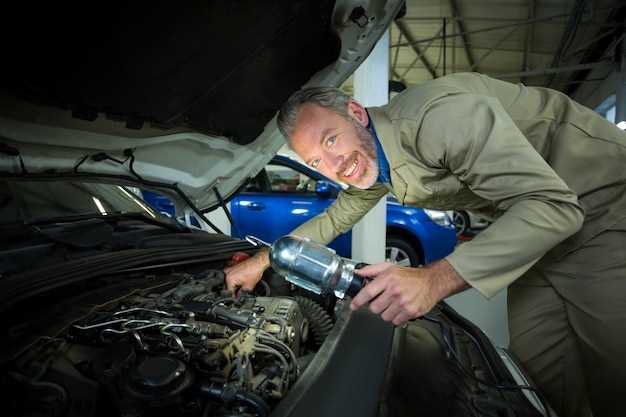
Inspect the Electrical System: Battery, Cables, and Spark Plugs
Test resting voltage immediately; aim 12.6–12.8V. If reading sits under 12.4V, charge with a manufacturer-recommended charger, then remeasure. Establishing this baseline supports lifespan tracking, helps detect early issues, and informs yearly planning.
Inspect battery lead terminals for corrosion, looseness, and heat damage. Clean corrosion with a baking soda solution, rinse, and dry completely; apply dielectric grease to protect against moisture. Tighten clamps to the specified torque to reduce resistance.
Examine insulation on all leads, looking for cracks, stiffening, or chafing. Replace damaged cables promptly. Check continuity with a multimeter; verify ground strap offers low resistance. Route cables away from heat sources, vibration, and moisture to extend life.
Überprüfen Sie Zündkerzen auf Elektrodenverschleiß, Verschmutzung und korrekten Zündfunkenabstand. Typische Bereiche liegen zwischen 0,030 und 0,060 Zoll, es sei denn, der Hersteller gibt etwas anderes an; passen Sie sie an oder ersetzen Sie sie, um eine konsistente Zündung aufrechtzuerhalten. Verwenden Sie Anti-Seize auf den Gewinden und drehen Sie sie mit dem vorgeschriebenen Drehmoment an, um ein Festfressen beim späteren Entfernen zu vermeiden.
Berücksichtigen Sie verwandte Komponenten wie das Laufrad: eine beschädigte Einheit erhöht die Motortemperatur und steigt somit das Feuchtigkeitsrisiko an elektrischen Verbindungen. Überprüfen Sie bei jährlichen Kontrollen Dichtungen und Schläuche; ersetzen Sie diese bei Bedarf, um eine Überhitzung zu vermeiden, die die Lebensdauer verkürzt.
Salzwasserbeschichtung beschleunigt Korrosion an Kontakten, Anschlüssen und Zündkerzen; nach dem Bootfahren im Salzwasser mit Süßwasser abspülen und anschließend vollständig trocknen; Feuchtigkeit kontrollieren, um die Zuverlässigkeit zu erhalten. In den kalten Monaten sollte die Batterie an einem trockenen, temperierten Ort aufbewahrt werden; halten Sie sie aufgeladen, um Frostschäden zu vermeiden und die durchschnittliche Lebensdauer aufrechtzuerhalten.
Jährlicher Fokus auf Reinigung, Schmierung und sichere Befestigung schützt Komponenten, unterstützt die Leistung und erhält den Wiederverkaufswert. Regelmäßige Überprüfungen von Ladebereichen, Blei-Gesundheit und Betriebsbedingungen bestimmen die typische Lebensdauer von elektrischen Baugruppen und verlängern die Gesamtlebensdauer.
Vorbereitung für die Lagerung: Spülen, Trocknen und schützende Abdeckung
Führen Sie nach jeder Saltexposition sofort eine vollständige Spülung durch; schließen Sie einen Spülschlauch an den dafür vorgesehenen Anschluss an, laufen Sie mit Wasser unter Leerlauf bis zum klaren Austritt des Wassers und fahren Sie dann herunter. Die Quelle des Schutzes gegen innere Korrosion ist das konsequente Spülen; diese Gewohnheit spart kostspielige Reparaturen und reduziert die Rostbildung.
Trocknen ist genauso wichtig wie Reinigen. Öffnen Sie die Ablassstopfen, neigen Sie das Gerät, um Wasser aus den unteren Gehäusen abzulassen, und wischen Sie freiliegende Oberflächen mit einem fusselfreien Tuch ab. Verwenden Sie Druckluft an den Auslassöffnungen, um schwer zugängliche Stellen zu erreichen; lassen Sie die Außenseite trocken, um Feuchtigkeitsansammlungen zu vermeiden.
Schutzabdeckungsqualität ist wichtig. Wählen Sie einen atmungsaktiven Bezug, der UV-Strahlen blockiert, aber Feuchtigkeit ableitet, und stellen Sie sicher, dass er in Ihren Stauraum passt, ohne Schläuche oder Propeller zu behindern. Eine gut sitzende Hülle schützt die Ausrüstung vor Regen, Staub und versehentlichem Kontakt, während gleichzeitig der Luftstrom die Kondensation minimiert.
Monatliche Prüfungen und Fragen. Ob Sie in einem feuchten Klima oder einer trockenen Zone lagern, führen Sie eine einfache Routine durch: Überprüfen Sie Schläuche und Klemmen, stellen Sie sicher, dass Ablassstopfen vorhanden sind, und bestätigen Sie, dass der Propeller nicht verstopft oder falsch ausgerichtet ist. Ein schneller 60-Sekunden-Test der unter Leerlauf betriebenen Drehung hilft, ungewöhnliche Geräusche, Abgaslecks oder Vibrationen zu erkennen. Wenn ein Problem auftritt, konsultieren Sie Dienste oder Servicezentren; die Behebung innerhalb weniger Tage spart Zeit und schließt übermäßigen Verschleiß und stundenlangen Betrieb ohne Last aus.
Speichermedium und Gewohnheit. Halten Sie den Standort innerhalb eines kontrollierten Temperaturbereichs und einer kontrollierten Luftfeuchtigkeit; ein atmungsaktiver Unterschlupf hilft; schützt die Ausrüstung vor direkter Sonneneinstrahlung; verwenden Sie einen Luftentfeuchter in feuchten Kellern; gute Routinen, Liebe zur Ausrüstung und gleichbleibende Pflege erhalten die langfristige Leistung. Wenn Rost oder Korrosion auftritt, beheben Sie dies sofort; Nachlässigkeit ist der Feind ihrer Haltbarkeit und kann zu teuren Reparaturen führen.