

 Johnson Evinrude Carburetor Adjustment – Expert Guide by Joe Reeves">

Start with a precise baseline: back the idle screw out 1.25 turns from seated, then verify with the marine manual and confirm the ignition point. theeplaymaker notes that this move gives you a clean starting point, and they stay focused without distractions like foulsgums during the first test.
For the next step, gather tools and a screwdriver for delicate moves; inspect hoses, clamps, and the fuel line; ensure the path is clear through the intake and within the carburetor body. With the manual in hand, tune the pilot circuit for the motors to help boaters achieve reliability, by tiny moves on the idle screw until the engine should respond with a crisp surge when you move the throttle, avoiding a stumble that indicates a lean or rich mix.
During testing, wear eye protection and keep hands clear of moving parts; this gives you hope for a stable baseline, while the boat is secured and owners observing the ignition timing and the bump in RPM. If the engine responds inconsistently, move the idle setting in 1/8-turn increments and repeat until the rpm is steady across a few cycles, then start again to confirm stability.
Keep a plan for replacements handy, including new gaskets and diaphragms; if you must reassemble, document every point of contact so you can respond quickly if performance shifts again. After you finish, move through a full cooldown and start to verify constant operation within the safe load range. The goal is a steady idle, clean acceleration, and reliable startup with minimal tuning need in the future.
Tools and Safety Precautions for Carburetor Tuning on Johnson Evinrude Outboards
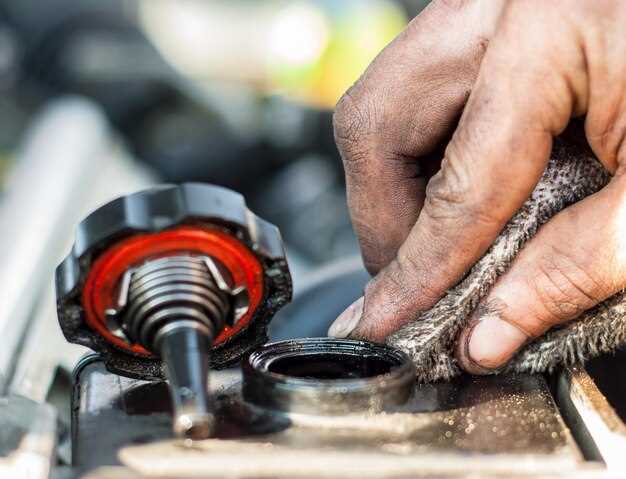
Isolate the fuel system, disconnect the ignition lead, and remove the cowling to access the carbs; ensure you have proper ventilation and a secure work surface before proceeding.
Tools and PPE: have a screwdriver, a small set of wrenches, needle-nose pliers, a clean rag, solvent, and a tray for retaining items; illuminate the face of each carb with a flashlight. When sourcing replacement gaskets, choose parts rated for your outboard model and verify the setting values from the applicationpdf.
Work in a well-ventilated area, keep flames away, and wear eye protection; never smoke near fuel, wipe spills immediately, and store fuel in approved containers; ensure distiller devices are powered off and placed away from the work zone.
Follow this procedure with going, front, center, and above references: inspect the throttle linkage, then use a screwdriver to adjust the front and center screws, turning in small increments; do not exceed the stop, and note each point of travel. These adjusting steps affect the line and the face of the carb flow, and you should repeat the sequence to confirm a steady response; if needed, go through the adjustments again until the setting stabilizes.
After the initial pass, run the engine on open water and check performance across going from idle to sspeed; observe smooth idle, throttle response, and acceleration; if leaning or rich, adjust in small increments and retrial; these iterations should be done regularly, they help lock in the proper setting and avoid chasing symptoms.
When finished, record the setting and the engine response in your notes; check above for any foulsgums and distiller-related residue, then store the tools in the retainer tray; keeping a clear log and the applicationpdf reference helps going forward, and the endstream of your data can be consulted again.
How to Identify the Correct Carburetor Model and Reference Screws
Identify the exact model from stamped markings and confirm with the manual and specs before sourcing replacements. Make sure the code matches the factory table to avoid issues later.
Model identification and markings
- Inspect the body for a stamped model code near the mounting flange; record the digits and suffix letters, then compare to the specs in the manual to ensure you have the correct carburetor family.
- Photograph the label area and note revision numbers; cross-check against the parts diagram in the specs to avoid mismatches.
- Look for subtle differences–the air horn shape, jet layout, and fuel passages indicate the exact family; if you see carbs or references to carbs on the plate, that hints at a specific line. If unsure, consult hettinger or theeplaymaker notes for issues and guidance.
Reference screws and first-fit checks
- Count the reference screws and note their positions; identify head type (slot, Phillips, Torx) and thread pitch to guide replacements and proper sourcing.
- Turn screws in little turns (1/8 to 1/4 turn); turning slowly helps you stay accurate and avoid stripping. If resistance increases, back off a bit and re-check alignment.
- Apply a thin smear of lube to the threads if they are stiff, then screw them in while keeping the unit level; after each adjustment, pause to observe the effect and verify the torque is not excessive.
- Lift the unit carefully during removal, keep the gaskets intact, and have a small container to keep fasteners from rolling away; after work, reassemble using proper procedure and verify you should have a clean reassembly.
- Test the setup with muffs and a controlled fuel supply; wait for the idle to stabilize, then check for issues; if anything looks off, source repairs or plan a rebuild with the appropriate replacements.
Step-by-Step Idle Speed and Air-Fuel Mixture Adjustment
Started and warmed, set idle speed to the target RPM within the safe range using the lever, and ensure the linkage is in the same position on all carbs; run the motors briefly to confirm response.
If idle stays high or hunts, move the lever slightly clockwise to increase idle, then test the response; when the engine wants more, repeat in small steps until the linkage moves properly.
To tune air-fuel mix, with the engine running and warmed, back off the idle-mixture screws on the carbs by a quarter-turn, then turn clockwise in 1/8-turn steps until the engine sounds clean. Do not skip this adjustment across each carb; ensure the settings are the same across all carbs.
Because foulsgums in the fuel path can cause rough runs, inspect carbs and replace worn parts; use fresh kits and clean components; this helps maintain proper settings and reduces issues.
With the idle fixed, run the engine under light load to confirm it respond to throttle movement and stays steady; listen for sounds that indicate smooth operation and no hesitation.
Record final numbers: idle speed target, screw positions, and linkage position; recruit a helper to verify by listening for smooth sounds and balanced operation.
Tools and Safety
Keep a clean work area and use a small screwdriver, tachometer, and replacement parts or kits as needed; follow service guidelines and safety precautions to prevent damage during adjustments.
Diagnosing Starting, Idle, and Acceleration Issues: Practical Fixes

Please start with fuel sourcing: drain the tank, refill with fresh fuel, and purge lines to remove varnish. On a boat, verify the pump output is steady; after refilling, bump the throttle slightly to confirm the engine responds and settles into a steady idle within a few seconds.
For hard starting or erratic idle, inspect the carb area: locate the needle behind the retainer and check that it sits correctly. If the seat is varnished, clean with appropriate cleaner and reseal. Make small adjustments: clockwise typically tightens the needle and leans the mix; test by starting, then observe the response and idle stability. Do not force changes; finish each check before moving on.
Idle tuning: set the front carb to a light idle, and synchronize all carbs in small increments. If the idle hangs or stalls slowly, loosen the idle stop and recheck the settings, keeping the engine at a fast idle for a few seconds to observe how it settles. Note the difference after each tweak and those changes; regular note-taking helps keep the boat performing consistently.
Acceleration checks: verify the throttle linkage is smooth and not binding; confirm the accelerator pump on the carb delivers a quick squirt when the throttle opens. If the response is slow, inspect the fuel path to the carbs, check for leaks around gaskets, and deal with any endstream debris that blocks the passages. Regularly checking vacuum leaks helps keep performance steady.
Longer-term fixes: if issues persist after cleaning and tuning, plan a carb rebuild or parts upgrade. Replace worn gaskets, the needle valve, and the retainer as needed; sourcing quality parts helps, and finishing the rebuild without rushing improves reliability. After completion, recheck the overall settings, run the engine in short cycles, and confirm the boat responds crisply at all throttle positions; waiting long for results is unnecessary.
Verification Tests After Tuning: Tachometer, Spark, and Fuel Delivery Checks
Do these checks immediately after tuning to confirm the unit runs correctly. Keep the engine clean, inspect linkage and lines, and log results for owners and those who will maintain the rig in the field. Startxref notes in your maintenance log for cross-reference as you proceed.
Tachometer verification: attach a reliable tachometer or use the built‑in gauge and verify rpm at idle and at wide‑open throttle (WOT). Target idle: about 750–900 rpm; WOT: roughly 4,800–5,600 rpm, depending on the model. If the needle doesn’t stay steady or drifts, turn idle screws and move the linkage until the line remains constant. Check for smooth, clean transitions when you move the throttle and listen for any sounds that indicate a lean or rich condition in the downdraft intake.
Spark checks: test one cylinder at a time with a tester or swap a plug boot to confirm consistent ignition across all cylinders. A strong blue spark, with no missing cycles, should appear within a couple of seconds per cylinder. If you hear misfires or see a dull yellow/orange arc, replace the offending coil or wires and recheck the grounds. Ensure plugs are gapped correctly and that the connection points are clean. These steps will improve reliability for boaters who rely on steady starts and smooth running.
Fuel‑delivery verification: measure pressure with an appropriate gauge, inspect fuel lines for cracks or soft spots, and check the metering needles for wear or varnish. Look for a clean, steady flow and a free‑flow path through the filter; in a downdraft setup, ensure the intake path isn’t restricted. If the pressure is low or fluctuates, replace the pump, clean or change the filter, and inspect fittings for leaks. The goal is a consistent line pressure and a free, uninterrupted feed to the metering section.
General notes: inspect the linkage located between the throttle and the pump or carburetor interface; if it’s stiff or loose, move or replace the linkage to restore correct travel. If you encounter any abnormal sounds, recheck mounting hardware and bushings, since a fixed alignment will keep the system running better and reduce wear. Those conducting checks should regularly repeat the tests after any adjustment to ensure the running condition remains stable, and they should consider a second pass after a short run to confirm consistency.
| Test | What to Inspect | Target / Indications | Actions if Not OK |
|---|---|---|---|
| Tachometer Verification | Idle and WOT rpm; linkage movement; idle screw alignment | Idle ≈ 750–900 rpm; WOT ≈ 4,800–5,600 rpm; smooth transition | Adjust idle screw or linkage; check for vacuum leaks; re‑test |
| Spark Check | Ignition on each cylinder; spark tester or plug boots; grounds | Strong blue spark; even across all cylinders; no missed cycles | Replace defective coil/wires; clean grounds; reseat plug boots |
| Fuel Delivery Check | Fuel pressure; fuel line condition; inline filter; needles | Stable pressure within spec; clean flow; needles seated | Replace clogged filter; inspect/replace lines; fix leaks; adjust/replace needles |
| System Integrity | Air path and linkage alignment; intake area (downdraft); mounting | No abnormal sounds; smooth idle; no binding or leaks | Move or replace faulty linkage; reseat components; re‑test |