

 Wie man ein Boot an einen Steg festmacht – Schritt-für-Schritt-Anleitungen zum Festmachen für sicheres Anlegen">

Hier ist eine konkrete Empfehlung: Sichern Sie zuerst die Bugleine, um ein Abdriften in die Pfähle zu verhindern. Beginnen Sie mit der Beurteilung von Wind- und Stromrichtung und wählen Sie dann Hauptleinen, die dieser Richtung und dem Abstand des Liegeplatzes entsprechen, wobei Sie den Vorgang einfach und wiederholbar halten.
Die meisten Schiffe an einem Kai verlassen sich auf einen vorbereiteten Bootsmann; in der Regel eine kurze Inspektion der Klampen und ein schichtweiser Ansatz, der die Last auf mehrere Leinen verteilt. Beziehen Sie sich auf die Hauptleinen, wenn der Bootsmann das Schiff positioniert, und behalten Sie gleichzeitig die Kontrolle, um übermäßige Bewegungen und Belastungen von Ausrüstung wie Pfählen und Fendern zu vermeiden.
Halten Sie beim Anlegen eine straffe Bugleine und eine lockere Heckleine, um den Druck auszugleichen, wenn sich die Strömungsverhältnisse ändern. Überprüfen Sie die Pfähle auf raue Kanten, suchen Sie nach Vorsprüngen und vermeiden Sie dann übermäßige Belastungen, indem Sie die Leinen in unterschiedlichen Höhen befestigen und Scheuerschutz verwenden. Überlasten Sie niemals die Beschläge und lassen Sie die Leinen niemals an scharfen Kanten scheuern.
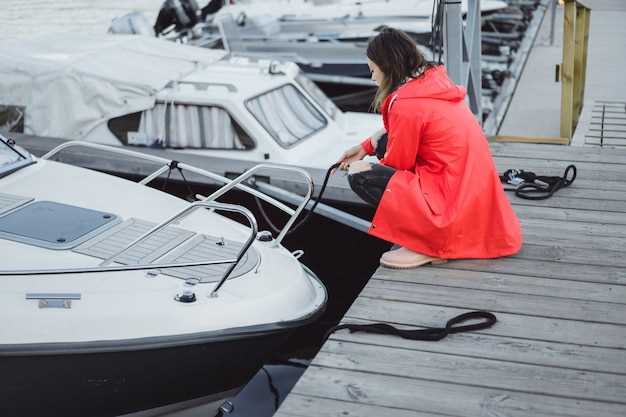
Im Hauptprozess ist die Leinenführung durch Klemmen reibungslos zu gestalten, um die lose Leine zu kontrollieren. Während sich das Boot setzt, die Leinen schrittweise anziehen, wobei übermäßige Spannung vermieden werden sollte, die von Fendern wegziehen oder sich auf Pfähle verlagern könnte. Hier ist eine kurze Checkliste, die Sie beim Anlegen verwenden können: vorbereitete Leinen, Befestigungen prüfen und bei Bedarf anpassen.
Achten Sie auf Wetter, bewegtes Wasser und die Anordnung der Liegeplätze; manche Liegeplätze haben Poller, die in Gruppen angeordnet sind. Das Hauptziel bleibt, alle Leinen so auszubalancieren, dass der Rumpf an der Kaimauer ausgerichtet bleibt, die Leinen nicht scheuern und die Belastung innerhalb der ausgelegten Grenzen bleibt. Dieser Ansatz hilft Ihnen, das Gleichgewicht zu finden, auch wenn Gezeitenverschiebungen die Ausrichtung erschweren.
Um den Prozess konsistent zu halten, protokollieren Sie lose Leinen in Schritten von jeweils einem Achtel Fuß und überprüfen Sie dann die Ausrichtung erneut mit dem Auge. Dieser Ansatz unterstützt den Bootsfahrer dabei, vorhersehbare Ergebnisse bei Anlegemanövern zu erzielen und reduziert die Wahrscheinlichkeit unerwarteter Verschiebungen, während er gleichzeitig angebrachte Beschläge vor übermäßigem Verschleiß schützt.
In der Praxis sollten Sie diese Verfahren bei der Vorbereitung, Inspektion und Ausführung von Leinen berücksichtigen. Durch die Einhaltung dieses Ansatzes gewinnt der Bootsfahrer Vertrauen beim Anlegen an einem Kai, während das Schiff gesichert und der Liegeplatz unbeschädigt bleibt.
Bootsanlegemeister: Wesentliche Grundlagen für sicheres Anlegen

Entscheiden Sie sich für Nylonleinen in der Länge von 20–25 Fuß, die für die meisten Liegeplätze geeignet sind; diese Wahl bietet zuverlässige Stärke, Elastizität und eine nachgiebige Fahrt, wenn der Wind sich dreht. Eine zusätzliche kürzere Leine von 12–15 Fuß ermöglicht schnelle Anpassungen, ohne alles neu bearbeiten zu müssen, und hält die Konfiguration flexibel, da sich die Bedingungen in diesem Moment ändern können. Wenn der Stauraum begrenzt ist, kaufen Sie ein kompaktes Set, das zwei 25 Fuß lange und eine 12 Fuß lange Leine enthält; wenn das Budget knapp ist, können gebrauchte Leinen als zuverlässige Backups dienen, solange sie keine übermäßige Abnutzung, Steifigkeit oder Verglasung aufweisen.
Die Kenntnis der Grundlagen hilft einem Bootsfahrer, alles mit Zuversicht zu erledigen. Im Folgenden finden Sie praktische Punkte, die Crews häufig bei der Auswahl von Typ, Länge und Anbringungsmethoden verwenden, einschließlich Antworten auf häufig gestellte Fragen zu Best Practices.
- Leinenauswahl und -prüfung: Wählen Sie Nylon als beste Option für Gewicht, Schwimmfähigkeit und elastische Rückfederung. Ein Durchmesser von 3/8 Zoll mit einer Länge von 20–25 Fuß ist weit verbreitet; halten Sie eine Ersatzlänge von 12–15 Fuß an Bord bereit. Achten Sie auf saubere Fasern, keine Glasierung und minimale Steifigkeit; gebrauchte Leinen müssen noch stark aussehen und etwas nachgeben.
- Anfahrtswinkel und Ausrichtung: Halten Sie beim Anfahren an den Pier den Winkel relativ zum Pfahl deutlich unter einem Viertelkreis. Dieser Winkel reduziert die Belastung der Beschläge und erleichtert das Festzurren ohne übermäßigen Zug an den Klampen.
- Sicherungsknoten an der Hardware: Verwenden Sie einen zuverlässigen Knoten an der Klampe mit zwei Wicklungen und einem Sicherungsabschluss, um ein Verrutschen zu verhindern. Diese Anordnung ist stark und einfach und minimiert das Risiko eines plötzlichen Lösens, wenn Wellen oder Kielwasser das Schiff seitwärts schieben.
- Festmachen und Lastmanagement: Nach dem Kontakt festziehen, bis Sie eine leichte, gleichmäßige Last spüren. Vermeiden Sie ein zu starkes Anziehen, da dies die Fähigkeit der Leine verringert, Stöße zu absorbieren; das Ziel ist eine ruhige, kontrollierte Haltung, die dennoch die Gezeitenbewegung zulässt.
- Abschließende Überprüfungen und Anpassungen: Testen Sie die Bewegung, indem Sie das Gewicht vorsichtig entlang des Leinenwegs verlagern und nach Reibungs- oder Scheuerstellen suchen. Stellen Sie sicher, dass die Stopper vorhanden sind, um Reibung an scharfen Kanten zu vermeiden, und prüfen Sie, ob die Position des Schwimmers die Leinen von Wasser und Beschlägen freihält.
- Best Practices empfehlen, so wenig Reibungspunkte wie möglich zu schaffen – Schutzschläuche oder Fender an Scheuerstellen werden empfohlen, und Stopper sollten unterhalb von Umlenkblöcken oder Beschlägen verwendet werden.
- Gängige Optionen für Festmacherleinen-Sets umfassen eine Mischung aus verschiedenen Nylonlängen und eine zusätzliche kurze Leine, um auf wechselnde Anlegebedingungen reagieren zu können, ohne hektisch nach Ausrüstung suchen zu müssen.
- Kenne deine Optionen: Kaufe nach Möglichkeit neue Ausrüstung, aber gebrauchte Leinen mit klarer Historie und ohne Glasur können gut als Backups funktionieren.
- Kenntnis der Gewichtsmerkmale hilft: Die Dehnung von Nylon dämpft Böen, der Auftrieb verbessert die Sichtbarkeit und das Bergen, und das gesamte Setup bleibt unter verschiedenen Wind- und Strömungsverhältnissen handhabbar.
Denken Sie nur daran, jede Verbindung zu überprüfen, bevor Sie den Liegeplatz verlassen, da ein einziger sich lösender Knoten zu einer plötzlichen Verlagerung führen kann. Hier ist eine kurze Zusammenfassung: Wählen Sie den Typ, der zur Schiffsgröße passt, die Länge, die ausreichend Reichweite bietet, und den Knoten, der unter Last sicher bleibt. Die beste Vorgehensweise sollte Ihnen sanfte Anpassungen, vorhersehbare Reaktionen und ein sicheres Anlegen ermöglichen – jedes Mal.
Bewertung des Docktyps und der Fenderplatzierung
Beginnen Sie mit einer praktischen Regel: Bestimmen Sie die Anlegeklasse – Schwimmsteg, fester Pier oder Holzkai – und passen Sie die Abdeckung der Fender sowie die Leinenführung an diese Form an. Diese Wahl, in Kombination mit dem Tidenhub und der Strömung, bestimmt, wo die Fender sitzen und wie die Leinen das Rumpf kreuzen, um die zentralen und seitlichen Kontaktzonen bei An- und Ablegemanövern zu schützen.
Häufige Fehler sind das Belassen von Lücken zwischen den Fendern, das Anhäufen von Fendern an einer Stelle oder das Verlassen auf eine einzelne Leine. Normalerweise bietet ein Abstand von drei Fingern über den Balken eine ausgewogene Schutzwirkung. Achten Sie bei der Annäherung darauf, dass die Leinen den Rumpf kreuzen, um die Last zwischen den Kontaktpunkten zu verteilen; manchmal verhindert eine schnelle Anpassung den Rumpfkontakt. Überprüfen Sie vor dem Abschluss die Positionen am Bug, in der Mitte und am Heck und passen Sie die Positionen gegebenenfalls an, um die seitlichen Fender an der Rumpfkontur auszurichten. Dadurch wird das Risiko von Schäden verringert, wenn Gezeitenänderungen zusätzliche Bewegungen verursachen.
| Liegeplatztyp | Fender Setup | Anmerkungen |
|---|---|---|
| Schwimmsteg | Zwei lange Fender mittschiffs, plus einen zusätzlichen in der Nähe des Bugs; versetzte Seitenfender zur Abdeckung von Backbord und Steuerbord; einen dritten Fender hinzufügen, wenn die Rumpfkrümmung dies erfordert | Der Schutz über den Träger passt sich an die wechselnde Höhe während der Gezeiten an; die Leinen sollten sich kreuzen, um den Aufprall zu verteilen. |
| Fest gemauerter Pfeiler | Fender an Bug, Mittschiffs und Heck; ein kleinerer Fender an jedem Überhang, um Lücken zu füllen | Die Rand-zu-Mitte-Abdeckung minimiert den Verschleiß; Spiel in den Leinen absorbiert plötzliche Bewegungen bei schnellen Annäherungen |
| Holzkai | Mehrere kleine Fender entlang der Mittellinie; zusätzliche Fender in der Nähe von Kurven; Höhen an der Wasserlinie ausrichten. | Unregelmäßige Oberflächen erfordern eine adaptive Platzierung; Querverstrebungen über die gesamte Rumpflänge beibehalten. |
Auswahl und Vorbereitung von Festmacherleinen: Material, Länge und Sicherheit
Festmacherleinen aus geflochtenem Nylon, mit einem Durchmesser von 1/2 bis 3/4 Zoll und einer Länge von 10 bis 12 Fuß, sind Ihre spezielle Wahl, um eine gleichmäßige Handhabung zu ermöglichen; typischerweise bleiben sie überschaubar und bieten gleichzeitig genügend Reichweite, wodurch sie zum Standard im Bootsbetrieb werden.
jede Leine sorgfältig prüfen: auf verbleibende Ausfransungen, verworrene Abschnitte oder weiche Stellen achten; wenn Probleme erkennbar sind, diese lieber ersetzen, anstatt einen Ausfall zu riskieren.
Der Schutz des Kerns vor Sonne und Abrieb ist essentiell; verwenden Sie UV-Schläuche oder -Schutzvorrichtungen, wo die Leine über Beschläge verläuft, und achten Sie auf Wellen von nahegelegenen Wasserfahrzeugen; ordnungsgemäß umwickelte Enden an Verschleißzonen reduzieren den Abrieb und sorgen für mehr Sicherheit beim Bootfahren.
Hier ist eine kurze Anleitung zum Festmachen: Zentrieren Sie die Leine auf der Klampe, wickeln Sie sie über die Basis zu jeder Seite, befestigen Sie das Ende und sichern Sie es mit einem halben Schlag; ziehen Sie sie vorsichtig fest und stellen Sie sicher, dass das Ende befestigt ist und die Einrichtung unter Last sicher bleibt.
Sobald Sie befestigt haben, überprüfen Sie das verbleibende Spiel und passen Sie den Winkel an; achten Sie darauf, dass sich die Leine nicht verheddert und dass jeder Strang sauber sitzt, wobei Sie Kreuzwicklungen vermeiden.
Plane deinen Ansatz: Geschwindigkeit, Position und Timing
Steuere mit einer konstanten Geschwindigkeit von 3–4 Knoten vom offenen Wasser aus an und verlangsame dann innerhalb von 20–30 m vor dem Rand schnell auf Leerlaufdrehzahl. Halte die Heckwelle klein, indem du abrupte Wendungen vermeidest und einen festen Kurs beibehältst, der den Hauptrumpf auf die Einfahrt des Liegeplatzes ausrichtet. Dies minimiert die Belastung deiner Taue und reduziert Stress, wodurch du mehr Zeit zum Reagieren hast. Tipps: Bleibe ruhig, halte deine Hände ruhig und kommuniziere klar. Da sich die Bedingungen ändern können, passe deinen Plan ohne Panik an. Wenn sich die Bedingungen verschlechtern, kannst du das selbst bewältigen.
Positionieren Sie sich so, dass Ihre Rumpfachse quer zur Anfahrachse liegt, mit einem flachen Winkel (ca. 10–15 Grad) zur Pier. Der gleiche Winkel reduziert Seitenkräfte und verhindert, dass Fender die Kante berühren. Verwenden Sie eine Vier-Leinen-Verankerung, um die Last über Bug und Heck zu verteilen, und lassen Sie Spielraum für Anpassungen, falls eine Böe Sie versetzt. Da sich Winde ändern, sollte das Setup schnelle Anpassungen ermöglichen und Spielraum für unterschiedliche Bedingungen schaffen.
Wenn Sie sich innerhalb einer Kantenlänge befinden, stellen Sie eine Leinenverbindung mit der Hauptleine her und setzen Sie dann eine feste Stoppfolge ein, um lose Leine zu vermeiden. Überstürzen Sie nichts: Halten Sie Ihren Geist in einem gleichmäßigen, gemessenen Rhythmus, der die Spannung auf die Mannschaft minimiert und die Kontrolle behält. Dies mit einer festen Basis zu tun, hilft Ihnen, den Abstand zu halten und eine Querbelastung zu verhindern.
Wenn Sie die Kontrolle verlieren, setzen Sie einen zusätzlichen Zug ein, um das Heck zu stabilisieren und die Drift über die Fläche zu verringern. Sobald die ersten Leinen halten, bleiben die gesicherten Leinen unter Spannung, während Sie die restlichen Leinen anpassen, um einen plötzlichen Ruck oder Positionsverlust zu vermeiden. Achten Sie auf die Wellen und bewahren Sie Ruhe, während Sie sich auf den endgültigen Halt vorbereiten.
Verifizieren Sie nach der Annäherung, dass alle Taue unterhalb der Wasserlinie frei sind, die Belastung innerhalb der Grenzen bleibt und Sie an jedem Ende einen sicheren Halt haben. Dies bietet Ihnen eine bessere Ausgangsbasis für die nächsten Züge und hält Länge und Spreizung gleichmäßig über den Pier verteilt. Da sich die Dinge schnell ändern können, beobachten Sie, wo Sie die Spannung abbauen und wo Sie die Länge entlang der Leinen verkürzen müssen, um sich an die unterschiedlichen Bedingungen anzupassen.
Festmachen: Bug-, Heck- und Springleinen ausbringen
Befestigen Sie die Bugleine mit einem einfachen Halbschlag an der vorderen Klampe, wobei Nylon aufgrund seiner minimalen Dehnung bevorzugt wird, und folgen Sie einer gängigen Methode, die alles straff hält, wenn die Strömung sich ändert.
Führen Sie die Achterleine zu einer Heckklampe auf der gegenüberliegenden Seite und wiederholen Sie denselben Knoten mit Nylon, wobei Sie einen kleinen Spielraum lassen, um Kielwasser und Schwell aufzunehmen und eine Überlastung der Klampe zu vermeiden; dieser Ansatz ermöglicht eine gewisse Bewegung bei geringem Risiko.
Installieren Sie zwei Springleinen: eine quer von vorne zu einem Punkt auf dem Pier längsseits und eine weitere vom Heck zu einem parallelen Punkt; dies ergibt insgesamt vier Leinen, die die Vorwärts- und Querdrift begrenzen und gleichzeitig die Kontrolle längsseits ermöglichen.
Knoten prüfen: Jeden Stich mit einem letzten, festen Zug versehen, überschüssiges Seil abschneiden und bestätigen, dass Sie sich selbst mit einem leichten Zug entlang des Docks testen können, um die Last zu spüren; diese gängige, einfache Methode minimiert Risiken und wird von vielen Skippern angewendet.
Wenn sich die Bedingungen ändern – Wind dreht, Strömung stärker wird oder Docks belebter werden –, passen Sie die längeren Leinen entsprechend an. Dies zusammen mit dem von Bedienern häufig verwendeten Vier-Punkt-Setup hält das Schiff ausgerichtet, während andere Leinen helfen können, mit den wenigsten Handgriffen und der Gewissheit, dass der verwendete Knotentyp zuverlässig bleibt.
Sobald Sie sich sicher fühlen, optimieren Sie die Einrichtung für Ihren Liegeplatz, aber sichern Sie vier Hauptpunkte – Bug, Heck und die beiden Springleinen – mit einem Knoten, dem Sie vertrauen, und denken Sie daran, sich zu fragen, ob mehr Kontrolle durch andere Leinen erforderlich ist; passen Sie sich bei Bedarf der Situation an, während Sie Docks und andere Bediener im Auge behalten.
Sich an die Bedingungen anpassen: Wind, Strömung und Gezeitenänderungen
Beginnen Sie mit einem zustandsbewussten Plan: Beurteilen Sie Windrichtung, -geschwindigkeit, Strömung und Gezeitenstand, bevor Sie sich nähern. Die Seiten des Rumpfes werden die größte Bewegung erfahren, normalerweise der Bug zum Wind und das Heck zur Strömung, damit Sie sich dessen bewusst sind und vier Festmacherleinen setzen können, um die Last gleichmäßig zu verteilen. Stellen Sie sicher, dass jede Leine parallel zur Bootsachse verläuft, und beziehen Sie sich beim Anziehen auf Ihren Plan, um ein Reißen zu vermeiden.
Windmanagement: Bei Böen über 15–20 Knoten das Boot rechtwinklig zum Wind ausrichten, um das Schwingen zu minimieren. Verwenden Sie zwei Vorwärts- und zwei Achterleinen, um den Rumpf ausgerichtet zu halten; die Leinen sauber aufwickeln, sodass keine um Beschläge gewickelt sind und die Bewegung eher gedämpft als verstärkt wird. Erhöhen Sie den Spielraum leicht, um Böen zu absorbieren, und ziehen Sie sie dann schrittweise wieder fest. Beachten Sie, dass plötzliche Böen die Seiten verschieben können; wenn der Wind dreht, beziehen Sie sich auf Ihren Plan und passen Sie ihn an.
Aktuelle Änderungen: Wenn sich die Strömung verstärkt, richten Sie sich nach der Strömung aus, um seitliches Abdriften zu verringern. Wenn die Strömung bei mittlerer Tide zunimmt, lockern Sie die Vorleinen leicht, damit der Bug nicht zum Pier treibt; ziehen Sie die Achterleinen an, um einen stabilen Winkel parallel zur Wand beizubehalten. Achten Sie darauf, dass die Spannung jeder Leine ausgewogen ist, und vermeiden Sie es, eine einzelne Leine zu stark anzuziehen, da dies zu Hängenbleiben oder übermäßigem Verschleiß führen kann.
Gezeitenwechsel: Der Tidenhub kann mehrere Fuß betragen; planen Sie, vor Hochwasser und nach Niedrigwasser erneut zu prüfen. Bringen Sie eine Springleine vom Bug zu einem sicheren Punkt an der Struktur an, um vertikale Schwingungen zu begrenzen; stellen Sie sicher, dass das Anlegen innerhalb eines sicheren Bereichs bleibt, wenn sich die Gezeiten bewegen. Wenn die Flut sinkt, senkt sich der Rumpf ab; achten Sie auf ausreichend Spiel, damit die Leine nicht an Pfählen reibt, und verwenden Sie Fender, um das Eigentum zu schützen. Wenn die Flut steigt, verkürzen Sie die Leine leicht, um übermäßige Bewegungen zu verhindern; prüfen Sie immer, ob sich die Leine nicht um etwas Scharfes gewickelt hat.
Zu vermeidende Fehler: Wind oder Strömung zu unterschätzen, die Vorhersage zu vernachlässigen oder Leinen mit zu wenig Spielraum zu belegen, führt zum Schwojen und möglichen Schäden. Auch das Verkeilen von Leinen an der falschen Stelle oder das Versäumnis, eine gleichmäßige Spannung aufrechtzuerhalten, verursacht Missgeschicke. Wenn Sie Abnutzung an einer Leine feststellen, ersetzen Sie sie und verlegen Sie sie neu; Reißen beginnt oft dort, wo Scheuerstellen versteckt sind.
Kurze Erinnerungen: Haltet Festmacherleinen bereit, die in gutem Zustand sind; überprüft den Verlauf jeder Leine, haltet sie so parallel wie möglich zum Rumpf und achtet auf die Bewegung über jedes Quartier. Beachtet, dass größere Boote mehr Aufmerksamkeit auf die Leinenführung benötigen; ignoriert auch niemals geänderte Vorhersagen; ihr könnt Anpassungen im laufenden Betrieb vornehmen. Der Bootsfahrer, der aufmerksam bleibt, minimiert Risiken und reduziert das Risiko von Sachschäden, und das Ergebnis ist eine stabile Schwimmfähigkeit auch bei wechselnden Bedingungen.