

 ADRIA Yacht General Arrangement Plans – Abeking Rasmussen">
Recommendation: Use the ADRIA Yacht General Arrangement Plans as the baseline for your Abeking Rasmussen project to secure consistent geometry and clear ownership of critical spaces. Start with a solid GA to align the master suite, flat deck areas, and sides before approaching yards, suppliers, or clients. This approach helps you make informed decisions early.
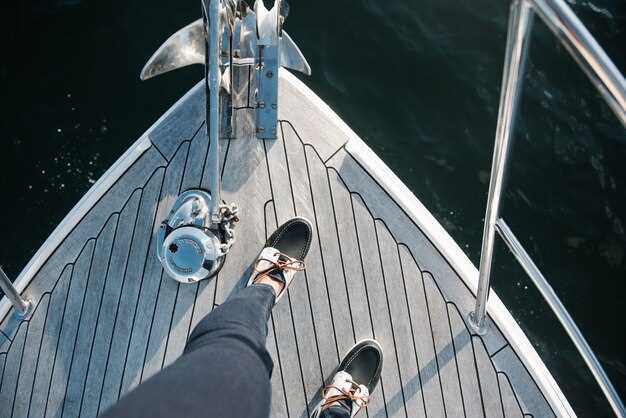
With the plan in hand, map client needs by marking the areas that matter most: a flat deck, hinged panels for accessible storage, and a reliable handle for quick access to the machinery spaces. Ensure the focus remains on safety and comfort as you define passage between sides and living zones, so the first impression at sea is calm and controlled.
In technical terms, audit the propulsion and systems layout against the GA. Specify a yanmar engine package and a matching pivot for the drive line, ensuring the owned equipment and the manufactured components integrate cleanly. Plan space for a master switchboard, robust harken hardware on the deck, and spare capacity to add a box cooler or a small bike locker if you want crew mobility on long passages.
For ownership and process, align the GA with client expectations and the business logic used by Abeking Rasmussen. Clearly assign responsibility for modifications, keep the schaddelees references in the specification for interface hardware, and document the responsibilities of the clients versus the yard team. This clarity helps you manage changes without disrupting schedules or cost baselines. This approach keeps the project going smoothly.
Finally, plan for deployment: confirm the GA sides align with the hull shape, preserve a very smooth flow from the master suite to exterior spaces, and keep the deck areas accessible for maintenance. Focus on a practical and repeatable workflow so the project can scale with ownership changes and new hardware like harken hardware or yanmar-based systems in the future.
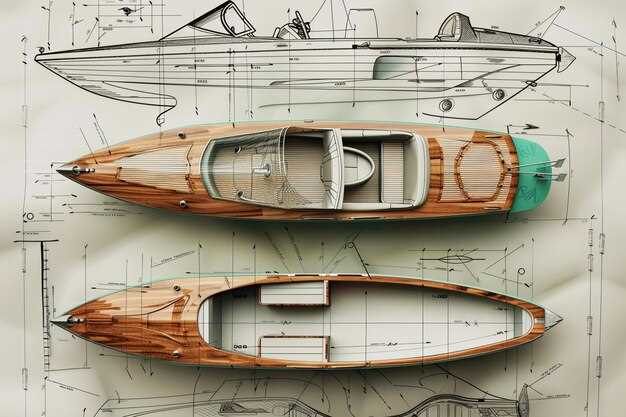
GA Plan Overview for Abeking Rasmussen Restorations
Begin with a permanent hull-axis plan that preserves the original lines while enabling a modern yanmar installation and robust winches. Keep the rudder and taffrail geometry intact and ensure access space beneath the deck for maintenance by a qualified tech.
- Scope and preservation: Preserve hull profile and deck contours, including the taffrail and rudder stock, while relocating electrical and mechanical gear to spaces beneath the deck. Foredeck features a permanent windlass and a set of winches for anchor and mooring tasks. The approach supports long-range operations without altering the external silhouette.
- Propulsion and power: Install a compact yanmar propulsion unit with a matched genset and a compact battery system. Align the shaft and mount with vibration isolation; plan cooling systems and exhaust routing to minimize noise at the helm. Document mass in tons and ensure trimming keeps stability margins comfortable during open-water passages.
- Deck equipment and handling: Place winches in practical positions for shifting sails or gear from one or two crew members; ensure the taffrail remains a visual reference and the helm area has accessible radio and navigation gear. Use corrosion-resistant fittings and modular lines for quick servicing.
- Electrical and controls: Route the main electrical bus to a weatherproof console near the helm; include lighting, pumps, bilge checks, and voice/radio communications. Provide simple alarms and a manual override for critical systems.
- Weight, stability, and material choices: Track weight distribution by zones, with emphasis on ballast placement and fuel storage. Use high-quality alloys and composite panels to reduce weight while maintaining strength, and verify the plan with a dedicated stability check to support offshore routes in diverse seas.
- Cruising plans and regions: The GA supports versatile itineraries through protected waters and open seas, with materials suitable for operations within a range of climates. Plan for routine maintenance cycles that fit typical yard slots at major shipyards in Europe and North America.
GA Plan Scope: Aligning Restoration Vision with Vessel Architecture
Recommendation: Define a single restoration target that ties to the main hull geometry and deck framework, then build a criteria-driven GA task map linking each element to the vessel’s architecture, ensuring your plan covers the entire structure.
Map the scope through an extensive review of the GA and structural layout. What to examine: alignment of the stemhead and rudder through the main deck, how interior spaces read against natural lines of the hull, and how finish details reflect the classique heritage while accommodating new systems. For the purchaser in kitts or elsewhere, the search should be thorough, time-consuming; once you found reliable references in sangermani portfolios and family-layout studies, you can harmonize them with the owner’s wishes and avenir-ready safety margins.
Develop an actionable sequence: assign GA items to zones, specify the required parts and component fit, and define circuit routing and inverter placement early. Verify that the main structural lines, stemhead, and rudder geometry allow service access without compromising strength or esthetics. Document finish textures and coatings to match the original character while meeting modern durability.
Going forward, maintain a living checklist that ties each change to the original intent, so the GA stays coherent as the project evolves. Still, the core is compatibility: the solution must integrate with sangermani’s fabrication approach and with the purchaser’s criteria, while preserving a natural appearance and a longer service life that respects the avenir mindset.
Finalize documentation for finish, parts, circuit routing, and inverter location; provide clear schematics for the purchaser and Sangermani team; align with the Abeking Rasmussen GA plan and the kitts venture. This yields a robust, ready-to-apply solution for long-term value and faithful adherence to the vessel’s classical lines.
Hull Geometry, Sections, Stations, and Weight Distribution in GA Drawings
Fix misalignments between hull sections and the GA station grid before running any weight studies; ensure the corrected geometry is fully displayed in the next revision and that the axes align with the keel and waterlines.
GA drawings show sections at fixed intervals; verify shapes at STA 0, STA 5, STA 10, and STA 15 align with the lines, and for antigua builds cross-check against the yard’s data. If the hull actually differs, adjust the stations accordingly and note the changes in the works log.
Weight distribution starts with a per-station budget: allocate weights by parts and equipment, then compute the longitudinal moment from fuel, water, stores, and systems. German engineering logic favors conservative limits–keep the center of gravity near midships, typically within 0.4–0.6 m of the centerline for the vessel size you model. Believed best practice is to model these values on the rule sheet before proceeding to a full stability check.
Practical steps include adding a per-station table to the GA with fields for berths, companionway loads, guest cabins, and stores; mark the bh15 equipment entries and specify lamps and covering loads for the deck and overlaying structures. This approach keeps the weight budget transparent and ready for review by the office and the yachtsman; William, the draftsman, can display the updates clearly for the crew to operate.
When the lines trace back to lehman or sangermani works, compare the section shapes with their documented styles and with german practice, noting any overhauled frames or spars. Believed deviations should be flagged, and the corresponding weight implications documented in the margins so the crew can adjust as needed without affecting core geometry.
Finally, run a search of the GA for discrepancies between displayed numbers and the vessel’s actual parts list; present a concise validation report to the office and the guest crew. The goal is to show the hull geometry, stationing, and weight distribution together, so the best decisions for trim, stability, and performance can be made before the yacht enters service. The display should be ready for the yachtsman’s review and easy to reproduce in future revisions.
Systems Layout: Electrical, Plumbing, HVAC, and Mechanical Routing
Route the electrical backbone along the western plinths from the main switchboard to subpanels and use a single, slotted trunking system with clearly labeled circuits for quick commissioning by the purchaser under contract. Keep critical feeds (diesel genset, navigation gear, and essential lighting) on dedicated breakers, and locate the main distribution near the bridge access for easy service at year-end checks.
Group navigation and communication electronics with a separate 12V DC bus, and power raymarine displays from a redundant 24V supply that is fused at the point of entry. Place a spare display on the crew side, because clarity at the helm simplifies routine checks and improves safety. Use white cable jackets for interior runs to reduce heat build-up and improve readability during maintenance, while keeping all runs away from high-heat engine areas to limit thermal impact on insulation.
Plumbing routes stay close to the waterline where practical to minimize vertical runs, with valves and shutoffs at each major section for quick isolation. Use larger-diameter lines for the potable system to prevent flow restrictions, and install separate lines for bilge and wash basins to reduce cross-contamination. The potable tanks total 1200 litres, with a primary pump delivering 25 mm mains and 12 mm branch lines to heads, galley, and crew areas. Greywater and blackwater lines route through dedicated chases to a tanks and treatment area, while hatch access provides easy service points for cleaning and inspection.
Hatches along the locker deck provide clean access to ballast and mechanical rooms without disturbing living spaces. All plumbing runs incorporate anti-siphon loops and air gaps at fixtures, because maintaining water quality is a priority for the purchaser. Use corrosion-resistant fittings in hot areas and ensure that all pipework in the engine room remains isolated from vibration-prone zones by mounting on rubber plinths or anti-vibration mounts. The basin and galley sinks connect to the same supply, with a vented waste line to prevent backflow and moisture buildup in the bilge area.
HVAC routing emphasizes quiet operation and flexible zoning. Ducts run along hull frames in dedicated chases, kept above floor level to preserve headroom and prevent collision with electrical trays. Insulate ducts with a white, high-thermal-resistance layer to minimize heat transfer and moisture condensation. The conditioned air serves cabins, saloon, and crew areas, with strategically placed diffusers to maintain a comfortable year-round environment in small spaces. All control panels feature remote sensing for accurate temperature and airflow, and spare ports are included for future climate control enhancements.
Mechanical routing centers on the engine room and auxiliary compartments. Route diesel fuel lines with double-wall protection in risk areas and install robust strain relief at every bend. Day tanks amount to about 800 litres each, and the supply lines to pumps, purifiers, and separators are sized to maintain steady pressure at peak loads. Use dedicated clean water and fuel chases to avoid cross-contamination, and mount critical equipment on solid plinths to dampen vibration, which helps extend component life and reduces noticeable noise in the main living areas. For the purchaser, this approach demonstrates a well-planned system that aligns with the contract requirements and supports long-term reliability.
| Zone | Routing Principle | Key Components | Anmerkungen |
|---|---|---|---|
| Western plinths and engine room trunking; single trunk from main panel | Main switchboard, subpanels, cable trays, 12V and 24V buses, raymarine power feeds | Label circuits; separate feeders for critical systems; spare display at purchaser’s area | |
| Bridge to helm and cabins; isolated from high-load gear | raymarine displays, radar, VHF, autopilot, lighting circuits | Powered from redundant feeds; white cables where visible; protected by dedicated glands | |
| Waterline routing to heads, galley, and crew areas | Potable tanks (total ~1200 litres), pump, 25 mm mains, 12 mm branches | Anti-siphon, vented lines, separate greywater/blackwater paths | |
| Dedicated chases to treatment area | Waste lines, valves, greywater tank, blackwater tank | Access hatches for service; robust seals at hull penetrations | |
| Chased along hull frames; ducts above deck level where possible | Air handling units, diffusers, insulated ducts | Sound insulation; quiet operation in guest areas; future expansion ports | |
| Engine room and day tanks; separate fuel lines | Diesel lines, day tanks (~800 litres each), pumps, filters | Access via hatches; anti-vibration mounting; clear labeling |
Deck and Interior Layouts: Equipment Footprint, Clearances, and Access
Focus on a practical footprint: position the windlass, motor, and their fastenings along the lower-right foredeck zone within a registered footprint that leaves 1.0 m of clear passage forward of the hatch and 0.8 m on either side for operation and recoil of lines.
Uprights and beams define safe zones; keep a flat deck near the cockpit to minimize trip risks and support crew during maneuvers. Maintain at least 0.75 m around the t-boom and spars to accommodate long races and smooth handling.
Rudder access remains essential: ensure a direct path along the sides to reach the rudder post for inspection and adjustments, with 0.6 m clearance on the outer side and similar room on the inner side to avoid interference with grating or lockers.
Interior layout prioritizes flow: settees along the main salon allow comfortable seating while preserving a clear aisle to the companionway. The refitted plan integrates a Doyle mainsail strategy and a sangermani hull concept, with registered access to critical systems and a straightforward route to the nav station.
Equipment footprint on deck includes clear zones for hatches, windlass, cleats, and deck fittings. Install robust fastenings into beams and hull, and keep the spinnaker gear–bag, sheets, and pole–within the sides without constraining the centerline. Plan for ample space around the sails and the t-boom to facilitate quick adjustments during races.
Maintenance and access are built in: route the motor and service lines under removable floor panels, with installed access hatches positioned for minimal disruption in operation. Ensure the path between living spaces, the cockpit, and the engine bay remains unobstructed, allowing long periods at sea without service delays.
Safety-minded details include handrails along uprights, clear sightlines from the cockpit to all major deck zones, and straightforward access to windlass and chain lockers. This approach preserves crew skills, supports refits, and keeps the vessel ready for demanding offshore passages.
Documentation and Change Control: Approvals, As-Built Updates, and Traceability
Implement a formal change-control workflow with a three-tier approvals chain and a single source of truth for all documentation. Lock the baseline GA drawings after approvals and require an as-built package reflecting actual layout, offsets, and equipment placements on all vessels.
Set approvals in sequence: design authority, safety/regulatory owner, and shipyard or vendor representative. Use a signed electronic form and attach relevant history entries from the pentek data logs, battery tests, and sale records to confirm provenance.
For as-built updates, after construction and fit-out, document actual basin, layout, level, and mounting points; update CAD/BIM models; capture replacement and coping changes; attach photographs and notes to them-. Keep the file naming consistent (vessel name, year, and revision).
Ensure traceability by linking every change to a unique issue number, vendor reference, and manufactured component; maintain a chain connecting design, fabrication, and installation across vessels such as lanzarotte and kambala. Track tonnes, flat packages, and whether items are manufactured on-site or supplied as off-the-shelf.
Data governance requires a central repository to store approvals, change logs, drawings, and as-built photos. Enforce revision levels, access controls, and a robust search by year, vessel, or sale to locate every item quickly.
Vendor and parts handling: record origin for each part, note vendors, and track misc items and small components through the chain; classify by type, including boards, ford components, batteries, and fittings.
Plan quarterly audits of the history log, verify traceability, and close gaps within two weeks of discovery; use metrics to drive improvement and avoid rework for replacement parts and basins.