

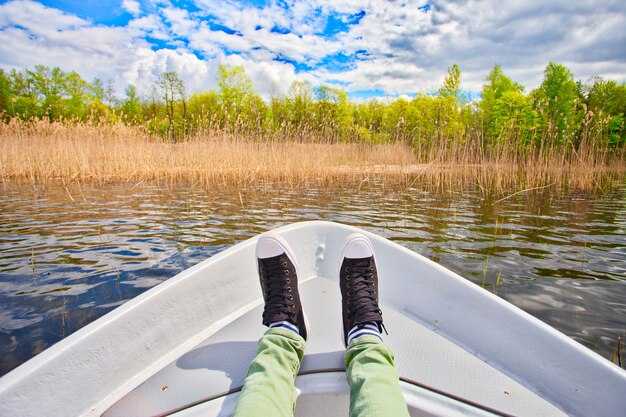
 Shallow Water Boats – 7 Essential Tips for Safe Boating in Shallow Water">

Step 1: Při přibližování se k zónám prozkoumejte hloubku a strukturu dna, ve kterých se nachází nízká hloubka; všímejte si písečných lavic a bahnitých kapes; otestujte kýl pomalým driftem a upravte rychlost; jsou bezpečnější, když je náklad vyvážený a vyhnete se náhlému naklonění poblíž ústí řeky.
Step 2: Distribuujte načíst rovnoměrně podél osa; vyhněte se hromadění těžkého vybavení na jedné straně; nevyvážená váha zvyšuje riziko převrácení při setkání s vlnkami, bočním větrem nebo stínem vzdálených věží podél pobřeží, nicméně princip zůstává stejný.
Step 3: Udržujte minimální pohon v úzkých místech; pokud se trup dotkne dna, pomalu couvejte; krátké zadrhnutí může vést k potopení nebo tvrdému nárazu; udržujte volnoběh, když jste pár metrů od břehu, abyste byli připraveni float, a s twin outboards na volnoběh sotva udržíte kontrolu.
Krok 4: V rybářských sekcích bezpečně uložte návnady a náčiní; při spouštění vlasců držte vlasec pod okraje lodi, abyste zabránili jeho zachycení; pokud si vybavení pronajímáte, ověřte si vztlak a délku vlasce; parmice a jiné návnady by měly být uchovávány v uzavřené nádobě, aby se udržely things organizované a připravené k použití.
Step 5: Pokud máte v úmyslu držet se spíše středu trasy, vyhýbejte se překážkám podél okraje; pokud se zvedá břeh, postupně se od něj odklánějte a dávejte pozor na skryté kameny nebo ponořené klády; works pravidelných kontrol vám pomůže vyhnout se tomu, abyste se stali ztracený a zůstaň away od nebezpečí.
Step 6: Připravte si bezpečnostní vybavení, zkontrolujte plovací zařízení a rozsah rádia; pokud si plavidlo pronajímáte, prohlédněte si trup a kotviště a stanovte plán s partnerem pro případ změny podmínek; said postupy zklidňují vaši posádku, když se podmínky mění a vy se posouváte směrem k hlubším místům v blízkosti věž along the coast.
Step 7: Pokud uvíznete na písečné lavici, zachovejte klid; držte cestující blízko středové osy; zhodnoťte náklad a palivo; vyšlete signál o pomoc, udržujte suchou strojovnu a naplánujte si kontrolovaný návrat, až to příliv a hloubka dovolí; toto case prokazuje, proč jsou rutinní kontroly a kontrolní seznam před startem offer větší šance na bezpečnou plavbu zpět, i když jste míle od domova a vidíte jen vlny kolem trupu.
Plavidla pro mělké vody: 7 tipů pro bezpečnou plavbu v mělkých vodách; Co dělat při plavbě v mělkých oblastech
Tip 1: Před vstupem do oblastí s malou hloubkou si vždy ověřte hloubku. Použijte několik map, přenosný hloubkoměr a pokud možno proveďte křížovou kontrolu s místními. Pokud je naměřená clearance malá, najděte si jinou trasu; upravte podle toho své plány a použijte rádio k potvrzení podmínek. Tento přístup snižuje riziko najetí na mělčinu a poškození.
Tip 2: Naplánujte si plavbu s ohledem na mapovaná nebezpečí. Pokud je kanál úzký, hledejte větší alternativu nebo okrajové čáry, které udrží trup v bezpečí. Seřaďte možnosti podle bezpečnostní rezervy a mějte připraveno několik záložních plánů pro případ, že se změní vítr nebo proudy. Během navigace dbejte na místa, před kterými místní varují, a upravte svou trasu.
Tip 3: Zpomalte, abyste minimalizovali škody a udrželi vlny malé; ustálené tempo vám pomůže spatřit ponořená nebezpečí dříve, než se s nimi setkáte. Vyhýbejte se sekání skrz porosty plevele a pařezy a minimalizujte stříkání, které by mohlo zakrýt překážky. Zpětný tah používejte střídmě a zůstaňte ve statickém, kontrolovaném pohybu, když jste blízko dna, abyste zabránili zachycení.
Tip 4: Vyvažte náklad, aby nedošlo k naklánění. Těžší předměty umístěte dozadu a udržujte nízkou hmotnost, abyste zlepšili stabilitu v nerovných úsecích. Pokud si všimnete náklonu, postupně vyvažujte a používejte citlivé řízení, abyste propluli obtížnými zónami bez prudkých manévrů.
Tip 5: Při lovu blízko dna používejte jemnou techniku a vybírejte nástrahy, které fungují v mělkých kapsách – raci nebo langusty mohou přilákat záběry na mnoha místech. Prozkoumejte okraje travin, abyste našli bezpečnější průjezdy, a přibližujte se opatrnými, pomalými tahy, abyste se vyhnuli zamotání nebo vyplašení ryb.
Tip 6: V případě potíží zachovejte klid a jasně komunikujte. Použijte rádio k přivolání pomoci, popište navštívená místa a současnou hloubku. Záchranáři vás navedou k bezpečnému východu a mohou navrhnout jiný postup, jak se vyhnout nebezpečí. Mějte připravené signalizační zařízení a v případě potřeby je použijte.
Tip 7: Po každém týdnu používání zkontrolujte problémy a aktualizujte své grafy. Poznamenejte si zmapované lokace, kterým se vyhýbejte, a sdílejte zjištění s místními a dalšími posádkami. Provádějte pravidelnou kontrolu vybavení, paliva a bezpečnostních prvků, abyste snížili riziko a neprodleně uklidili jakékoli ztracené náčiní nebo vybavení.
Praktické pokyny pro navigaci v mělkých oblastech
Před odjezdem zkontrolujte hloubkové mapy, abyste předešli uvíznutí na mělčině; porovnejte plánovanou trasu s okolními porosty trav a kanály; ověřte, zda se tyto značky shodují s indikátory vodorysky, a ujistěte se, že jsou cestující před zahájením plavby poučeni.
Vybírejte trasy s většími rezervami a provádějte měření hloubek na více místech podél obvodu; případně upravte kurz o malé odchylky a znovu zkontrolujte údaje; zahrňte dvojici hlídkařů pro sledování skutečných podmínek.
Pohybujte se rychlostmi vhodnými pro trolling v blízkosti travních porostů; udržujte stabilní hladinu a vyhněte se prudkému přidávání plynu nebo zatáčení, které zvedá záď a zvyšuje riziko zásahu vrtulí; udržujte vrtule čisté od nečistot a dávejte pozor na slepá místa v okolí, kde se mohou nacházet ponořená nebezpečí, která odpovídají jejich skutečné poloze.
V oblíbených oblastech si před vstupem naplánujte konzervativní trasu na mapách, označte travnaté plochy a známé překážky a bezpečně uložte jídlo, aby se nekutálelo; tyto kroky pomáhají předcházet rozhodnutím na poslední chvíli a udržují plavidlo pod kontrolou.
Pohotovostní postupy: určit dva členy posádky na hlídku; pravidelně provádět kontrolní měření; pokud hodnoty klesnou pod bezpečnou hranici, zastavit a před pokračováním přehodnotit situaci; tyto kontroly snižují riziko a udržují podmínky dostatečně monitorovatelné pro všechny na palubě.
| Scenario | Action | Klíčová metrika |
|---|---|---|
| Přístup k porostům vodních rostlin a travnatým plochám | Snížit rychlost; sledovat značku ponoru; aktualizovat mapy | Rychlost ≤ 6–8 uzlů; hloubková rezerva ≥ 0,6 m |
| Poblíž pod hladinou se nacházejících překážek | Dodržujte vzdálenost; testujte hodnoty ručním hloubkoměrem | Vzdálenost ≥ 10 m; hloubková rezerva ≥ 0,3 m |
| S cestujícími na palubě | Určete dvojici hlídačů; poučte je před odplutím | Dva hlídači aktivní; briefingy dokončeny |
| V operacích s trollingem | Pohybujte se opatrnou rychlostí; udržujte volnou dráhu za lodními šrouby. | Stabilní rychlost; žádné překážky na cestě |
Před vstupem si zkontrolujte hloubkové mapy a lokální změny hloubky.
Doporučení: Před vstupem do oblastí s omezenou hloubkou si stáhněte autoritativní hloubkové mapy a porovnejte je s mapováním v reálném čase. Pokud mapa ukazuje jasný koridor, navigátor se usmál a opatrně pokračoval, držel se hlubších míst.
Při čtení hloubkových map si všímejte úseků, kde hloubka klesá pod 1,2 metru; v okolí mělčin a ohybů s menší hloubkou může nejnižší hloubka rychle klesat, někdy i o 60–90 cm na vzdálenosti 6–9 metrů. Zde si vyznačte bezpečnou zónu a držte se trasy v hloubce 1,5–2,4 metru, kdykoli je to možné. Pokud mapa ukazuje klesající gradient, před najetím na danou linii si udělejte objížďku na vnější okraj ohybu a nikdy nepřejíždějte místa s hloubkou menší než 1,2 metru, pokud nemáte plán a připravenou těžkou kotvu.
Použijte ruční hloubkoměr a zvažte jeho pronájem, pokud vaše vestavěná jednotka nepokrývá danou oblast. Porovnejte jeho živé hodnoty s mapami a hledejte nesrovnalosti. To je obzvláště důležité v blízkosti zátok, kde přítok sladké vody vytváří mapovací anomálie a láká nebo vytváří stanoviště raků v blízkosti konstrukcí.
Vliv přílivu na hloubku: větší přílivové cykly mohou zvýšit hloubku kolem lavic; stoupající příliv často pomáhá při vjezdu do prohlubní s větší hloubkou, zatímco klesající příliv může vést ke čtení menších hloubek, než jsou ve skutečnosti. Plánujte přejezd během období vyššího přílivu a buďte připraveni vycouvat, pokud zjistíte, že hloubka se blíží nejnižší vyznačené úrovni na mapě.
Rybáři by se měli řídit konkrétnı́mi linií hloubek: hledejte náhozy podél hrany kanálu, kde vás náhozy a trolling udrží ve bezpečné hloubce. Při hledání přı́ležitostı́ k lovu použı́vejte náhozy na krátkou vzdalenost blı́zko břehu, ale zůstaňte 2–4 délky těla od okraje a sledujte zatopené struktury. Pokud použı́váte návnadu, zvolte během prvního průjezdu malé, pomalu se pohybujı́cı́ nástrahy a poté přejděte na těžšı́ nástrahy pouze v přı́padě, že hloubka dosahuje alespoň minimálnı́ hodnoty uvedené v mapě.
Další nápad je zmapovat si trasu za zatáčkou pomocí mapovacího obvodu na vašem zařízení. Jsou to jednoduché kroky: porovnejte data z map, pak proveďte živé kontroly; udělejte další průjezd pro potvrzení, a pokud se hloubka pohybuje kolem 1,2–1,5 metru, je tato oblast bezpečnější pro plavbu pomalou rychlostí nebo lehkým trollingem. Pouze když potvrdíte skutečnými údaji, měli byste driftovat nebo nahazovat do cílové zóny.
Volba trupu, lodního šroubu a zatížení pro použití v mělkých vodách
Doporučení: Použijte hliníkový trup s plochým dnem nebo mírným V a krátkým poměrem délky k šířce v kombinaci s kompaktním, vysoce výkonným lodním šroubem. Toto nastavení dramaticky zlepšuje manévrování v omezených zónách s nízkou hloubkou a snižuje riziko uvíznutí na mělčině při pohybu v blízkosti útesů. Konstrukce obvykle zůstává v rámci jmenovité kapacity lodi, což pomáhá osobám na palubě a cestujícím udržet stabilitu a zabránit potopení v měkkém dně.
Váha a vyvážení: hliníkové trupy jsou shovívavé, ale zatížení musí zůstat v mezích stanovených výrobcem; neignorujte rozložení hmotnosti, když je v lodi hodně vybavení nebo několik cestujících. Vyvažujte dopředu a ke středu, abyste zabránili naklonění přídě dolů. Předsunuté vyvážení obvykle snižuje náklon a udržuje příď lehkou, zatímco vycentrování nákladu zlepšuje manévrování za volantem. Pochopte vliv rozložení hmotnosti; i malé posuny mohou způsobit neplánovaný pohyb, v závislosti na tom, jak stojíte nebo sedíte a zda ručně přesouváte návnadu nebo nářadí. Náklad vždy přesouvejte postupně, abyste udrželi kontrolu a vyhnuli se překvapením pro cestující.
Lodní šroub a elektronika: zvolte tří- nebo čtyřlistý hliníkový lodní šroub se stoupáním odpovídajícím velikosti trupu a typickému zatížení. Menší průměr pomáhá zabránit zahloubení v měkkém dně a snižuje riziko potopení při nárazu na ponořené překážky. Pokud vezete návnady a vybavení na pstruhy nebo jiné ryby, ujistěte se, že nastavení umožňuje rychlé úpravy bez zamotání vlasců a že elektronika zůstane funkční i při točivém momentu motoru. Bezpečné upevnění elektroniky vám pomůže udržet si situační povědomí a umožní vám upravovat rychlost, aniž byste ztratili kontrolu během pohybu.
Rozložení nákladu a vyvážení: těžší předměty umisťujte nízko a ke středu, aby se příď nadměrně nezvedala a záď se nehoupala za vámi. Obvykle se vyhýbejte umisťování těžké výbavy za konzoli; pokud je vzadu velká hmotnost, náklon se výrazně zvětší a roste riziko uvíznutí na mělčině. Silně nevyvážené zatížení výrazně omezuje manévrování; napravte to posunutím ke středu a použitím popruhů k udržení výbavy pod kontrolou. Vliv přesunu hmotnosti je znatelný, proto plánujte delší cesty s ohledem na rovnoměrné vyvážení. Tento přístup umožňuje bezpečnější provoz a pomáhá předcházet potopení v měkkém dně nebo při setkání s ponořenými překážkami.
Provozní poznámky: Návnadové boxy, vybavení a ryby v boxech by měly být uloženy v přístupných přihrádkách, aby se zabránilo posunu s cestujícími. Navíc delší cesty s několika zastávkami vyžadují stálé řízení zátěže, aby elektronika zůstala viditelná a plavidlo stabilní. Záleží na způsobu změny hloubky, proto respektujte terén a vyhýbejte se velkým, náhlým pohybům, které by mohly způsobit uvíznutí na mělčině. S robustním hliníkovým trupem, odpovídající vrtulí a disciplinovaným zatížením si užijete lov pstruhů a dalších druhů na stísněných místech a zároveň zajistíte pohodlí posádky. Tento plán umožní bezpečnější provoz a pomůže zabránit potopení v měkkém dně nebo při setkání s ponořenými překážkami.
Jezděte pomalu a řiďte strategicky, abyste se vyhnuli uvíznutí na mělčině
Snižte rychlost na volnoběh v rizikových zónách; řiďte se směrem k hlubším místům zobrazeným v hloubkových mapách. Tento disciplinovaný přístup vás udrží v mezích a pomůže vám bezpečně překonat rizika, jak se mění povrchové podmínky, a poskytne vám spolehlivou kontrolu.
- Hliníkové trupy reagují rychle na plyn a vyvážení; udržujte pomalé, kontrolované tempo, abyste minimalizovali riziko kontaktu se dnem.
- Kormidlo otáčejte pomalu s postupnými korekcemi; vyhýbejte se prudkým obratům, které tlačí kýl směrem k měkkému dnu.
- Plánujte pohyby s využitím aktuálních informací o proudu, větru a hloubce; další rozhodnutí se opírají o tyto mapy, abyste zůstali ve středu plavební dráhy, v rámci nejhlubšího možného koryta.
- Při přibližování se k potenciálním překážkám dodržujte větší brzdnou dráhu; tento čas navíc vám pomůže se přizpůsobit, aniž byste se dotkli dna.
- Při přibližování se k plošinám, návnadám nebo umělým nástrahám ještě více snižte rychlost a udržujte široký oblouk, abyste se vyhnuli kolizím; představují pohybující se vlasce a pohybující se ryby, které vyžadují větší prostor.
- Pokud si pronajímáte plavidlo, ověřte si u provozovatele oblast provozu, známé hloubky a doporučené trasy; předejdete tak riskantním manévrům v blízkosti neznámého dna.
- Východní a západní indikátory kanálů se liší; prozkoumávejte mapy a povrchová data, orientujte se podle map a pohybujte se směrem ke straně s trvale vyššími povrchovými výnosy; průzkum by měl zůstat v rámci jasně vyznačených tras.
- Pochopte, že delší pohyby po konzervativních trasách obecně snižují riziko uvíznutí; někdy tyto kroky přinesou prvotřídní výsledek a umožní vám pokračovat v pohybu.
Identifikace typu dna a překážek: Písek, bahno, rostliny, kameny
Po zahájení proveďte rychlou kontrolu dna v kanálu pomocí vyhledávače a ruční sondy k určení typu substrátu. Displej by měl ukazovat písek, bahno, plevel nebo kameny; výsledek zaznamenejte do tabulky a poznamenejte si okolní prvky.
Písečné lavice vypadají rovnoměrně, ale textura se může měnit s proudem; pohřbené předměty se mohou posouvat s průjezdem vln; na písku manévrujte se stálým plynem, abyste se vyhnuli zahloubení a udrželi trakci; pokud vidíte okraj písku, naplánujte si trasu do hlubších míst v kanálech.
Bláto nabízí měkkou podporu při zatížení; může uvěznit dno a způsobit náhlou ztrátu kontroly; mají tendenci uvíznout na mělčině, pokud jsou změny rychlosti prudké.
Plevel obaluje lodní šroub a nasávání; vypadají přirozeně, ale blokují průtok; na jedné straně ponechte okraj plevele; pokud se plevel rozšíří za shluk, zvažte zvednutí nebo odstranění, abyste zabránili zranění a ztrátě řízení.
Skály představují riziko tvrdého kontaktu; na mapě vypadají jako tmavé skvrny; ponořené skály vyžadují opatrnou navigaci podél kanálů; používejte vyhledávač a sonar k nalezení a vyhýbání se dnu.
Místní poznámky a mapy Johnsonových zahrnují pohřbené objekty v okolí, suché stromy a předměty vytvořené člověkem; pokud narazíte na označený objekt, změňte kurz podle toho; nejméně riziková trasa obvykle vede v rámci jasných kanálů. Pokud se objeví něco nečekaného, berte to jako překážku a upravte kurz.
Různé typy podkladu vyžadují odlišnou manipulaci. Vytvořte rychlý záznam o typu dna: poznamenejte si písek, bahno, řasy nebo kameny; umístěte značku do grafu s přesnou polohou; vyhledávač vám pomůže identifikovat riziko a tato pomoc zvyšuje bezpečnost mezi vodáky v konkurenčních kanálech.
Vyvážení hmotnosti a vyvážení pro lepší světlou výšku
Doporučení: Dosáhněte vyvážení plavidla rozložením nákladu a zátěže tak, aby byl trup rovnoběžný se dnem, když se příliv blíží k mělčinám a útesům, čímž se zlepší světlá výška při plavbě do omezených oblastí.
- Před spuštěním použijte zatěžovací kartu k zaznamenání celkové hmotnosti, polohy těžiště a očekávaného vyvážení; zahrňte poznámky z manuálu a předpovědi přílivu a odlivu; aktualizujte po každém týdnu provozu nebo po jakékoli změně cestujících nebo vybavení. Léta praxe zlepšují přesnost; veďte si průběžný záznam, kterému můžete věřit.
- Nejtěžší předměty dejte dolů a poblíž středu lodi; rozložte cestující podél boku, abyste zabránili náklonu; umístěte vybavení podél středové osy, abyste vytvořili vyvážený profil; upravujte po malých krocích, abyste vyladili vyvážení bez přehnaných korekcí a zároveň poslouchejte odezvu trupu.
- Udržujte nezbytné palivo a vybavení co nejblíže ose a vyvážené vpředu i vzadu; dodržujte pokyny obsluhy a příručku; pokud se vydáte do rozbouřenějších vln, reakce na trim se stane předvídatelnější a lépe ovladatelná, což je velmi výhodné.
- Přibližujte se k mělčinám pomalu; ověřte ponor pomocí hloubkoměrů a informací o přílivu; pokud se blížíte ke dnu, zastavte se a přehodnoťte rozložení nákladu a zátěžové vody, než budete pokračovat; vyhněte se akcím, které by vás mohly uvíznout u útesů.
- Zapojte rybáře a cestující do plánu; vysvětlete, kde sedět a jak se pohybovat; jsou si vědomi změn vyvážení; místní zkušenosti s mořskou vodou ukazují, že rozložení hmotnosti po délce snižuje náklon a pomáhá udržovat světlou výšku.
- Zhodnocení po plavbě: porovnejte skutečné vyvážení s předpokládanými hodnotami, aktualizujte kartu a záznamy pro příští plavbu; s praxí v průběhu let a ročních období se ovládání vyvážení stává přesnější a méně odhadem.
Některé situace vyžadují rychlé úpravy: pokud potřebujete proplout pod nízkým okrajem nebo klouzat podél okraje útesu, posuňte těžší předměty dopředu nebo dozadu o menší vzdálenosti, přičemž zůstaňte v bezpečných rozmezích; vždy se připravte na změny vln a větru a udržujte nízké riziko uvíznutí s připravenou výbavou pro nouzové zásahy.
Odpověď na uzemnění: Okamžité kroky a bezpečné zotavení
Vypněte pohon na volnoběh, řiďte směrem k pobřeží kontrolovaným obloukem a držte váhu nízko s pokrčenými koleny, abyste snížili riziko převrácení.
Po potvrzení kontaktu se dnem vystupte na pevný povrch, samozřejmě zkontrolujte celistvost trupu a pasti a odstraňte zamotané předměty; nestůjte v bahnitých kapsách, které by mohly uvěznit kotníky.
Pokud trup zůstane zaseknutý, okamžitě volejte pomoc, protože poškozený kýl nebo ohnuté kování mohou zhoršit zranění; nepokoušejte se vyprostit z nepříjemného úhlu, místo toho zajistěte lana k nedaleké kotvě a vyčkejte na příjezd záchranných týmů.
Za klidných podmínek mějte návnady a nástrahy uložené a mimo dosah trupu; pokud se objeví pozorování ryb, poznamenejte si druh a udržujte vzdálenost od vlasce, abyste zabránili poškození vybavení; lehká montáž a dokonce i zlatá třpytka by měly být zajištěny, aby se zabránilo zachycení; to pomáhá snížit další škody, zatímco čekáte.
Pokud se vítr stočí, upravte kurz na východ a pak se přibližte k břehu skrz okolní kanály; plynulým, stabilním pohybem se přitahujte ke břehu; to jen pomůže minimalizovat delší vystavení a zabrání uvěznění v měkkých místech.
In morning checks, if you spot a Johnson twin anchor rig, verify it is secure before stepping away; the procedure called by guides lowers risk of further damage and helps anyone recover gear quickly; after release, move the boat gently to the dry area and recheck the hull for any imperceptible cracks.