

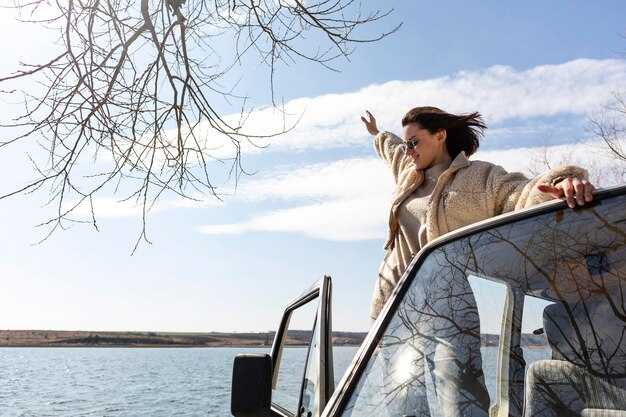
 How to Take a Great Photo on a Boat – Pro Tips for Stunning Seascapes">

Stabilita na palubě je nejdůležitější.Umístěte nohy na šířku ramen, pokrčte kolena a uložte lokty na trup. V náročných podmínkách použijte monopod nebo se opřete o zábradlí, abyste udrželi fotoaparát stabilní. Pro mořskou tříšť a stříkance zvyšte závěrku na 1/1000s nebo rychleji zachytit nejjasnější vlnité závity. Pokud světlo klesne, upravte na 1/500s ale míř k rychlejšímu rychlosti, když se pohyby zrychlují.
Techniky pro zaměření a rámování: přepněte na manuální režim nebo použij single-point AF, zaměřte ostření na hranu s vysokým kontrastem, poté znovu skládejte. Na lodi pohyb vody vytváří pohyby scény; předvídejte, kam loď bude unášena, a sledujte to svým zaměřením. Pokud se vám nepodaří zamknout, přepněte do kontinuálního ostření v jasném světle, ale vraťte se k single-shot AF když zahlédnete čistký, oceánský horizont, který udrží scénu ostrů. Chvíli nepromeškáte, pokud budete trénovat sledování a načasování.
Složení je důležité v každém záběru. Umístěte prvek popředí (lano, okov nebo bóji) pro přidání hloubky a navedení pohledu do scéna. Use kontrast mezi tmavým trupem a bílou vlnou, aby se vynořil objekt. Udržujte horizont vodorovný; šikmá čára narušuje rytmus obrazu v drsném moři a zklidňuje fotografický hodnota rámu. Pokud se setkáte s tricky úhel, kývejte tělem s kýváním lodě, abyste vytvořili vysoce kontrastní siluety, když zapadá slunce a mraky září, okamžik, který můžete zachytit cvikem a vytvořit něco nezapomenutelného.
Osvětlení a expoziceV silném lesku, v poledne conditions, použijte polarizační filtr k odstranění odrazů a ztmavnutí oblohy; foťte v manuální režim nebo aperture priority aby vyrovnalo jas oceánu. Použijte malou kompenzaci expozice (+/- 0,3 až +0,7), abyste zachovali detaily vody a zabránili přeexponování světel. Jak světlo přichází a odchází, speed vaše reakce má význam; pokračujte speed a kontrast v mysli, jak se mění sluneční světlo. Pokud chcete a unforgettable scéna, buďte připraveni stisknout spoušť, když loď vyjede ze stínu do slunce.
Časování poráží štěstí na lodi. Sledujte sekvenci pohyby zaskoku vlnu a fotografujte v dávkách, abyste zachytili vrcholný okamžik. Pokud to vaše kamera nabízí, použijte rychlejší dávkový režim; a fotografický sequence can yield a handful of frames where spray is crisp and the surface texture shows depth. In tricky osvětlení, nafoť několik snímků v expozice zaobrácené, aby zachovalo detaily v jasných zvýrazněních i tmavých prohlubních.
Safety and gearmējte u sebe vodětezku tašku na fotoaparát, často osušujte objektiv a consider dešťový štít v zónách stříkání. Použijte clonu, abyste zkrotili odlesky, a po skončení opláchněte sestavu, abyste zabránili usazování soli. Pro dlouhé, exhilarating sessions, plan your conditions a vezměte si s sebou náhradní baterie, abyste se vyhnuli výpadku napájení během jízdy; baterie se mohou rychle vybít. Jasný plán vám pomůže vyhnout se propásnutí vaší nejlepší scéna momentů a zajišťuje, že vaše vzpomínky zůstanou unforgettable.
Krok 2: Upravte nastavení fotoaparátu pro skvělé obrázky mořských scenérií
Nastavte základní expozici v režimu Manuální a začněte s 1/1000 s, abyste zmrazili pohyb na drsných vodách. Pokud sprej zasáhne objektiv, zvyšte ISO na 400–800 a udržujte clonu f/8–f/11, abyste zachovali detaily; pro hedvábnou vodu plánujte fotografování ze stabilního povrchu při 1/4–1/8 s a používejte monopod nebo zábradlí jako opěrku, zatímco sledujete pohyb v sérii snímků. Tento přístup zlepšuje vaše snímky a pomáhá vám později porovnávat možnosti.
- Selecting exposure and ISO: In bright sun, use aperture around f/8–f/11 and ISO 100–400; shoot RAW to preserve detail; if you’re using a smartphone, enable Pro mode and capture DNG when possible; for mixed light, auto white balance is acceptable and can be tweaked later in post; this here helps keep color consistent across different scenes.
- Motion and focus: Use AF-C (continuous) with a tracking focus area; employ back-button focus to lock on the subject and recompose; for spray, use 1/1000–1/2000 s to freeze motion; for a trace of motion, try 1/250–1/500 s and pan slightly to show movement through the frame.
- Stability and grip: Everyone should tuck elbows down toward your torso and keep the camera close; brace against the boat rail or use a monopod; on smartphones, two-handed grip and chest support helps; waterproof housing protects gear from spray.
- Perspective and space: Explore different perspective angles to emphasize space and depth; shoot from knee height or lower to exaggerate waves; plan a quick succession of frames to capture the subject under changing light and waves.
- Equipment and protection: If you have rugged cameras or a waterproof housing, you’re better prepared for rough conditions; having a spare battery and memory card helps; smartphone users should enable Pro mode and keep the lens clean and dry.
- Post-process and workflow: Import images as RAW, check the histogram, and adjust white balance and highlights to keep water color natural; batch process similar frames for a cohesive look; store images with consistent metadata to simplify selection later.
White Balance on a Boat: Presets and Custom WB for Blues and Sunlit Water
Set the white balance to 5500K manually for most coastal, sunlit days to keep blues accurate and sunlit water balanced; shoot RAW to refine WB later and preserve multiple frames from the start, so you can compare options without losing detail.
On a boat, presets help you respond to changing light quickly. Use Auto WB as a baseline, then switch to Daylight (about 5200–5500K) when the sky is clear and the blue water reads true; Cloudy adds warmth for calmer days and more natural skin tones; Shade pushes more warmth for late afternoon light. For night scenes or the glow after sunset, Tungsten can cool the scene, but expect a cooler water cast. Work to stabilize WB across a sequence so colors stay harmonious as the deck moves and there are movements in the frame.
From the start, a custom WB method gives you the most control. Place a neutral gray card (or a clean white shirt) in open shade on deck and shoot a reference frame. In RAW, set WB to a target around 5500–6000K to keep blue water true while preserving the sunlit warmth. If a card isn’t available, use a bright gray area in the scene, then adjust WB in post to prevent casts on the water. This approach helps stabilize exposure and WB, especially when you switch between still life moments and sweeping seascapes.
To minimize shifts when the boat rocks, lock WB and exposure and shoot in a burst with a steady shutter, then pick the frames where the water and sky share a similar cast. A polarizing filter helps reduce glare and gives you more distinct blue tones, while keeping the sun’s shine on the surface. If you must shoot with limited reference, shoot a short sequence and fix WB in post; that saves space in editing and keeps the sequence coherent for a coastal shoot.
During sunset, temperatures swing and blues can look richer or cooler. Try WB around 6000K for a crisper, cooler water tone, or push toward 5200–5600K to enhance warmer skies while preserving blue water. For night, Auto WB with careful post adjustments works, but always keep a reference shot for continuity. Here, WB is a tool to shape the vastness of the sea and sky, not a fixed rule–the right preset or custom value lets you photograph them in calm, expansive moments, from ordinary to spontaneous, and then the shine appears.
Metering Modes: Evaluative vs Spot for Balanced Sky and Sea
Recommendation: Use Evaluative metering as your default on a boat for balanced sky and sea. Depending on the scene, this mode analyzes the frame and offers a reliable exposure for the blue water and the sunny sky, providing a solid photographic taking that serves their interests. The advantage is it adapts to dynamic light across the frame, so you can enjoy the moment without constant tweaks. If the sky becomes very bright or highlights on water look small and blown, switch to Spot metering to lock exposure on a precise area. Once you lock it, shoot a quick bracket or check the histogram to verify results.
On a moving vessel, stay prepared. Keep your gear handy, plant your feet securely, and stabilize against a rail or the deck. Always monitor the horizon and know your vantage: Evaluative handles a broad scene, Spot helps when a small bright area dominates. If you want to emphasize texture in the water or cloud patterns, use Spot on a small area and then return to Evaluative to resume balance. During shooting, shoot in RAW to preserve latitude, and check the histogram frequently to avoid clipping. If exposure pushes too far, the sky wont recover in post, so use exposure compensation as needed and keep your shots aligned with the light direction to make the best use of their photographic potential.
Practical scenarios and tips: In sunny conditions with very bright sky, start with Evaluative and apply -0.3 to -1 EV if the sky clips; in ordinary daylight you can stay near 0 to -1. For high-contrast moments, bracket across 2-3 frames to capture both sky detail and water texture. In blue-water scenes where interest lies in reflections, Spot metering on the sky can control glare while Evaluative preserves water tones. In scenes with limited dynamic range, Evaluative often balances tones, but bracketing remains a smart move to ensure you capture the full spectrum. Once you establish a reliable workflow, you’ll enjoy quick, repeatable results and a clean transition from sky to water across your sequence of shots.
Shutter Speed Tactics: Freezing Waves vs. Capturing Long Exposure Motion
Set your shutter speed to 1/1000s to freeze the most dynamic waves when the boat rocks. If light is limited by overcast weather, raise ISO to 1600–3200 and still preserve detail in spray, then adjust exposure to keep the depth in your photograph intact. Do this carefully to avoid blowing highlights and to maintain color; avoid taking careless frames and focus on the core motion. This approach yields crisp edges along foam and salt, enhancing the scene in a single frame.
For motion, switch to long exposure to capture smooth water and trailing spray. Start at 1/4s and move to 2s if the light permits; use a stable rail or a compact gimbal, and keep your feet planted to limit body rocking. A mindful technique helps avoid blur and yields a unique texture in the waves. If renting gear, be mindful about weight and balance.
Before you pick mode, check weather and scene: overcast can flatten contrast; bright sun may create glare; beware problems such as reflections off railings or a moving sail; then decide which approach will most enhance the scene and your photograph. In this article, you’ll find practical steps to apply at sea.
Gear note: renting a lightweight setup with minimal gear often pays off on a boat. Use a remote trigger for long exposures, secure your drinks and other items, and maintain a mindful stance to protect your body and your shot. Have a spare battery and a small memory card on hand to stay ready for changing conditions.
| Mode | Scenario | Shutter Speed | Tips |
|---|---|---|---|
| Freezing Waves | Rocking boat, spray visible | 1/1000s – 1/2000s | Plant feet, brace body; keep horizon level; shoot in bursts to lock crisp edges |
| Moderate Motion | Waves breaking softly, foam detail | 1/250s – 1/500s | Pan with movements; use a longer lens to compress depth; avoid rolling framing |
| Long Exposure | Silky water, light trails | 1s – 2s | ND filter optional; tripod or solid rail; remote shutter for stable capture |
Aperture Choices: Depth of Field for Horizon Details
Set aperture to f/11 as your default for horizon details; this high DOF keeps near white foam and the distant horizon sharp, offering a great sense of depth. Use hyperfocal distance at your focal length so youre not chasing focus on a moving boat, and the frame may move. If youre shooting wide and want more water texture, stop down to f/16; if light is tight, open to f/8 and compensate with ISO or shutter speed.
On overcast days, contrast drops; maintain edge-to-edge sharpness with f/11–f/16. To freeze spray and keep the horizon crisp, use shutter speeds in the range of 1/500–1/2000s v závislosti na větru a výšce vln. Pokud chcete hladší vodu v popředí, můžete se ponořit do 1/60s, ale budete potřebovat stabilní platformu nebo vodotěsný kryt a strap to keep the camera from moving. Experiment with multiple speeds pro dosažení rovnováhy mezi akcí a ostrostí horizontu. Při pořizování snímků here v klidnějších chvílích se stále můžete zaměřit na jasnější horizont.
Techniky: open objektiv do širšího rámce, pokud chcete zdůraznit horizont; manuální ostření pomocí živý pohled, přiblížit se k horizontu, abyste uzamkli čistou linii, a poté nastavit hyperfokální vzdálenost pro vaši ohniskovou vzdálenost. Tyto techniky vám pomáhají plánovat záběry a udržet konzistentní detaily horizontu. Udělejte multiple pořídit snímky s mírnými odchylkami v clonce a ISO, aby se zachytil okamžik. V editing, můžete vyvážit white a modré tóny pro přirozený vzhled.
Poznámky k převodům: strap pevně připevněte kameru k tělu nebo liště; použijte vodotěsný housing nebo pláštěnku, když se rozprší; mějte po ruce hadřík z mikrovlákna na otírání soli a vody z objektivu; upravte setting pro vítr a oslnění a vezměte si náhradní baterii.
Další kroky: procvičovat během spontaneous momentů; tento článek here nabízí další tipy; zkuste a unique pohledem ohraničením f/11 s různými speeds, pak porovnej v editing. Jste připraveni přeměnit prostý horizont v něco memorable.
ISO a šum: Řízení ISO na pohyblivé lodi
Nastavte automatickou citlivost ISO s limitem 1600 a začněte s clonou 1/1000 s, clonou okolo f/8, abyste zachovali ostrost objektu a zároveň zmrazili stříkající vodu. V modré hodině zvyšte na 3200 a upravte, abyste udrželi kontrolu nad světly. Tato rovnováha zachovává detaily a minimalizuje šum a zároveň vám dává čistý náskok na objekt, když se loď naklání.
Stabilizujte tělem, zapnutími loktů, opěrným popruhem a přitisknutím fotoaparátu k tělu. Postavte se s pevným postojem, abyste absorbovali neustálý pohyb, a načasujte stisknutí spouště v okamžiku, kdy se loď opírá o vlnu. Mírné naklonění ve směru pohybu minimalizuje prostoje; získáte lepší kontrolu a více prostoru pro zachycení čisté barvy a textury.
Záleží na bodech: Manuální režim vám dává kontrolu; Priorita závěrky funguje, když se mění světlo. Pokud používáte Automatickou citlivost ISO, mějte na paměti strop a upravte expozici pomocí kompenzace expozice, aby obloha nevybledla. Pro široký výhled zkuste širší clonu s kratší expozicí; pro malířský vzhled pohybujte s lodí s delší ohniskovou vzdáleností.
Post-processing: foťte v RAWu, porovnávejte snímky při ISO 400–800 a 1600–3200; vyberte nejlepší pořízení a aplikujte redukci šumu pouze tehdy, když je to potřeba, abyste zachovali texturu stříkající vody a tkaniny na subjektu. Nepřehlazujte; zvýrazněte detaily v hřebenech pěny a plachtách. Mějte na paměti hodinu světla; pokud ji minejte, další hodina nabízí další šanci zlepšit barvu a náladu.