


Rule ISO 100, shoot RAW, horizon on the top third, water milky at dawn to capture color shifts before spray disrupts the surface.
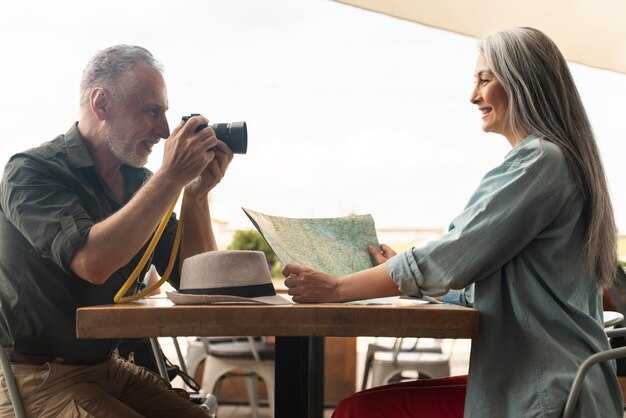
claire notes that their best moments materialize when light crosses the deck; unless gusts rise, wait for a lull; if storm looms, never push into spray; a humpback breach near the bow forms a chevron in the wake, ideal to photograph with a telephoto.
Keep only small gear handy: camera on a strap ready to shoot when whales surface; horizon line looks best when aligned with water; a lunar glow after sunset offers silver tones across the planet, so a longer shutter yields milky trails.
On port days, indigenous silhouettes color the scene; looking toward the sea yields color clues; heres a moment to photograph small groups anchoring the frame; keep the composition tight.
Pause to find rhythm that matches the vessel’s pace; this approach helps you find really crisp details without crowding them; after you test a few frames, then apply the same workflow at the next stop.
On the Day Aboard: Quick, Hands-On Photography Checklist
Bring a compact tripod; second battery; microfiber cloth. Mount on the viewing decks during golden hour to stabilize shots; set ISO 100–200, aperture around f/8, shutter 1/60–1/125 to create water texture. Shoot RAW; enable exposure bracketing in steps -1, 0, +1 to capture light range.
heres a quick reminder: keep the lens clean; sensor dry.
things to check: white balance, exposure, framing, focus.
With a nikon body, use matrix metering; enable live view to check shadow under the rail; adjust WB to Daylight or Auto depending on light.
Monitor crowds on busy promenades; position near the rail on the vessel; wait for gaps in movement; frame context with distant land or boats.
At dusk, watch shadow shapes along the water; earthshine paints the surface pale; tilt horizon slightly to emphasize composition; use a mid telephoto to isolate patterns on the surface.
Data backup remains essential; carry a spare memory card; bring tools: microfiber cloth, lens brush, cleaning solution; pack a weather sleeve around the camera body; a waterproof pouch keeps gear safe on wet decks.
Peters offers snippets of their local color; seek quiet corners during cruising stretches; when a call rings from the bridge to check a distant vessel, switch to a telephoto lens; isolate a silhouette against a pink horizon.
Inside a cabin, push ISO up modestly; review data on the back of the nikon; check composition using live view for a different angle; when docking at indigenous ports, compare views across focal lengths to find clean framing.
want crisp textures; choose shutter 1/125 in daylight; regular checks on the histogram help maintain exposure; seen patterns of motion reveal best moments.
simply adjust exposure as scenes shift; making minor tweaks becomes routine; popular vantage points exist on the stern rail; use them early in the day.
astrophysics curiosity improves timing at night; keep in mind the vessel back lighting; you may capture reflections; bring patience; keep within organization on data log.
Night shots reveal wonder when spray glows under starlight.
used gear deserves preflight check: battery levels, memory card space, weather seals, lens coatings.
Gear and settings checklist for embarkation day
First, choose a reliable camera body with strong high ISO performance; pair a versatile zoom around 24-70mm; include a longer tele such as 70-200mm to capture distant subjects. This setup highly serves bright deck scenes; onboard moments during the trip go smoothly. This setup goes a long way. Pack a spare battery, two memory cards, a microfiber cloth; add a compact rain sleeve to protect gear near spray. Crowds often gather during sail-away; keep distance, look for clean backgrounds to maximize subject isolation.
Beginners should start in manual mode with RAW capture; auto ISO capped at 3200. In bright sun, set ISO 100–200, aperture f/8, shutter 1/1000–1/2000 to freeze spray, fast motions. In dusk or overcast conditions, raise ISO to 800–1600; aperture f/4–f/5.6; shutter 1/60–1/125 to keep detail without blur. White balance: Auto or around 5500K for sea tones. This approach is part of a simple setup that leaves little to chance when the light shifts.
Onboard handling: hand-hold technique yields sharp results on a rocking deck; keep elbows in; one hand supports the lens; press smoothly; shoot bursts of 3–5 frames to catch moments such as a whale breaching. Just practice. This matter requires precise timing.
Lens strategy: base with a standard zoom; add a longer tele for distant vessels; include a wide 16–35mm for sweeping harbor shots. Use either a monopod or stable railing support to extend exposure if wishing longer light trails; circular polarizer reduces glare; a light ND helps when smoothing water at bright days. Get close to the subject; watch shadow edges; avoid shooting directly into the sun when possible.
Exposure technique: bracket around tricky scenes–a three-shot sequence: -1, 0, +1 EV–to capture dynamic range; highlights on sunlit water can blow out; review histogram; use the little highlight alert to keep scale readable. This approach reduces waste where light shifts where you walk between crowds; events such as sail-away provide changing light; look for changing light positions to sharpen results; statistical checks show that the best keepers come from thoughtful angles rather than random shots.
Contexts: alaska coastlines offer dramatic light; arctic itineraries present long blue hours; lunar scenes: shoot near harbor lights after dusk; include the moon rising over vessels for dramatic contrast; if you visit shore stops, keep a compact prime ready to capture campers against ice. This is part of a broader trip that invites you to mix wildlife; harbor life; shore camping during occasional land visits.
Care: never leave camera unattended; never spray; keep a bag zipped; store gear in cabin during rough seas; on embarkation day organize gear in a weatherproof bag; ensure quick access to the main zoom, a spare battery, memory cards; be mindful of crowds; give them space to look.
Stabilizing shots on a moving deck: shutter speeds and bracing
Baseline shutter set to 1/1000s to freeze spray; quick deck motion. In bright daylight raise ISO to 100–400 to keep exposure clean; on calmer moments 1/500s preserves texture; if seeking motion trails, 1/60s yields smooth water lines while a subject passes through frame. Burst mode on smartphones helps capture the exact moment; look through a quick series to choose a crisp frame. During a period of rough motion something alive happens on the ocean surface; anti-crepuscular lighting can feel like an eclipse; the goal remains to keep horizon straight while not losing the sense of wind.
Stance; anchor: feet shoulder width; knees soft; weight centered; chest lowered; elbows tucked; body pressed into rail or deck; left hand bracing on a rail; right hand holding camera; look along horizon; breathe out; press shutter
- Rail brace technique: press cheek against viewfinder; tighten belly; keep spine stable
- Body alignment: shoulders square to motion; shift weight toward toes; maintain low center of gravity
- Breathing pattern: exhale slowly before pressing; hold for a fraction to minimize shake; release
Tools: tripod-like support from railing; use burst mode; iphone enables burst; Live Photo mode; smartphone sensors with optical stabilization (OIS) help; adjust exposure with grid; timer remote trigger helps during rough sea recovery; onto the moment when the ship lists toward east; youre able to lock onto a crisp line; your gaze remains steady; this fact proves highly effective across most cruising routes
claire on a boat deck during cruises demonstrates bracing during arctic nights; she notes keeping core tight while looking east toward distant horizon reduces wobble; iphone motion remains aided by OIS; smartphones supply burst options; youre encouraged to look onto the frame and pick the sharp moment; the technique works mostly on northern routes where seas run long; sometimes the wind shifts, yet you can capture a clean texture with a quick 1/1000s; look toward the water surface to reveal something alive in motion; period of practice takes you yourself toward mastery
Framing seascapes: horizons, foreground interest, and ship lines
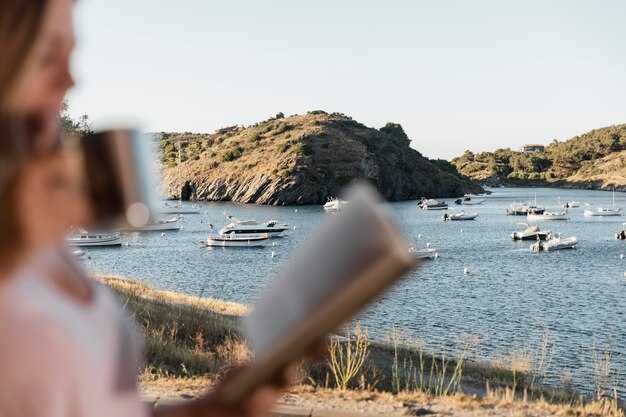
Place the horizon on the upper third to balance dramatic clouds and a bright sea. Choose a foreground texture–a railing, a lifebuoy, or a small patch of deck gardens–that gives scale. This call to careful framing creates a sense of space and invites the eye to travel from the near detail to the vast horizon. It offers an opportunity to tell a clear story even when the deck is busy, just as light shifts near alaska and turns flats of water into a magical glow.
Foreground interest can be a smaller object in the lower third: a coiled rope, a porthole reflection, or a patch of wet timber that anchors the view. When you present a textural element in front, the viewer senses depth and movement. Using a mid-range focal length (35-50mm on full frame) helps keep the ratio between foreground and horizon. Look for repeated lines along the quay or the ship’s rails to guide the gaze toward the horizon; the clouds overhead then frame the view with cinematic balance. If conditions allow, bring a camping lamp or a small plant pot as a temporary foreground. This adds scale and a touch of human presence.
Ship lines provide straightforward guidance: tilt the camera slightly so the bow or stern leads toward the center, creating converging lines that invite looking toward the distance. A touch of motion blur on the water with a longer exposure can morph the scene into an incredible, nocturne mood. Keep the horizon level with the gunwale to avoid a disorienting tilt, and frame a hint of skyline on a calm day for contrast. If you shoot from the quay at a port, the juxtaposition of steel and water reveals a sense of place.
Once you dial in the frame, test a wider view to reveal ship lines and city silhouettes. Spend a minute scanning for foreground anchors that keep the eye moving toward the horizon. Look for clouds that lift the deck into a nocturne mood. For low light near sunset, a quick flash off-camera can fill the near field without washing distant detail. Use a smaller aperture and, when possible, a polarizer to keep textures crisp–from quay edges to garden planters. In alaska’s harbors, the queen anchors calmly offshore, inviting you to observe how light plays inside a cabin window and how an eclipse moment can simplify the scene. The tiny label claire on a bench can become a playful cue to refine your present frame and to notice unspoiled details along the quay.
Capturing travel moments: candid people, details, and storytelling
Recommendation: Start with one instant that tells a story, frame it tight, and keep the rest out of frame. Use a 24-70mm equivalent, shutter 1/500–1/1000s, ISO auto up to 3200 when light drops; shoot RAW to capture vivid color.
Details matter: a candid look, a raised hand, a handshake at the rail, a child pointing at the horizon. A humpback breach in the distance, milky spray, rainbows bending over lights at dusk, the staff guiding guests, or a grandmother laughing with her family. The inside of cabins framed through glass, the front deck as waves curl over the rail–these small elements add value to the scene. Mostly the shots work when you isolate subjects against a dynamic background.
Culture as thread: note where different groups intersect–australians sharing a joke with staff, an American couple exchanging a look near the dining hall, locals behind a port market. This would add value to your narrative. A shot can be highly vivid when you include milky spray, rainbows, and bright signage; watch for the darkest corners inside the ship where excess light washes color. Take advantage of events: arrivals, onboard plays, cooking demos, and late-night conversations that reveal cultures, news, and life on cruises, sailing days included. heres how to balance light and motion so subjects stay readable. Dreaming about what would happen next, you’re able to chain a few frames into a clean arc, where each take points toward the next scene. Some shots spark wonder, some capture something relatable, mostly because the setting invites authentic interaction. Been documenting this year, america and australians share the frame, and the result can read like a tripadvisor entry inviting others to imagine more.
Shooting interiors and sunsets: light handling and color balance
Set white balance exactly 5400K to harmonize sunset warmth with cabin illumination, which helps consistency. Shoot RAW and adjust afterward; smartphones in pro mode help preserve color. Observe the histogram when available and compare what appears on the display with post results.
Interiors demand clean separation of light from windows. Place subjects near the side with natural glow; tilt the camera to minimize reflections from glass; meter interior surfaces via spot or center-weighted mode; keep ISO between 400 and 800; shutter 1/60–1/125s; aperture between f/2.8 and f/4 with handheld work. On fast vessels, push ISO to 800–1600 while preserving detail. When space is tiny, use smartphones or compact cameras; enable HDR, tap exposure lock on the subject; avoid using flash unless you bounce off ceiling or wall; keep flash as last resort. greg from staff has access to well-lit corridors, and they have shared practical notes useful on cruises.
Sunsets on deck: balance sky detail with the vessel silhouette. Set WB around 5200–5600K to preserve blue clouds while keeping fiery tones. Bracket exposures at -1/3 EV, 0, +1/3 EV. Use a fast lens (f/4 or faster) to isolate subjects; if you want smoother water, long shutter helps only with a stable support. If hands-held, stay near 1/125s. Keep horizon straight; align the clouds along the upper third. anti-crepuscular tones may appear near the horizon; observe the color gradient and adjust accordingly. These adjustments help keep color consistent across frames. On smartphones, enable long-exposure options or Smart HDR; use a stabilizer or brace against a railing to keep sharp. Across vessels, the light shifts quickly, so capture with intent.
tripadvisor lists popular overlooks on decks; observe sights from their respective sides; keep access to a longer lens; capture whale silhouettes or indigenous performances with care; these moments present a living record of the voyage. Once you observe, time shots with the vessel’s pace; keep yourself ready; observe clouds, they present vibrant memories of the night.