

 Your Guide to Boat Snacks – Easy On-Deck Delights">

Pack portable, extra-crunchy granola clusters for boating, toss them into a waterproof pouch, and start the trip with a snack that feels like kings of deck snacks and stays crunchy in the spray. These bites fuel you on quick runs to shore and keep your hands clean for steering and drinks.
What to pack for lunch on deck? A simple trio works: cheesy crackers, granola clusters, and portable fruit bars. Keep them in an insulated bag on the side so they’re ready for a quick toss when you hear the engine and you want a little boost between watches.
For extra depth, add cheesy crackers with a tang of vinegar in a tiny dip to kick flavor. The combination of granola bites and salty snacks creates a full, balanced bite that works with any drinks you keep cold in the cooler.
In a small, leak-proof container, keep a side of yogurt dip or peppered pickles. You can toss these with crunchy crackers for that extra-crunchy texture that survives spray and sun. This setup stays portable and ready for your lunch or a quick snack during lookout duty.
Wholesome snacks make a real difference when the sea is choppy: they provide steady energy and keep you satisfied between sips of drinks. The goal is a full stomach without heavy meals, using simple bites to keep you alert at the helm.
4 Ham and Swiss Sliders: On-Deck Prep and Serving
Heat the sliders to just-warm, plate on a tray, and serve immediately with a tidy toppings bar. This keeps the meat juicy and the cheese rich, and youll get more tastes per bite as the crew samples different toppings.
On-deck prep: gather buns, ham, Swiss slices, and a toppings line. Keep components in bags and label them for quick grabs–packaginglets helps crew members grab what they need without rummaging. For variety from the same batch, making a Greek-inspired spread: mash chickpeas with Greek yogurt, a pinch of cumin, lemon juice, and salt. This option from the pantry adds creaminess without extra heat and offers options for different tastes.
When it’s time to heat, toast the buns lightly, assemble four sliders per batch with ham and Swiss, and finish under brief heat until the cheese glistens. If space is tight, a skillet on a hot burner works fine; rotate the stacks to prevent scorching. The meat stays moist with brief heat. Have needed utensils handy, having tongs, a small grill pan, and a parchment-lined tray ready.
Serving and toppings: arrange four sliders per plate and set out a toppings tray with pickles, lettuce, tomato, onion, and optional honey for a glaze. The classic pairing remains the favorite, but the Greek chickpea spread offers an alternative. These snacks travel well, so pack them into bags and label with packaginglets for quick grab-and-go service on deck. For a moment of contrast, stash a small chocolate treat at the end of the row as a sweet finish. when service hits, keep a clean cloth ready for quick cleanup.
| Step | Action | الملاحظات |
|---|---|---|
| Prep | Slice buns, ham; arrange Swiss; prep toppings | Keep cold; bags ready |
| Assemble | Four sliders per batch | Cheese on top; pre-stack |
| Heat | Warm on deck until cheese melts | Toast edges lightly |
| Serve | Set out toppings; finish with honey or spread | Label portions and reuse |
youll appreciate how easy these are to share on a boating day.
Ingredient Checklist for 4 Sliders (bread, ham, Swiss, spreads)
Grab four slider buns, four slices ham, four slices Swiss, and a trio of spreads; this setup delivers great, melting food that stays cooler in a cooler and makes a grab-and-go meal on wakeboards or on deck.
- Bread: four slider buns, split and toasted lightly to create a thick surface that holds fillings without sogging.
- Ham: four slices, thick-cut; lightly warmed if you like, then pat dry to avoid excess moisture; england-style ham keeps the flavor classic.
- Swiss: four slices of Swiss cheese, arranged to cover the ham so the cheese melts evenly; long slices work best for full coverage.
- Spreads: three options to mix and match:
- Garlic-mayo spread: 2 tbsp mayo + 1 minced garlic clove, a pinch of pepper, optional cumin.
- Mustard spread: 1–2 tsp grainy mustard with a drizzle of honey and a touch of salt and pepper.
- Caprese spread: diced tomatoes + diced mozzarella or fresh mozzarella, torn basil, and a drizzle of olive oil; season with salt and pepper.
Serving tips: never overload the buns; keep fillings compact to maintain structure when melting cheese. Keep assembled sliders in a cooler until serving, then present with fruits and drinks or wine for a balanced on-deck meal. If you want a bolder finish, add a sweet pepper slice for crunch, or switch to caprese-spread for a lighter option. youre ready to grab-and-go, and these bites pair well with pizza nights or longer afternoons on the water.
Fast Assembly: Steps to Build on a Non-Stick Surface
Coat the non-stick surface with a thin film of butter and heat to medium before you begin. While the surface warms, prep your toppings so you can stack quickly, keeping everything within arm’s reach for fast assembly.
Base options include sliced bread, tortilla rounds, or traditional flatbread. Place your choice on the surface, then dust with paprika and cumin for a warm, nutty note that complements fresh toppings.
Garlic butter forms the flavor backbone: melt 1–2 tablespoons butter, stir in minced garlic, and brush lightly on the base. If you have time, add chopped fresh herbs; this prep prevents soggy edges while boosting aroma. thats the move for speed.
Top with sliced veggies, a sweet pepper, and a Greek-inspired layer: feta, olives, and oregano for a creamy, tangy bite that elevates every mouthful. For a richer profile, drizzle olive oil and a squeeze of lemon.
Cook 2–3 minutes per side on the non-stick surface, turning once when the edges look crisp and the cheese melts. If the surface starts to stick, lift and reseat the toppings, then resume heat.
Packing for cruise days: keep toppings in chilled containers and pack bread separately for quick assembly. Prefer wine with this snack, a chilled white or light Greek varietal to balance the nutty and sweet notes. Your crew will learn the rhythm and enjoy every bite.
Important tip: wipe the surface after use with a dry cloth, then a quick damp wipe. Always dry before the next round to maintain non-stick performance. Potential issues, like sticking after long use, fade with regular light oiling.
Heat Methods: Skillet Fry vs. Portable Grill on Board
Start with skillet fry for most side snacks on board; it heats fast, gives a crisp edge, and keeps heat under control on a boating day. Whether you want bacon bites, garlic mushrooms, or plain zucchini, the skillet delivers reliable, scrumptious results with minimal gear. Theyre easy to clean and nothing beats the speed of a hot pan for a quick, refreshing bite that keeps the crew happy. A quick dust of paprika adds color and a hint of heat.
On the other hand, a portable grill on board brings smoky depth and an extra-crunchy bite for larger batches. It holds heat well in swells, keeps a cooler of skewers ready, and lets you glaze with garlic, paprika, and vinegar for a savory finish. It is ideal for bacon-wrapped bites and seafood, and you can coax deeper flavors without drying out the meat. For desserts or playful twists, melt chocolate over fruit for a simple, scrumptious contrast.
To maximize on-deck results, keep a few staples ready: garlic butter, paprika dust, and a splash of vinegar for glaze. For sides, roast corn or peppers on the grill for extra crunch; for skillet, finish with a touch of dry paprika and fresh herbs. When you switch methods, keep safe distances from flames and reseal the cooler after use. theres room for creative twists as you test toppings like garlic butter, paprika dust, and a vinegar glaze. This approach offers creative options for snack time on boating trips, whether you want plain, savory, or something that tastes like kings on the deck.
Storage and Safety: Keeping Meat Safe at Sea

Keep raw meat below 40°F (4°C) at all times in a sturdy cooler with pre-chilled packs and a thermometer. Position the bottom shelf as the coolest, and limit lid openings to maintain stable temps.
Label every package with its contents and date using packaginglets, and seal items with leak-proof wrap or containers to prevent drips. Also store ready-to-eat items like cheddar cheese and sliced vegetables away from raw meat to prevent cross-contamination.
Lifespan guidance in a properly chilled cooler: raw beef, pork, and lamb last 3–5 days; raw ground meat 1–2 days; cooked meat 3–4 days. If you notice off-odors, unusual texture, or color, discard what seems spoiled. On a moving deck, rotate stock regularly to keep the oldest items in front and re-pack as needed.
Adapt the plan to the boat layout and crew size.
To tackle on-deck safety, keep two bins: raw on one side, cooked on the other, having a separate cutting board for each. Use diced portions for quick meals, reducing open time and keeping temps stable. When planning lunch or subs, aim for simple, convenient options that travel well and stay scrumptious with minimal fuss.
Flavor and adaptation tips: a greek-inspired finish with lime juice, cumin, oregano, and olive oil adds brightness to grilled chicken or pork while keeping cross-contamination risk low. For a traditional and convenient lunch, try melting cheddar on a hot subs with bell pepper slices; the melting cheese keeps the filling together and tastes great on deck. If weather is too humid, swap lime for a lemon twist; otherwise, keep a squeeze bottle of lime handy.
Next, set up a simple daily check: keep a log of temps, rotate stock, and confirm what remains for the next meal. youre ready for great, safe meals on the water; this guide helps you stay prepared and avoid waste while keeping lunch side dishes handy and delicious.
Serving Setup: Plating, Napkins, and Cleanup on Deck
Set up a dedicated deck station before guests arrive: use a hard-sided cooler for cold items, pre-portion bites into small containers, and keep napkins within arm’s reach.
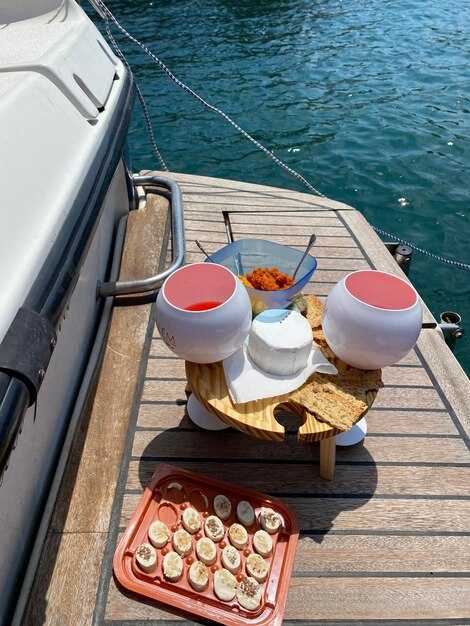
Plating and layout should be simple and navigable: line about two feet of counter space along the rail and present fresh options like quiche slices, a cheeseball, and a mix of bites from sweet to savory. These bites shine when you place them on a low tray so they don’t tip with each swell, and you can hand them to them easily as guests pass. For what guests prefer, offer a choice between crackers and veggies, and an option of pita chips for crunch. Pack tiny portions in packaginglets to make grab-and-go easy and cut waste, thats a handy way to keep these ready. Store snorkeling gear below deck to keep the serving area clear, and keep summer sun from hitting the trays by rotating items onto a shaded rack. Use instant ice packs to refresh the setup if the heat rises, and ensure the food stays fresh by slicing or prepping just before serving; adapt the layout if more guests arrive than expected, so you can tackle the crowd without fuss. We aim for variety and a refreshing contrast of flavors that pairs well with a cool drink.
Cleanup plan: place a heavy-duty trash bag and a recycling bin within reach; wipe surfaces with a damp cloth; collect scraps and packaginglets; tie the bag and stash it in a corner until you dock; keep a separate bin for compostable packaginglets if you can, and empty it when you land, so the deck stays clean after the last waves.