

 Straight From the Experts – 21 Waterskiing Tips for Your Best Summer Ever">

Begin with a rope length around 60–75 feet (18–23 m) and a wide, balanced stance to ensure you entered clean pulls; when the line tightens, keep the core braced, shoulders level, and hips tucked slightly toward the boat with the trunk engaged to maximize control as you enter the wake. This setup also stabilizes your upper body and protects your shoulders during the first pulls.
Maintain a slightly flexed knee and even weight transfer between both feet; this core-driven balance protects the knees and makes the pull more consistent, aiding anyone who participated in wake-focused drills before. The guys running the progression keep the pace steady, so you can mirror the steps as skill improves.
In practice, michele و russell represent the coaching crew, showing a base workout that anyone can enter: 10 minutes cardio, 4 sets of 12 cable anti-rotation, 6–8 sets of 30-60 second planks. collins and an anonymous crew member demonstrate modifications across various boat speeds and wake sizes, so the crew has participated in the same sessions.
Weather note: rain can hide slick spots on the deck; check equipment before rides, and dry the handle grips. Observe wind and chop: a headwind reduces the line tension and makes balance trickier; adjust rope and stance accordingly.
Safety matters: inspect the boat’s ballast, check the binding release, and ensure the string’s quick release is ready; the team demonstrates a pre-ride check so they can show consistency across various sessions, representing a mix of skill levels and encouraging steady limits during peak heat.
To keep momentum, integrate micro-challenges as games: one set focuses on edging, another on line-tension control; a simple drill is to hold a light, balanced stance for 6 seconds, then accelerate into the wake. This keeps the sequence engaging and mentally sharp, and they continue to show improvements as weather and water conditions shift.
Gear, Safety, and Morning Prep for Consistent Sessions
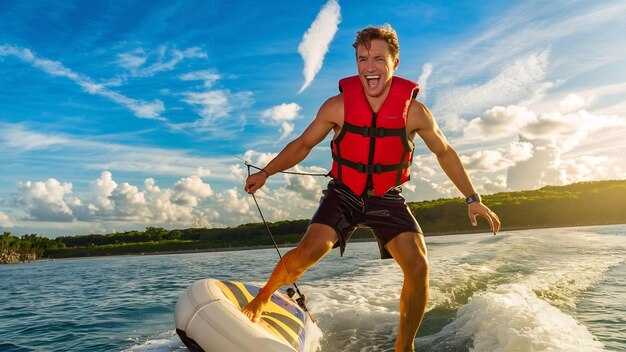
Start each session with gear check: wear a snug PFD, inspect line tension, and confirm speed matches rider level.
Gear designed by a florida builder already improved reliability among recipients; participants who participated in national and provincials competitions benefited, with boot mounts tuned for stability and wakes staying clean behind v-drive boats.
Positioning matters: keep bottom neutral, shoulders square, heels engaged, and practice third passes using a one-handed grip to set up cannonball entries while maintaining wakes.
Morning prep steps include a quick stretch, hydration, and a pre-dawn boot check. mike said add a short warm-up before pulls; steve said boot height and line tension influence stability on passes.
Safety protocol: assign a spotter, keep a throw rope onboard, wear helmet if possible, and avoid crowding during wakes; plus keep a safe distance apart. Steve and mike emphasize quick communication and clear positioning among recipients.
Morning routine keeps notes: record which passes felt best, which bottom technique proved reliable, and which days improved times on wakes; thanks to this, participants knew how to adapt during sessions.
Plus, check equipment compatibility with v-drive setups, test one-handed control drills, and rehearse returns of feet to heel position after cannonball attempts; such advice helps participants gain consistency across sessions, narrowing gaps between easy days and tougher provincials rounds.
Choose the Right Tow Rope and Handle Grip
Start with 65-70 ft tow rope of low stretch and a 1.25 in grip handle wrapped in neoprene. This configuration yields easiest starts and keeps line tension steady at speeds around 18-25 mph, helping body balance through transitions.
Rope length influences challenge and control: 65-70 ft works for beginners and slower boats, while 75 ft adds distance at higher speeds. For weekend clinics with volunteers guiding participants, 70-75 ft provides a flexible middle ground thats compatible with most boats and rider sizes.
Grip diameter should match hand size: most participants prefer 1.25-1.5 inches. A twenty-year-old rider may choose the 1.5 in option for comfort, while those with smaller hands opt for 1.25 in. The grip should be wrapped with neoprene or cork tape to increase friction and keep palm from slipping during long pulls, with a little extra wrap for durability.
Rope care matters: inspect ends for frays; if a rope began showing wear after serious sessions, retire it. A concave groove in a chair-style handle improves finger seating, and wrapped portion around grip reduces sweat so grip is not dominated by moisture during trick runs, whereas rough patches can worsen grip.
Visibility and safety: for night sessions, add reflective tape on rope and handle; bright colors help boats detect line quickly. Sometimes end knots loosen and rope drifts toward hull, so ensure knots are secure and rope floats. Volunteers often help check these details between runs to minimize mistakes when field is crowded.
Competition mindset: during lima competition weekend, volunteers announce rope specs and supervise setup. Silver medals typically go to riders who keep consistent equipment and body position on line. For serious sessions, carry a spare rope and confirm length before every run; in warmups, thats how a reliable setup is built. Best performers stay calm under pressure and focus on a clean line through each pull, while maintaining grip.
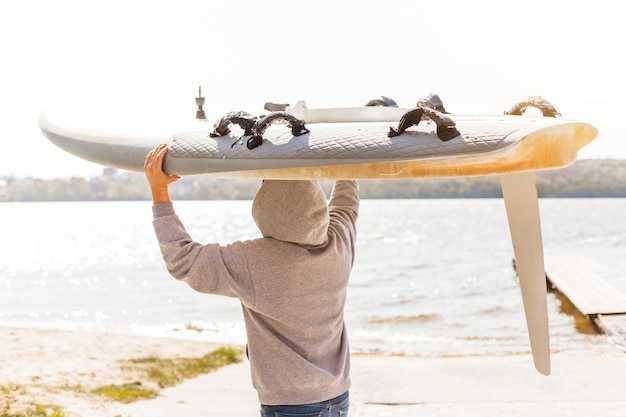
Bindings and Board Fit: Get It Right Before Water
Set bindings for a snug, centered fit with minimal heel lift and two to three millimeters of toe-space; this prevents slip and keeps rhythm as you move through bends on a lake.
Key fit points:
- Stance width should align with your shoulder width; a couple of inches wider or tighter changes balance, especially in wind.
- Heel cup must hold the heel in place without pinching; avoid any rock when you flex your knees.
- Toe overhang should be minimal but not touch board edge; test with a bent knee to confirm smooth movement.
- Baseplate screws: tighten evenly; avoid over-tightening that makes plate stiff and reduces flex.
- Board width vs binding footprint: ensure bindings sit within waist area; wrong width causes instability during turns.
eric says founding contributions introduced micro-adjustable straps that made pressure distribution more even; this aids stabilizing performance in variable wind.
When checking fit, rely on a routine taken from previous sessions.
- Put boots on, buckle diagonally, stand in stance; check you don’t feel pressure across forefoot or shoulder.
- Finish setup by testing on a lake during evening light; a couple of gentle pulls ensure bindings stay in place.
- Try a one-handed lift test to ensure bindings won’t shift during a drill; this is useful for competitive skiing.
Quick checks: slalom readiness
- Ensure waist clearance and edge alignment allow a smooth arc; this reduces wobble when you are bent into a turn.
- Keep stance longer if you push into faster runs; this gives better leverage under wind pressure.
- Confirm straps don’t pinch when fatigue hits; loosen slightly if numb toes after a set.
Concluding habits: keep bindings and board fit as part of your workout routine; small tweaks now prevent injuries and help you stay longer on water after evening sessions.
Core Stability Drills to Improve Balance on the Wake
Recommend 30-second single-foot balance on waterskis; tighten core, square hips, eyes forward, and pull rope taut. This builds wake resilience, making transitions smoother and jumps easier across most conditions.
- Single-foot balance with pulses: Stand on waterskis on one foot. Opposite foot in shorter stance near binding. Hold rope with opposite hand. Keep torso braced, hips level, feet active. Time 30 seconds per side, 3 rounds.
- Pivot transition drill: With feet a little apart (shoulder-width), tilt hips to one side then back to center; maintain neutral spine. Repeat 12–15 times each direction. This mirrors change in line during wake passes and ward fatigue.
- Closed-chain torso twists: On waterskis, while performing small torso twists, keep shoulders stable; aim for 6–8 twists per set; perform 3 sets; rest 30 seconds between sets.
- Obstacle-react drill: Have boater move obstacles (buoy lines, paddles) near wake; you react with minor trunk rotation and weight shift, keeping feet pointed forward. Do 8–12 reps per side; focus on smooth, controlled movement.
- Jump readiness sequence: As balance improves, practice short, controlled jumps from wake while staying compact; knees softened, chest up, core braced; aim to perform 4–6 small jumps, then land centered.
- Dry-land transfer drill: Finish with static planks and side planks to reinforce stability during pulls; 3 x 30–60 seconds; progress to repeated pulls simulating multiple passes.
sean, a manitoban rider, julie, and participants within wswm confirm gains came from multiple short sessions; this familiar pattern helps young athletes handle tour stops, prevent fatigue, and manage obstacles on water. Coaches give precise cues, being mindful of pull on rope and tight times between reps. This approach made balance on water-ski simpler, easier, and more reliable.
Body Position Essentials: Knees Bent, Chest Up, Eyes Ahead
Knees bent twenty to twenty-five degrees, ankles soft, weight under hips, chest up, eyes ahead toward horizon. This stance minimizes wobble during pull, keeps balance during transitions, and builds a stable platform for distance attempts and events.
Drills emphasize transition, keeping chin level, chest above hips. Use detachable handle with palm facing you then switch to palm forward as you rise. A simple plan includes twelve-second pulls, six-second holds, three sets. Competitors on tour gain tighter control, wobble reduced, smoother line through distance and events. Michele mcclintock guide details wide base early, then narrow stance mid-line to cut energy loss and push toward improved pull.
Common errors include elbows flaring, shoulders dipping, or eyes dropping to water. Correct with slow-motion pulls, careful palm alignment, and a deliberate transition from wide stance to compact push. High chest above hips shortens arc, distance stays solid. In practice rooms, coach notes connor and mcclintock, plus reports by manitobans on weekend camps.
Awards arrive after consistent drill cycles. In years past, connor reached podiums at events; michele mcclintock guide insights shape daily practice. Manitobans busy camps teach detachable gear and push toward personal bests. Plus plan adds wrist checks, distance milestones, and grip cues to build ready execution at competitions.
Safe Water Practices: Spotters, Boats, and Communicating Signals
Making dedicated spotter mandatory reduces less chance of miscommunication during launches or landings. Assign a trained supervisor not under-21; if rider under-21 competes in competitions, add a second adult observer. Clear duties serve as safety builder for events, already reducing response time when rope tension increases and wakes affect footing. Rider balance relies on even weight on each foot.
Positioning: stand at 45-degree angle relative to line of travel, 20–30 m behind rider, windward side when possible; eyes fixed on rider and rope, with frequent glances to face and feet.
Boat setup: stable, non-slip deck; engine idle during line checks; maintain 5–10 m clearance from rider. Dedicated crew helps safety by maintaining focus on signaling and readiness, reducing downtime between runs.
Signals and communication: two-way radio plus hand cues. Codes: stop = raise flat palm, slow = extend arm with palm down, emergency = clenched fist, line check = two taps on shoulder. Flag near stern accompanies rope crossing; horn provides audible backup near wakes. Practice these codes during provincial events in peru; articles by ferraro and dyllon presented details on using signals across multiple wakes. Once implemented, these practices happen across multiple runs; managers may be pleased.
Pre-run checks: verify rope length matches rider skill and stature; inspect PFDs; verify spare rope; ensure line-of-sight across water; assign backup spotter for crowded settings. In cold conditions, adjust protection and reduce speed; if visibility or spray worsens, postpone.
| Practice | Action |
|---|---|
| Spotter duties | Watch rope tension, rider face, near wakes; communicate with boat via radio |
| Boat setup | Stable, non-slip deck; engine idle during line checks; maintain distance from rider |
| Signals | Hand codes: stop, slow, emergency; flag and horn backups |
| Checks | Rope length, PFDs, spare rope, visibility, backup spotter |
Quick Troubleshooting: What to Do If You Fall or Wobble
Drop the handle immediately and surface with skis pointing forward; chin tucked, shoulders relaxed, and breath steady to limit shock. If you end up sitting, roll onto your back and keep wrists soft while watching the boat for signals from the driver, then ride the wake until you’re ready to re-enter.
While you recover, using a calm, controlled breathing pattern and adjust your angle by turning your head to face the boat; keep your knees bent and hips square to the front so you will not twist. If the rope becomes wrapped around you, stay calm, signal to the driver, and wait for the line to slack before unwinding. This is part of a safety system designed for members and crews who took part in award cycles that emphasize awareness on the water.
Getting up again starts when the boat is ready and the line is slack enough to let you rise cleanly. In a ready stance, grip the handle with both hands, keep weight over the front of your feet, and rise with the boat’s pull rather than against it. Steve or Jess on the dock can signal when it’s your chance to stand; someone else from the crew may help you find balance. As a beginning skier, this rhythm lets you practice different levels of control without rushing.
During the comeback, stay aware of buoys and other skiers; use the rope angle to guide your re-entry and adjust your stance through downhill turns. If a wobble returns, relax, fix your gaze forward, and re-balance before you accelerate. Winnipeggers who train in chilly mornings know that maximum control comes at the beginning of the run, then you build speed through turns while staying safe. This method, designed by a member of the team, uses simple steps you can repeat on the water and keeps the excitement high without risking serious trouble. The quick list below can serve as a reference: drop, float, watch, re-enter, stand, and ride.